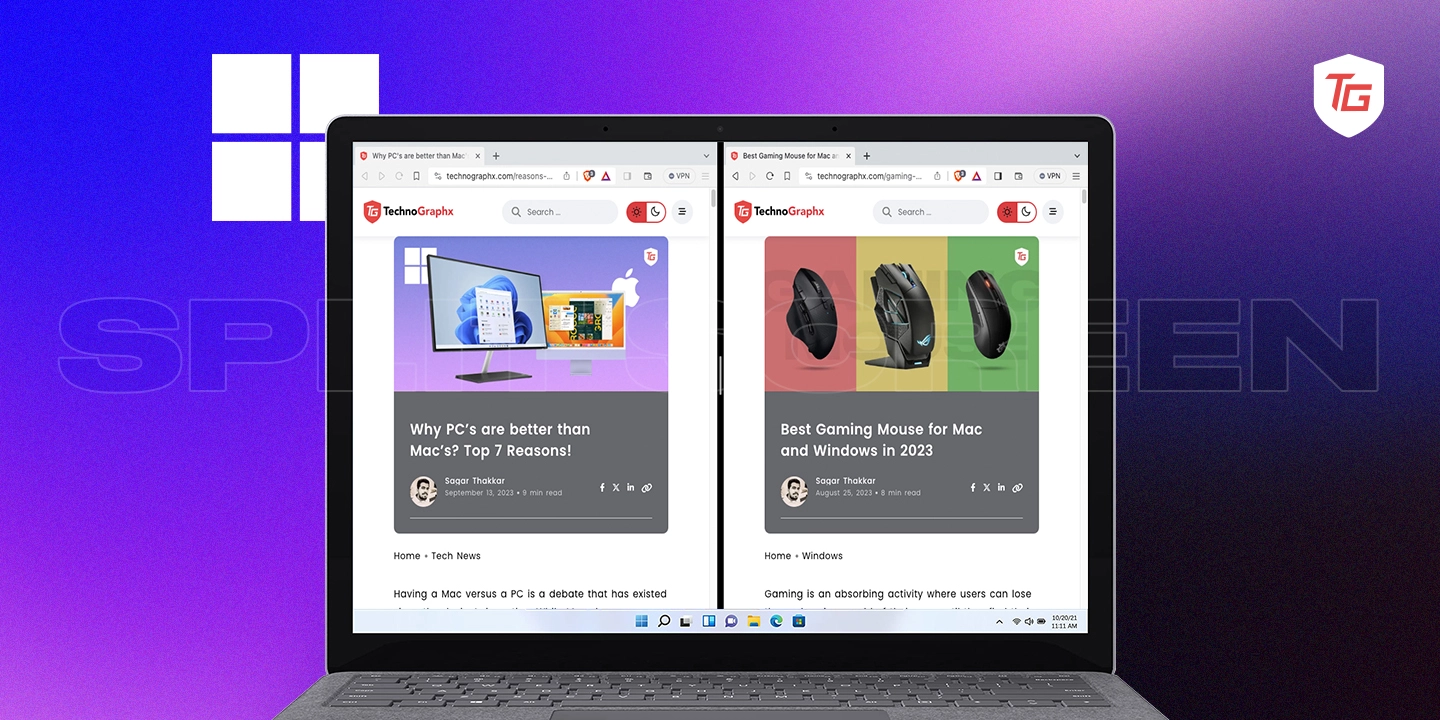
While performing tasks on your devices, it often becomes important to multitask. Windows has always taken this into account while creating its operating systems and including specific features to aid multitasking. Virtual desktops, Task View, and switching between windows using Alt+Tab keys, are a few examples amongst others. However, one of the most underrated multitasking features that we’ll be circling today is Split Screen. In this guide, we will explain how to split your screen on Windows 10 and 11.
We will also show you some of the most practical ways to overcome difficulties or bugs while trying to split your screen. Let’s get to it.
5 Ways to Split My Screen on Windows
1. Split Windows 10 and 11 Screen by Dragging
Windows 10 and 11 app dragging feature is the easiest way to split screens. This functionality is made possible by the Snap Windows feature that can be found in the Windows Settings app.
1. Click and hold the top bar of any open application.
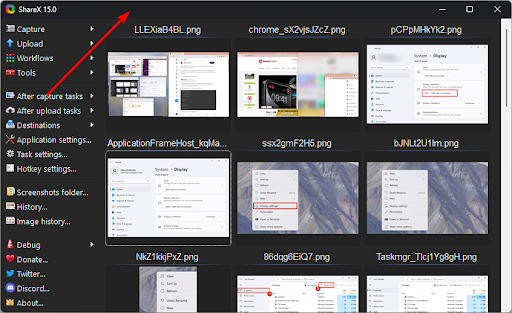
2. Drag it to any corner of your screen and only leave it when you see the outline of a border formed on the screen.
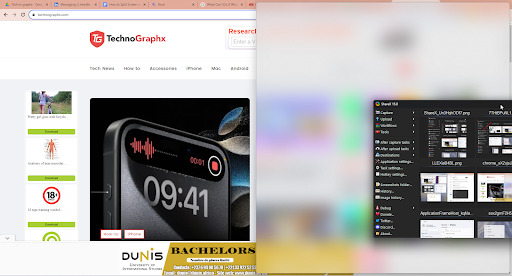
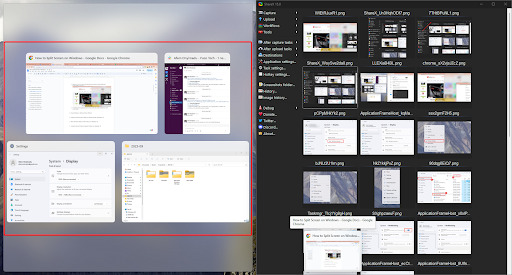
3. From the list of open apps displayed on the side, select the second application you want on your screen.
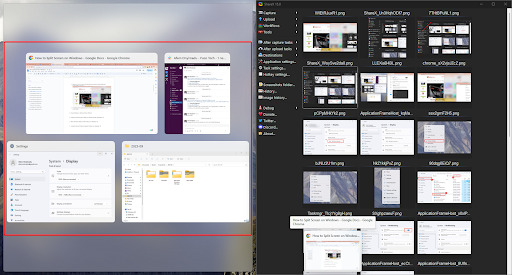
2. Using the Keyboard to Split and Move Windows
Windows keyboard hotkeys combine 2 or more keys to perform a function. Hotkeys are a huge productivity hack and may perform functions such as closing windows, copying files, and even splitting or moving screens in Windows 10 and 11.
1. Press Windows + Z to open the Snap layouts menu, showing a preview of your open windows.
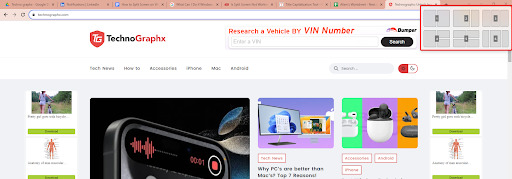
2. Click on a number to select the split screen pattern you want, the options are usually between 1 to 6.
3. Use the arrow keys to indicate the position you want your primary windows placed in, and hit Enter.
4. Use the arrow keys to navigate to the Windows that occupies the next screen position and click Enter. Repeat this step for as many screen positions as you have.
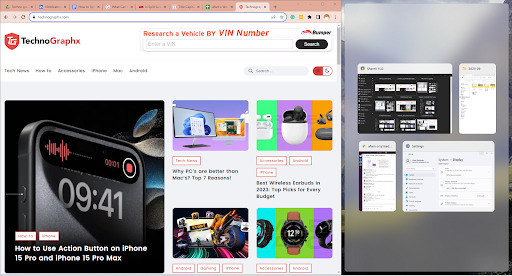
3. Using the Snap Screen Feature to Split the Screen (Windows 11)
In solution 2, we used keyboard keys to navigate screen options. Windows 11 has a Snap Windows feature that opens up the split screen options by simply hovering over the maximize button. Here is how to use it.
1. Hover on the maximize icon of an open window to display the snap screen option.
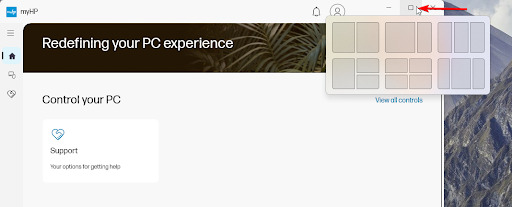
2. Click the layer you want you use from the six available options.
3. The windows should snap out, then you can click on another screen that you want to include.
4. Show Windows Side by Side Feature on Windows 10
The Windows 10 Taskbar comes with a host of functionalities. It lets you view thumbnail previews of active windows and also gives extra flexibility for arranging the Windows.
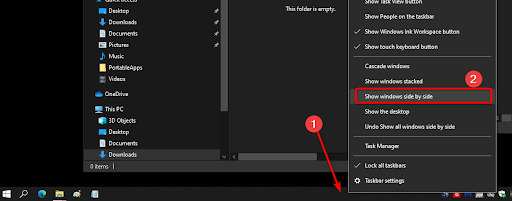
You may stack windows side by side using the steps mentioned below.
1. Open all the Windows you need to stack.
2. Right-click any empty space on your Taskbar.
3. Select the Show Windows side by side option.
5. Using Show Windows Stacked Feature on Windows 10
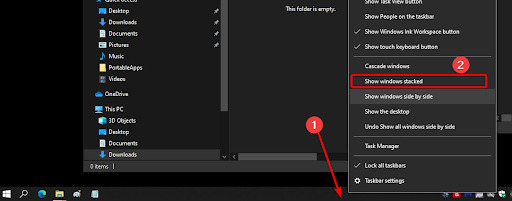
There is another Taskbar function for splitting the screen. It is called Show Windows stacked. The main difference between the ‘side by side’ and stacked features is that stacked Windows are placed vertically on top of each other, with your most recent Window placed in front. It, however, makes the title bar of each window visible making it easier to navigate.
1. Open all the Windows you need to stack.
2. Right-click any empty space on your Taskbar.
3. Select the Show Windows stacked option.
What Can I Do if Windows 10 and 11 Screens Can’t Split?
1. Configure the Snap Feature on the Windows 10 and 11 Settings
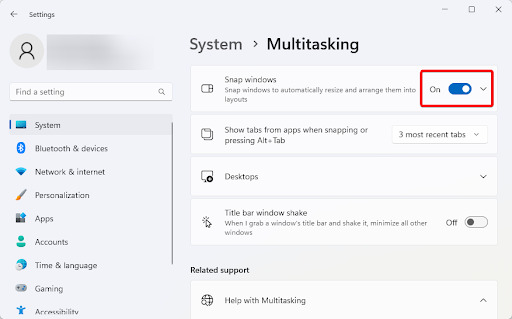
On Windows, the Snap Windows function allows you to quickly arrange your screen to suit multiple configurations. If this setting is turned off, elements like dragging the windows may not function properly, and may be the reason why your screen split is not working.
1. Press Windows + I to open the Settings app.
2. On the right pane, scroll and click Multitasking.
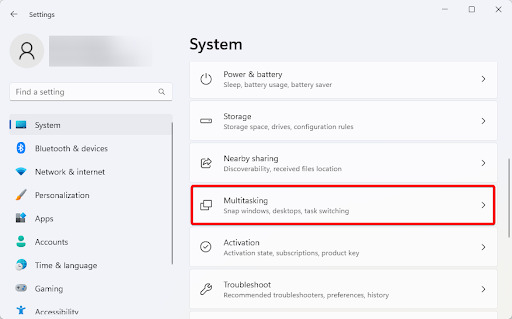
3. Toggle on the Snap windows option.
2. Restart Windows Explorer
Windows Explorer is a utility that governs a lot of user interface elements. If it is corrupted, you may experience difficulty running specific graphics-related processes. Restarting Windows Explorer will clear temporary glitches and bugs and may resolve the issue.
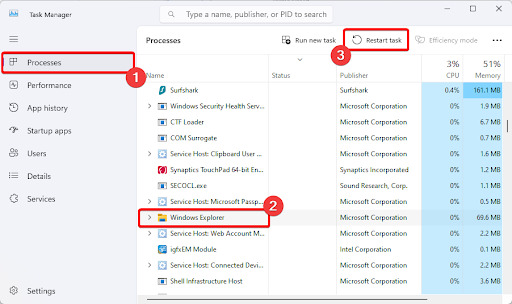
1. Press Ctrl + Shift + Esc to open the Task Manager.
2. Click Processes on the right pane, click Windows Explorer from the running process list, and click the Restart task button.
3. Reconfigure the Display Settings
The display resolution you are using may not fit your screen size best. This may affect some functionality; the workaround will be reconfiguring the display settings. You may do that by following the steps below.
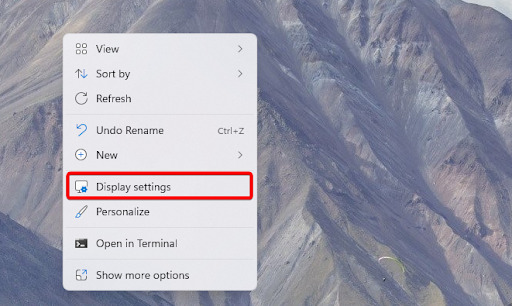
1. Right-click on your desktop and select Display Settings.
2. Scroll down to the Scale & layout section.
3. Click the Display resolution dropdown and select the recommended setting.
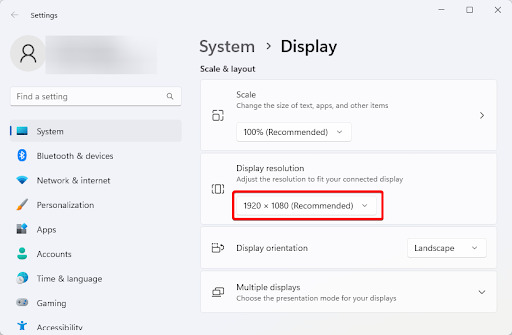
4. Now verify if the screen split works.
Final Thoughts:
That’s all with this guide folks! You should notice that there are a lot of similarities between Windows 11 and 10. In most cases, you can use the same methods for a split screen with very minor UI differences.
Note that we have not written these solutions in any particular order, and we expect you to stick to what feels the most practical. However, we would love to hear your thoughts, so please reach out to us in the comments section and tell us how you love to split your screen on Windows.
In case you missed:

