If you have a collection of pictures that you want to convert into a neat and organized PDF file, don’t worry! Your iPhone has the perfect solution for you. In this guide, we’ll show you how to effortlessly transform your images into a PDF format. We promise to keep it simple and straightforward, just like your favorite selfie poses. So let’s get started and turn your pictures ‘PDF-tastic’!
1. Using Print Option in Photos
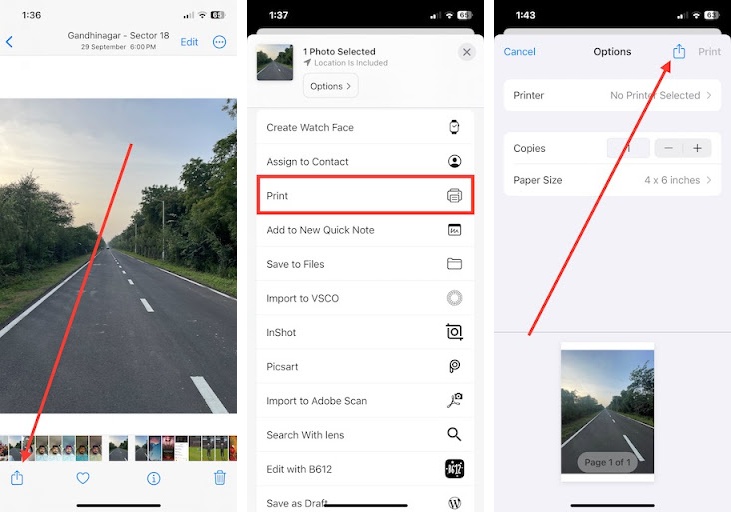
Step 1: Open Image then Tap the Share Icon
Step 2: Scroll to Find “Print”
Step 3: Pinch Outward to Preview then Share as PDF
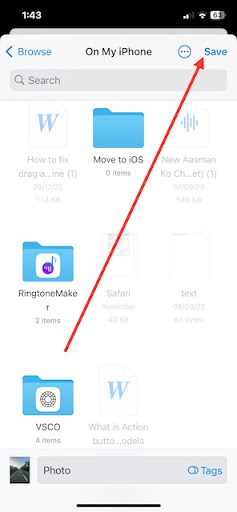
In the top right corner, tap the share icon (a square with an arrow pointing up). From the options, select “Save to Files.”
Step 6: Name and Save the PDF
You’ll be prompted to name your PDF and choose where to save it. Once done, tap “Save.”
2. Using the Books App
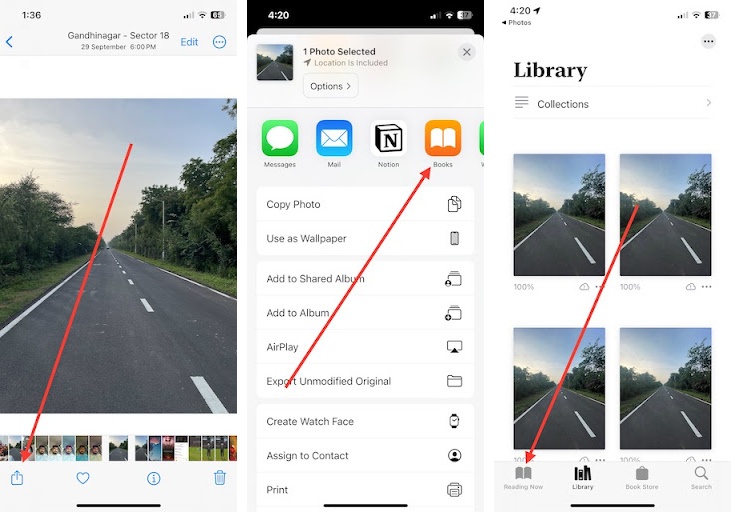
Step 1: Open the Image than Tap the Share Icon.
Step 2: Scroll to Find “Books” > Visit “Reading Now” Menu.
The Books app will open with your image. Now go back and then head over to the “Reading Now” menu from the bottom left corner.
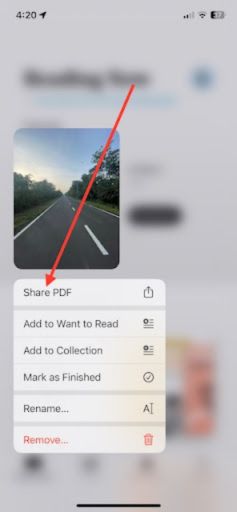
Step 5: Share PDF
Finally, press and hold onto the image and then select “Share PDF” button in the pop-up menu.
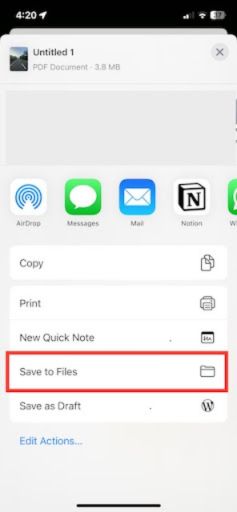
Step 6: Save the PDF
You can now choose the “Save to Files” option or send it directly to the most appropriate destination.
3. Save Photos as PDFs Using the Files App
Step 1: Open the Files App than Navigate to the Image
Step 2: Select the Image then choose “Select” to select it.
Step 3: Tap the Menu Icon
In the bottom right corner (depending on your iOS version), you’ll find the Menu icon (three horizontal dots).

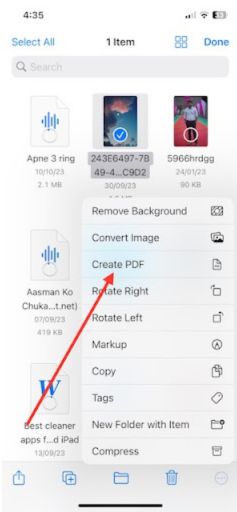
Step 6: Scroll to Find “Create PDF”
In the sharing options, scroll to find “Create PDF.” It might appear as the third option in the pop-up menu that appears.
Step 7: Save the PDF
After selecting “Create PDF,” your iPhone will convert the image to a PDF file. You can then specify the location where you’d like to save it in the Files app. Choose an existing folder or create a new one, and then tap “Add” or “Save” to save the PDF.
That’s it! Your image is now transformed into a PDF, and you’ve successfully saved it using the Files app on your iPhone. Enjoy your organized digital documents!
4. Use Third-party Apps to Turn a Photo into a PDF
If you’re looking for more flexibility and additional features when converting images to PDF on your iPhone, you can turn to third-party apps available on the App Store. Here’s how to use one of these apps:
Step 1: Download a PDF Conversion App
Head over to the App Store on your iPhone and search for a PDF conversion app. Some popular options include “PDF Expert,” “CamScanner,” “Adobe Scan,” and “Scanner Pro.” Download and install the app of your choice.
Step 2: Open the App
Once the app is installed, open it.
Step 3: Select or Import Images
In the app, you can typically select or import images from your iPhone’s photo library. Follow the app’s specific instructions to choose the images you want to convert into a PDF.
Step 4: Convert to PDF
Most PDF conversion apps have a “Convert to PDF” or similar option. Tap this option to transform your selected images into a PDF document.
Step 5: Customize and Save
Depending on the app you’re using, you may have various customization options, such as arranging the order of images, adding annotations, or adjusting settings. Make any necessary adjustments.
Step 6: Save the PDF
After you’re satisfied with your PDF, save it in the app. You can often choose the destination folder or save it directly to your iPhone.
Step 7: Share or Use Your PDF
Once saved, you can easily share the PDF via email, messaging apps, or cloud storage services. You can also open it for viewing or editing as needed.
Using a third-party app provides you with more advanced features and customization options, making it a great choice if you frequently work with PDF documents on your iPhone. Each app may have a slightly different interface and feature set, so feel free to explore and find the one that best suits your needs.
Conclusion
Now you know several methods to convert images into PDFs on your iPhone. Whether you choose to utilize the built-in tools or explore third-party apps, your iPhone provides the flexibility and convenience to easily create PDF documents from your images. So go ahead and transform your visual memories and important documents into the versatile and shareable PDF format!
More iPhone Tips: