Have you ever come across an exciting picture online and wished to learn more about it? Perhaps it’s an interesting pair of spectacles or a hidden historical site. You see, your iPhone has a secret power that can help you unlock the secrets of the internet! Let’s explore the potential of iPhone reverse image search in this guide. We’ll walk you through simple techniques so you can quickly become an expert digital geek. With only a few touches, you can quickly turn your iPhone into an effective research tool!
What is Reverse Image Search?
While searching for something crucial on the web, imagine coming across an image that catches your eye. Now, before scrolling further, you want to know all about the image. Such as its source or context of origin, related or exact photographs from the internet, and associated websites. Using an image to do a text-free web search is known as a reverse image search. Suppose the precise image doesn’t show up, one that is strikingly similar will.
1. Using the Photos App
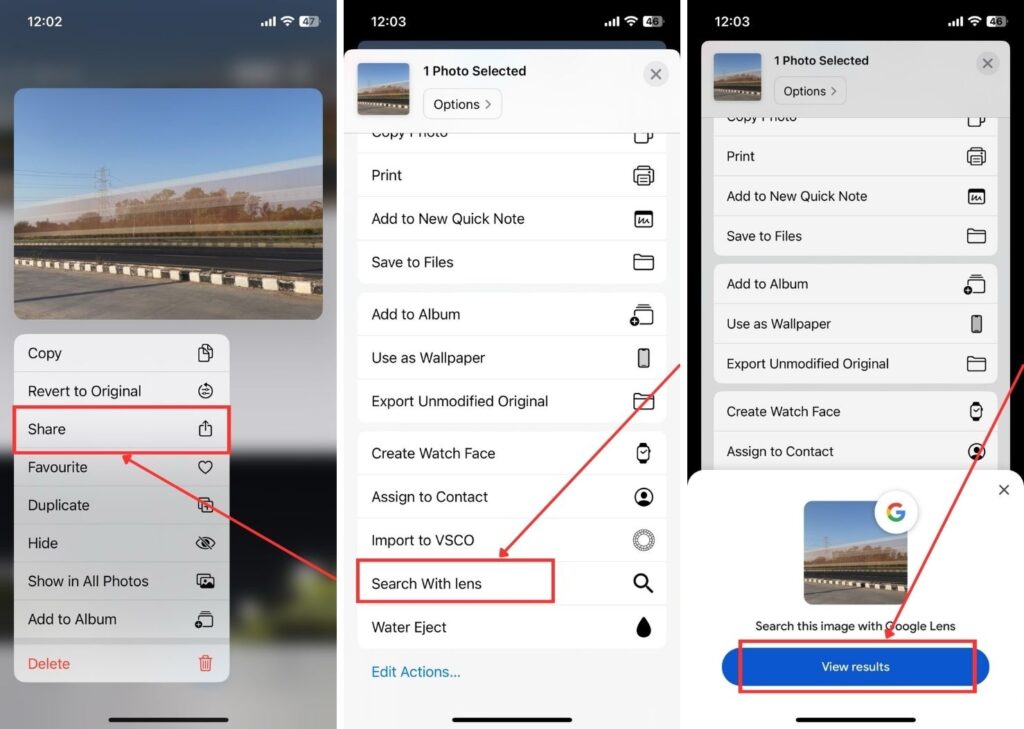
Step 1: Open the “Photos” app. For the image you want to search for, “tap and hold” on it.
Step 2: Click on “Share.”
Step 3: Navigate and click on “Search with Lens.”
Step 4: Hit on “View results.”
Step 5: Select the area covered by the object in the image. Now, tap on the “Globe search icon.” You will get the required or similar image along with the information you were seeking.
2. Searching via Google images
Step 1: Launch the “Chrome” app. Type the “image name” you want to search.
Step 2: Now click on “Images.”
Step 3: Open the “image.” Now, tap on the “Google Lens” icon.

You can also “tap and hold on the image” and select “Search image with Google.” Similar images will be displayed on a new page.
3. Using Safari
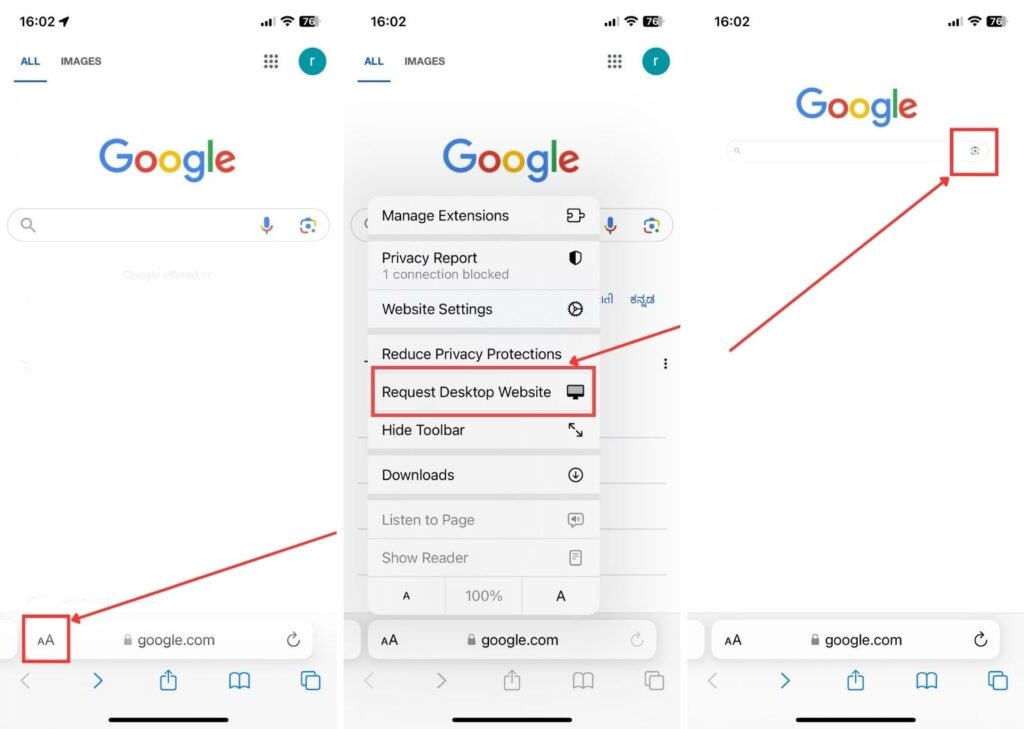
Step 1: Launch “Safari” app. Head on to “Google.”
Step 2: Click the “AA” symbol on the address bar.
Step 3: Now hit on “Request Desktop Website.”
Step 4: Now click the “Google lens” icon on the Google search bar.
Step 5: Choose “Upload a file.”
Step 6: Select “Photo library.”
Step 7: Choose the image you want to upload and click “Done.”
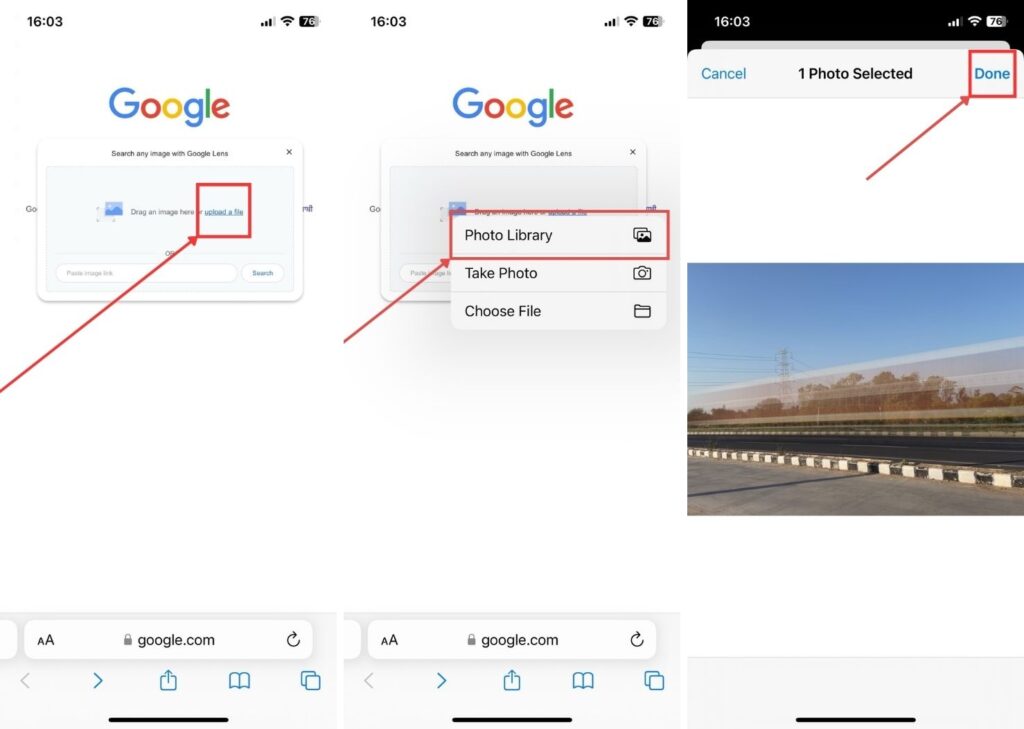
Step 8: It will now show related images. Scroll down the tab to get more information.
4. Make Use of Google Lens
Step 1: Open the “Google Photos” app. Select an image.
Step 2: Select the “Lens” icon situated at the bottom.
5. Copy the image URL to Google
Step 1: Go to “Photos.” “Select and hold” the image that you want to know more about, and hit “Copy.”
Step 2: Launch “Chrome.” On the search bar, “Paste” the image you copied. Choose “Allow paste” if prompted.
Step 3: You will get the results for it.
6. By Using Third-party Apps
Apart from using search engines like Google, third-party apps can also be made use of. It’s quick and straightforward to conveniently reverse an image search on an iPhone by using third-party apps. Find a trustworthy reverse image search app in the App Store by first searching for “Reverse Image Search” or “Reversee.”
Wrapping Up!
Using the above methods, you can easily go to the source of a particular image and know more about it. Using the technique most suitable for you, the user experience can be elevated and increase the capabilities of the iPhone, whether it is for identification, research, or just curiosity.
In case you missed!