Whether you want to scan a photo or document, you usually rely on a scanner. However, if you’ve got an iPhone or iPad, scanning documents or images in a few simple steps is relatively easy. Luckily, iPhones have an inbuilt document scanning feature that simplifies the process. In this article, we’ve explained how to scan documents using an iPhone using native apps and third-party apps.
How to Scan Documents using Notes app on iPhone
If you use the Notes app a lot on your iPhone or iPad, scanning and adding a document to it is straightforward. The process is the same on iPhone and iPad without many differences. Follow these instructions to scan and add a document to your notes in the Notes app on your iPhone or iPad.
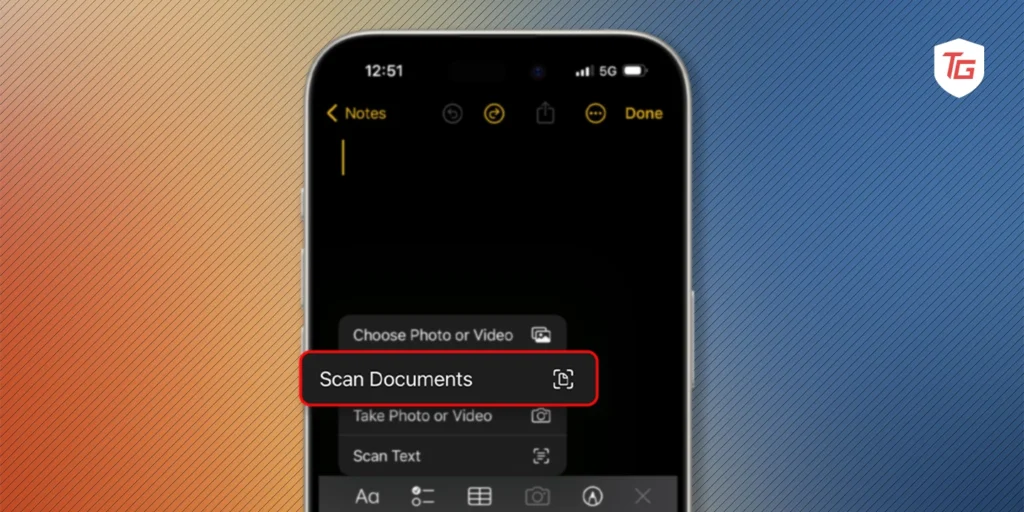
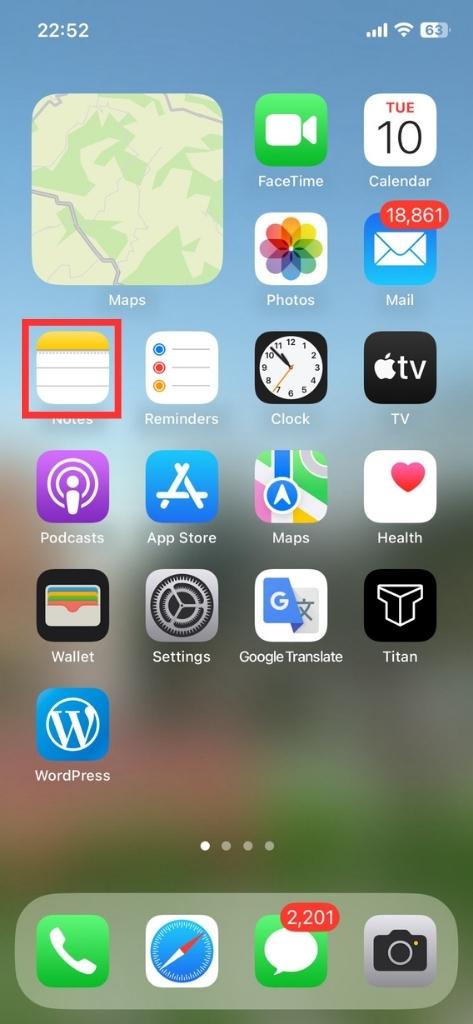
1. Open the Notes app on your iPhone or iPad and create a new note or select the note where you want to add the scanned document.
2. Tap the Camera icon and select Scan Documents.
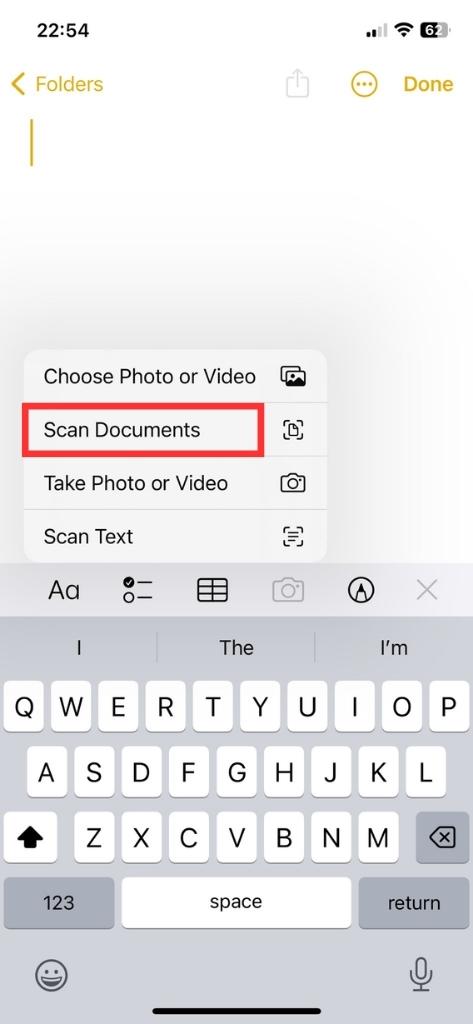
3. Line up your iPhone’s camera with the document and press the Shutter button in the middle. Repeat this step if you wish to scan multiple pages.
4. Tap the Save button on the after scanning the required pages. You’ll also see the number of pages next to it.
You’ll see the scanned pages as images in the note and you can add images or text to the notes or on top of the document if necessary.
How to Scan Documents using Files app on iPhone
Assuming that you want to save the scanned document as a file, using the Files app would be much easier for you. Again, the process is almost the same for iPhone and iPad with the placement of some options differently.
Steps to scan documents using the Files app on iPhone or iPad:
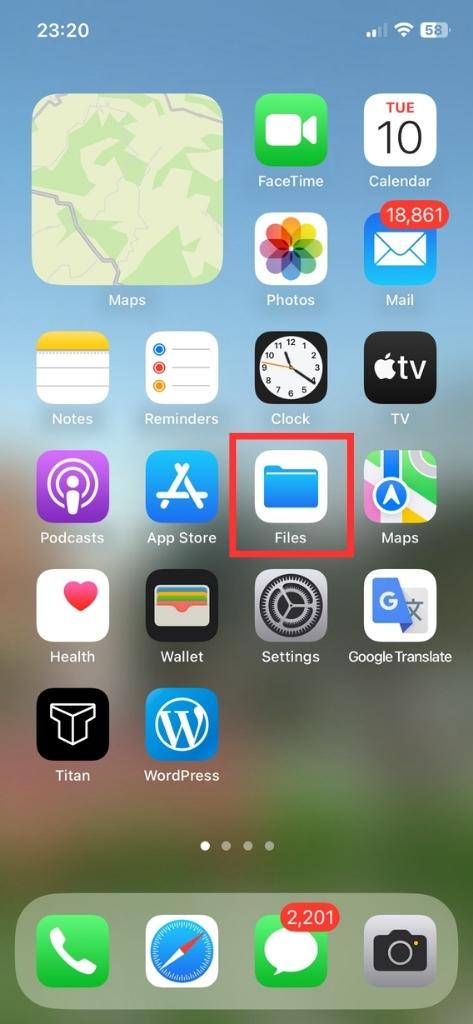
1. Open the Files app on your iPhone or iPad.
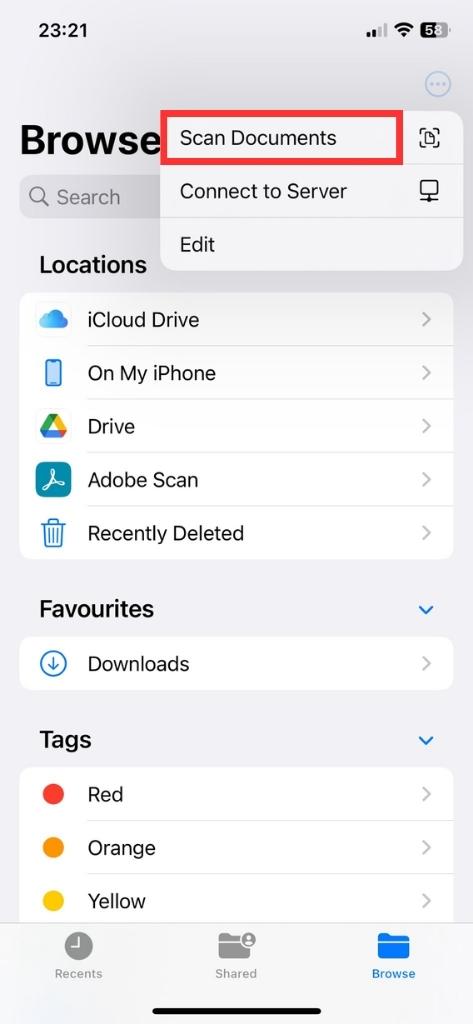
2. Tap the three-dots menu icon on the top right of the display and select the Scan Documents option.
3. Line up your iPhone’s camera with the document and press the Shutter button in the middle. Repeat this step if you wish to scan multiple pages.
4. Tap the Save button on the bottom right after scanning the required pages. You’ll also see the number of pages next to it.
5. Select the folder where you want to save it, rename the document if needed from the bottom, and press the Save button on the top right of the display.

Once finished, you can check the folder where you saved it and you’ll find the scanned document there. You can then choose to share the document with anyone.
How to Scan Documents using Third-Party iPhone Apps
The App Store offers a wide range of document-scanning apps, such as Adobe Scan, SwiftScan, Genius Scan, and CamScanner. Below we describe how to scan documents on iPhone using an app like Adobe Scanner.
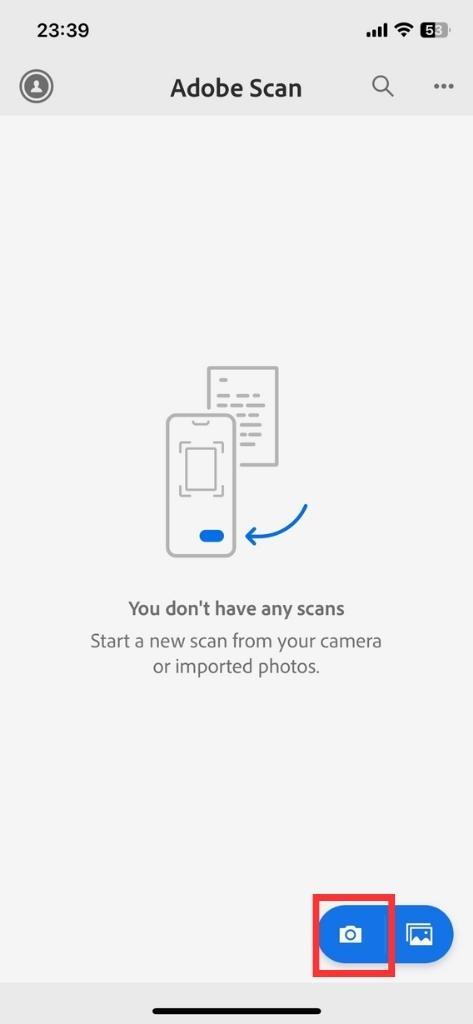
1. Download “Adobe Scan” app on iPhone.
2. Open the app and tap on the camera icon to scan a document. To use an existing image from the Photos app, tap on the Photos icon.
3. Next, select the document type from the slider menu above the capture button.
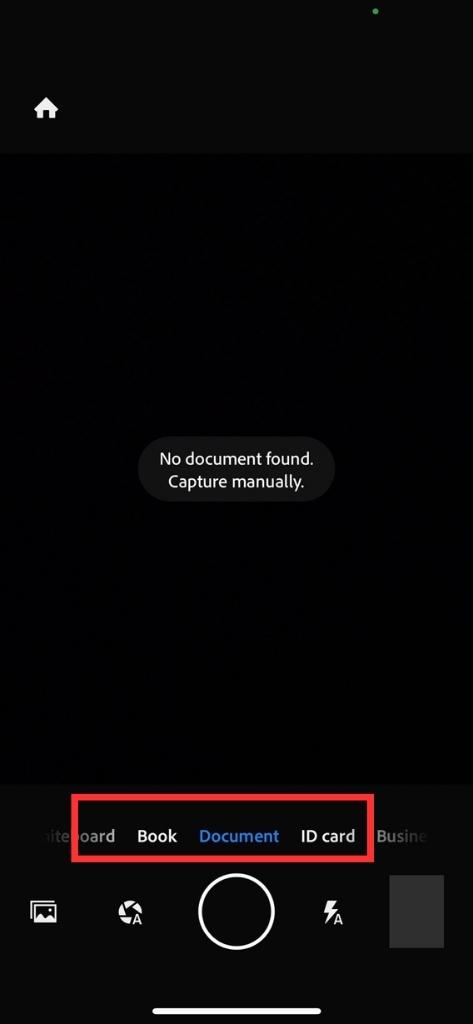
4. Position the document in the camera’s view & tap the “Shutter” button.
How to Share Scanned Documents from iPhone
After learning how to scan documents with your iPhone, it’s time to learn how to share scanned documents. The Files App and Notes App can also be used for sharing documents from your iPhone.
👉 Share Scanned Documents from Files App
1. Open the “Files” app and locate the “Scanned Document.”
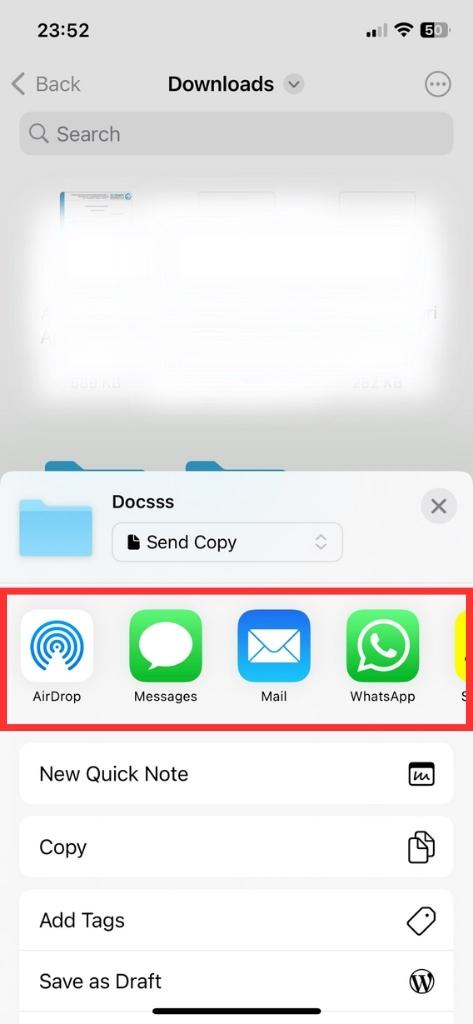
2. Select “Share” from the drop-down menu when you touch and hold the scanned document.
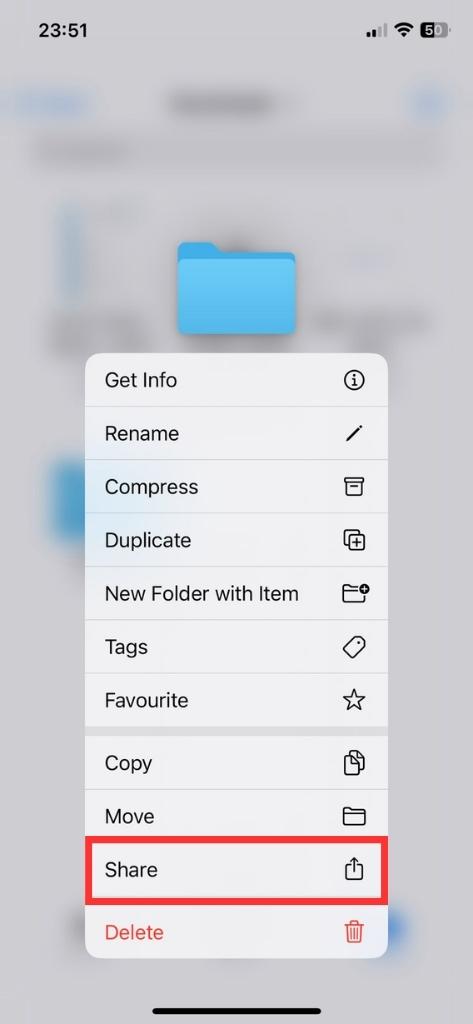
3. Then, choose the “App” through which you want to share the file using the share sheet.
👉 Share Scanned Documents from Notes App
1. Open the “Notes” app, open “Scanned Note”, and tap “Share” button at the top.
2. You can also Swipe left the document and tap on Share icon.
3. Now, choose the app you want to use to share the Note.
How to Edit a Scanned Document on iPhone
If you want to add a signature to your scanned document or markup the document, it’s best that you scan the document through the Files app to avoid confusion. Once you save the file through the Files app on your iPhone, follow these steps to edit a scanned document:
1. Open the Files app on iPhone.
2. Navigate to the folder where you saved your scanned document and tap on it.
3. Press the Markup option on the bottom right.
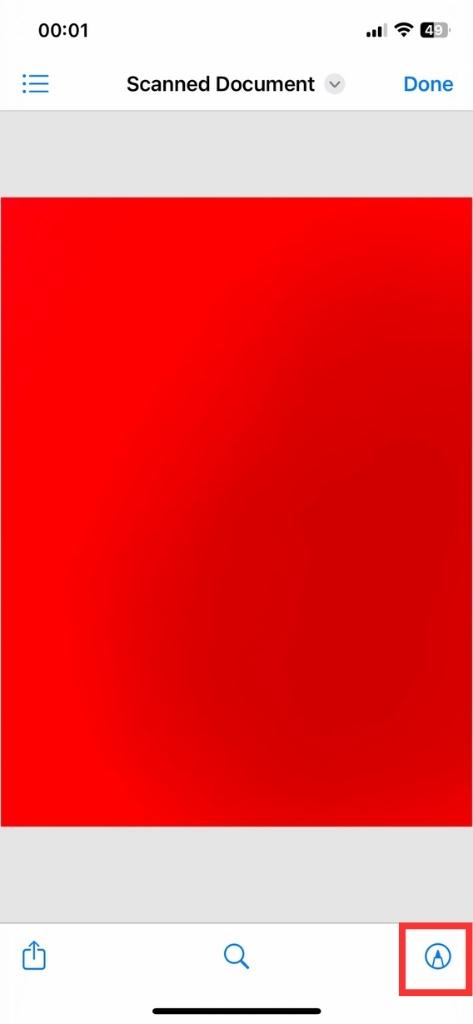
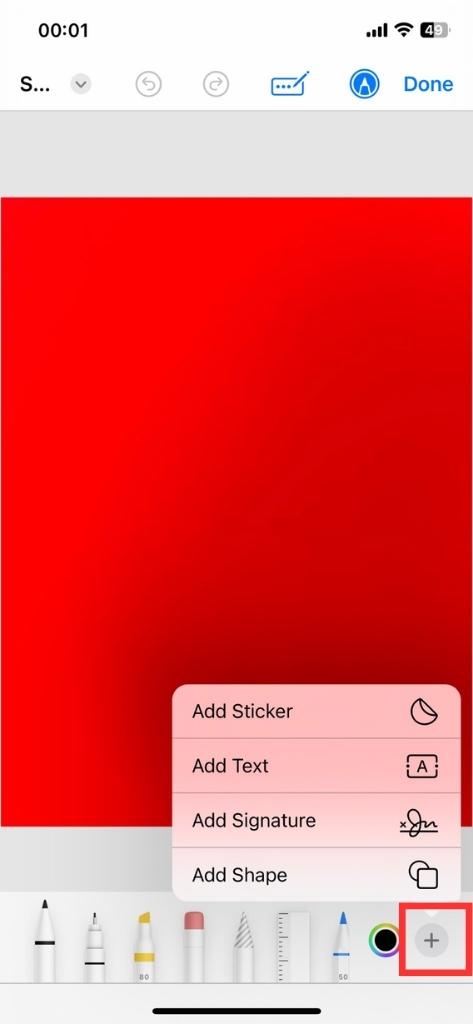
4. Tap the Plus button to add a sticker, signature, shape, or text as required.
5. Tap Done on the top right to save the changes.
You can then share the saved document to anyone through email, AirDrop, or any other preferred method.
Conclusion
Scanning documents from your iPhone and iPad is a convenient way to send documents to anyone without using a scanner. A few other apps other than the Notes app and Files app also support the Scan Documents option, so keep an eye when using other apps for this option. We hope this guide helped you to scan documents on iPhone or iPad.
More iPhone Tips: