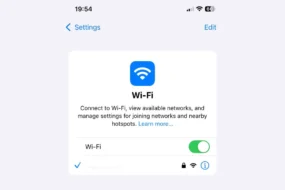
Airdrops are of great help. They let us transfer things smoothly among different devices such as iPhone, iPad, or Mac. Bluetooth 4.x is used for the data transfer. It proves to be power-efficient as well as a strong connection for transferring the data quickly. It is one of the best features of Apple devices with which you can transfer things without any trouble. Today, in this article, we are going to discuss How to fix Airdrop iPhone iPad.
Along with the speedy transfer, the connection is secured and hence, you can rely on it. At times though, the situation may cause you trouble. Sometimes, it may pop on your screen that “Airdrop not working”. But you need not worry.
Things to Keep in Mind
There are certain things that you need to keep in mind. Those are none other than common device compatibility measurements. They are as follows:
- The devices you are using must be in iOS 7 or later version.
- MAC/ X lion (10.7) version or greater should be there.
- Bluetooth and Wi-Fi should be enabled by you before proceeding with Airdrop
- Make sure the devices are within 30 feet so that the data transfer is proper and secure.
How to Solve the Issue?
To solve the issue, there are different methods. These methods vary from device to device and hence, you need to try and see which one suits your situation. Following are some of the methods that can help you in solving the issue.
Airdrop Settings
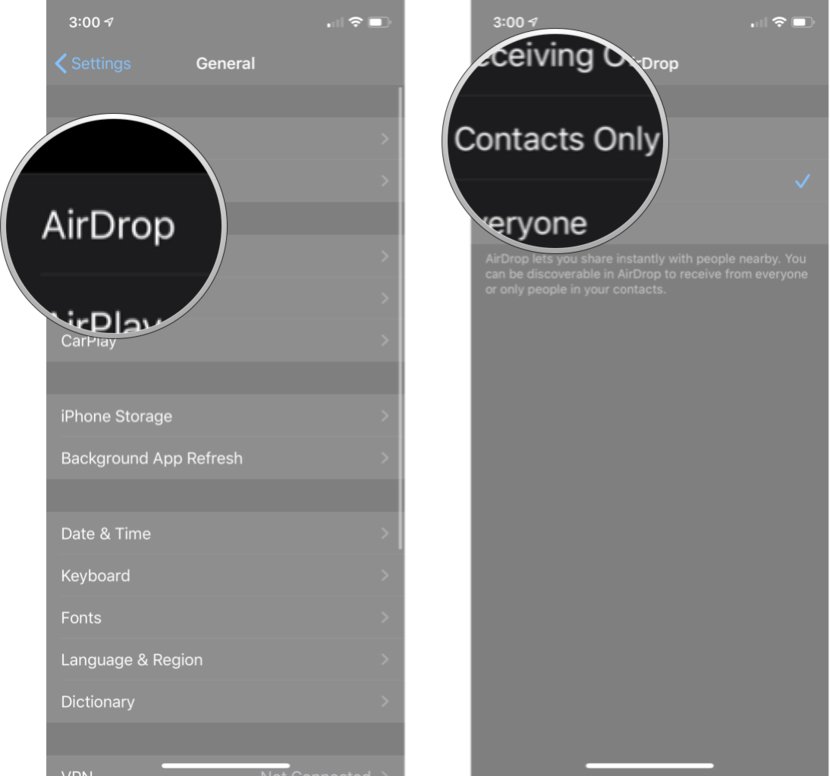
There are different levels of airdrop. Those are Off, Contacts and Everyone. The most commonly used and complex one is Contacts only, as it has to verify contacts on both ends. If you are facing the error, try turning the Airdrop off and then again on. Moreover, you can also try to put the setting “Everyone” and see if it resolves the issue. Following are the steps that are ought to be followed:
- Click on settings and then click on General inside it.
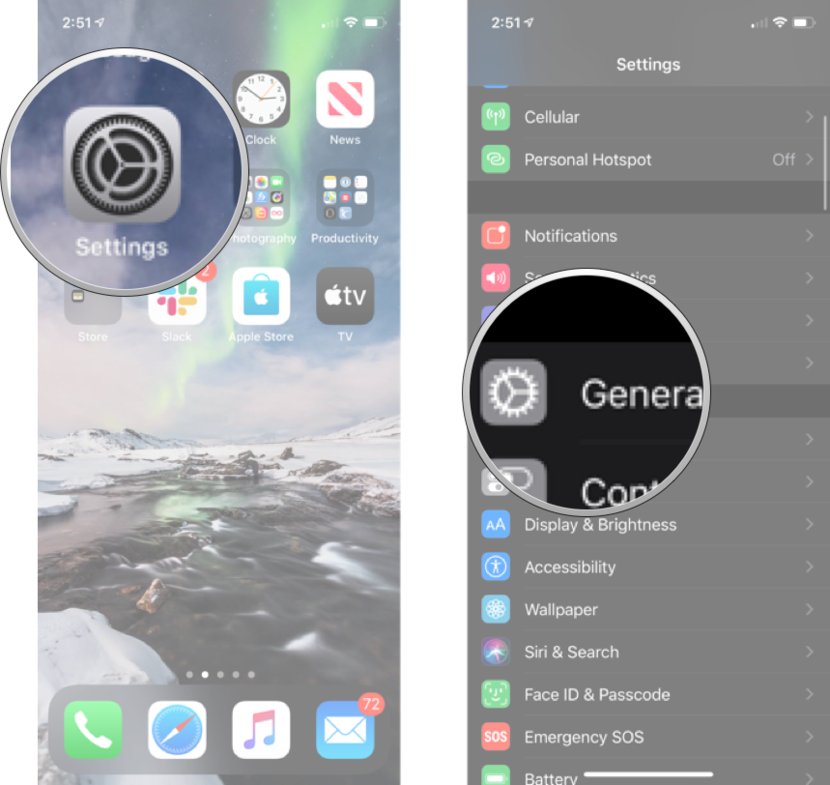
- Click on Airdrop and select the option that you want to try.
If you are finding MAC but isn’t showing in the devices, you can try the following thing:
- Click on Finder on your MAC device.
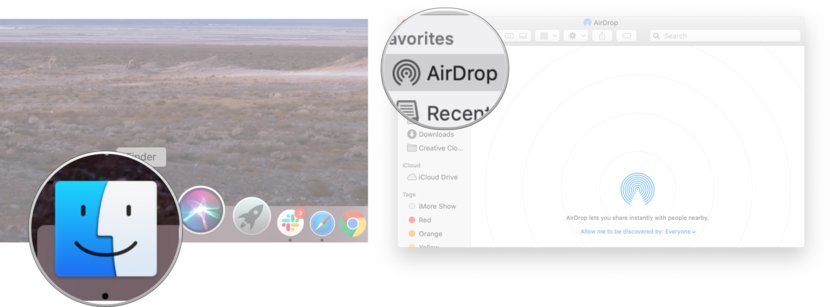
- Then, move on to Airdrop. Click on the setting as mentioned above.
If this doesn’t solve the issue, move on to the next solution.
Toggling Wi-Fi and Bluetooth
If the above-mentioned solution does not work, then you can try on toggling Wi-Fi and Bluetooth. If they are not working properly, they might cause you trouble. Hence, you need to toggle them on and off and see if they work accordingly or not.
Following way, you can toggle Wi-Fi on iPhone/iPad and MAC
iPhone/iPad
- Click on Settings and inside Settings. There will be an option named Wi-Fi
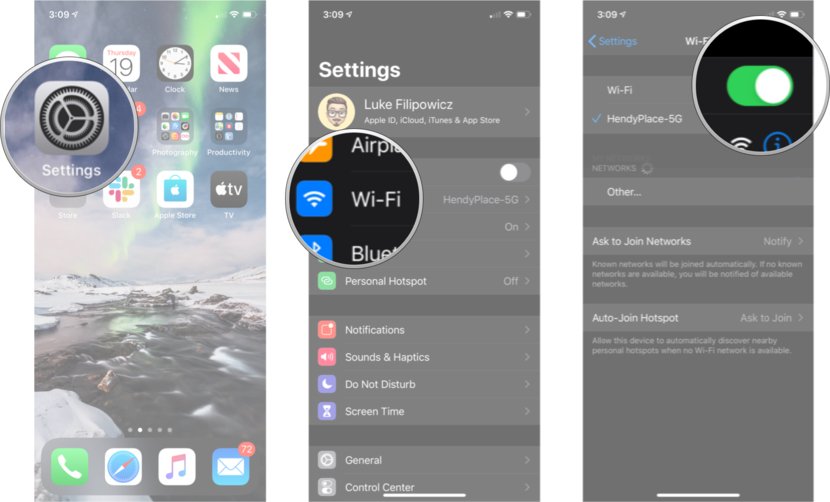
- Click on it and if it is on, turn it off and again turn it on.
MAC
- Click on the Wi-Fi symbol. It will be displayed in the Menu Bar.
- Now, turn it off by clicking on “Turn Wi-Fi off” and again turn it on by clicking “Turn Wi-Fi on”
Following way, you can toggle Bluetooth on iPhone/iPad and MAC
iPhone/iPad
- Click on Settings and inside Settings, there will be an option named Bluetooth
- Click on it and if it is on, turn it off and again turn it on. In layman terms, try doing on-off.
MAC
- Click on the Bluetooth symbol. It will be displayed in the Menu Bar.
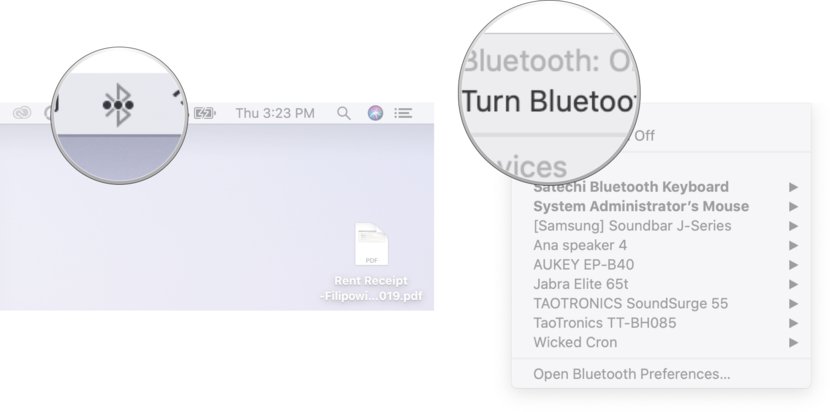
- Now, turn it off by clicking on “Turn Bluetooth Off” and again turn it on by clicking “Turn Bluetooth on”

If you don’t want to do both of them manually, then you can turn on aeroplane mode and turn it off again. This will perform the same function as we said above.
Resetting Network Settings
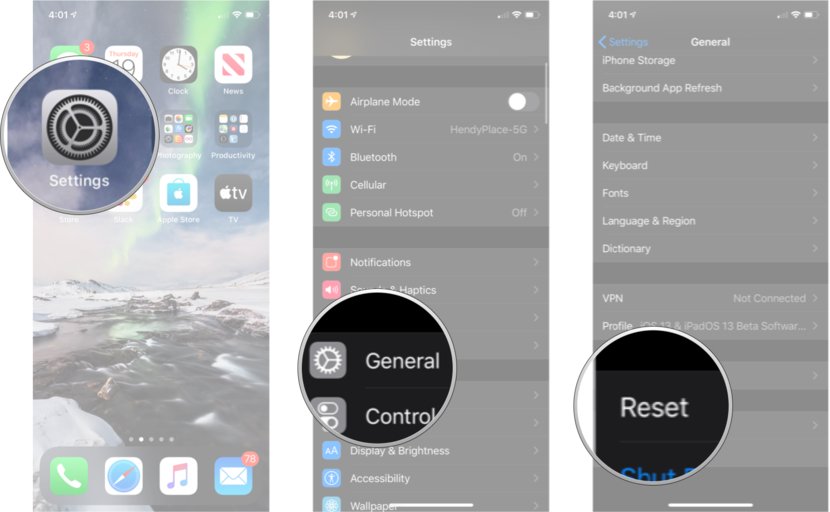
Sometimes, you need to Reset Network Settings to ensure Airdrop works correctly. Following way you can reset Network Settings.
- Click on settings and inside settings, click on General
- Now, proceed to the option that says “Reset”.
- Inside Reset, click on Reset Network Settings.
Sign in Again in iCloud
Sometimes, you need to log out from your iCloud and again log-in to check if the solution works or the problem persists. To do this, follow the steps mentioned below.
- Click on Settings and inside settings, tap on your name
- Go to iCloud and there, sign out.
- Now, sign in using your credentials.
Check if the solution works. If it doesn’t, go on trying the rest of the one’s mentioned below!
Hard Reset
Hard reset your device. Sometimes, you need to hard reset your device to solve the issue. Follow the steps mentioned below but make sure you follow the step that is mentioned for your device version.
iPhone 6.0 or earlier/ iPads
- There will be an on-off button on your device. Press and Hold it.
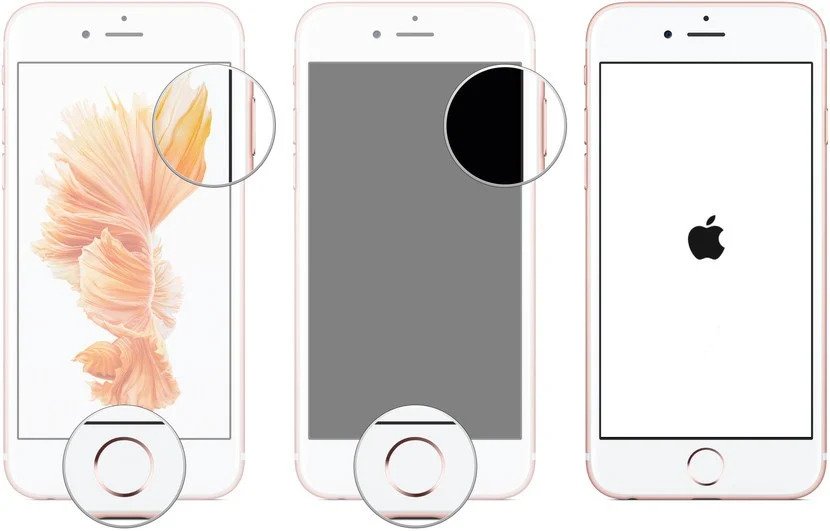
- Keep pressing the button and simultaneously, press the Home button.
- The screen will go off and again come on with the famous Apple logo on it. Hold it till the logo comes on the screen.
iPhone 7
- There will be an on-off button as we mentioned. Press on it and Hold it.
- Now, press on the lower-volume button while holding the on-off button. In short, make sure you hold both of them together.
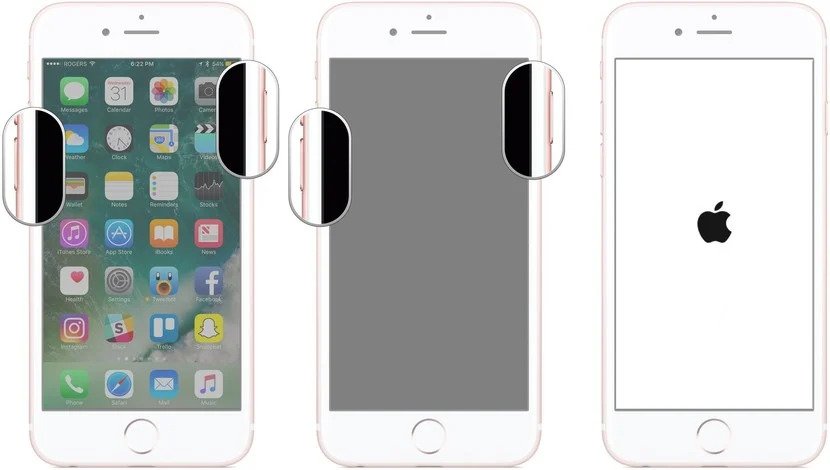
- As we said above, keep holding them till the screen goes off and the apple logo comes on the screen,
Rest of the Devices Except Mac
For these devices, the procedure is slightly different. Follow the steps mentioned below carefully.
- Press the Volume up button and immediately release it.
- Now, press the Volume down button and immediately release it.
- Hold the sleep button and keep holding the side button.
- Keep holding the side button even if the screen goes out.
MAC
- There will be the apple icon on top and far left on the menu bar. Click on it
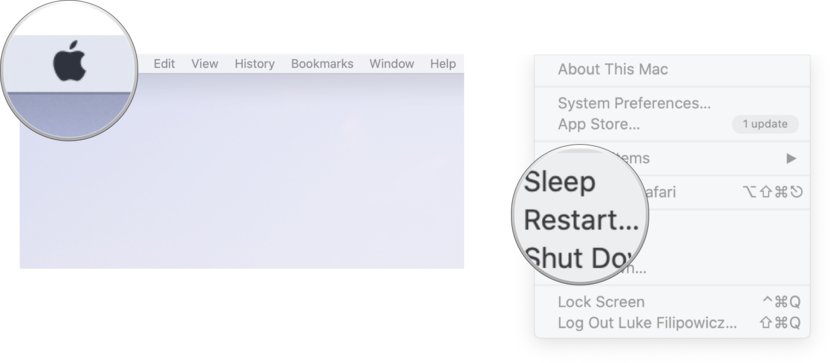
- Click on restart.
In most cases, the above solution works.
Update
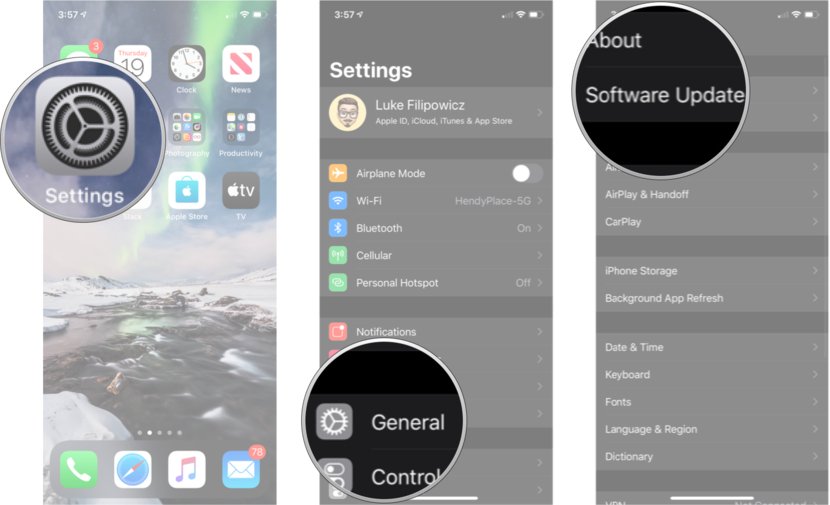
Try updating as many times, the latest update comes with many fixes and patches. When updated, the problem may get resolved. Follow the steps mentioned below to solve the issue.
- Click on settings and inside settings, click on general.
- Inside general, there will be an option named “Software Update”.
- If there is an update, it will be shown. Click on install to install the update.
Last but not the least, contact Apple Support. Yes, contacting them can solve the issue. If you have an apple store near you, go and ask for help.
This was all about How to fix airdrop on iPhone iPad. We mentioned different solutions. These solutions vary from device to device and hence, try and opt for the one that suits your situation the best. We hope that the article has served its purpose and will help you in solving the issue.
Keep reading:


