
AirDrop on Mac makes it easy for users to transfer files, photos, and documents wirelessly with Apple devices. It can, however, sometimes experience hiccups, just like any technology. There’s nothing to worry about if you don’t find AirDrop working on your Mac. It is common for users to encounter such software malfunctions. To help you resolve this issue and get back to effortless file sharing, this article walks you through various troubleshooting steps. Check out various alternative methods to fix AirDrop not working on your Mac.
1. Check for AirDrop Compatibility for macOS
The first thing you should do when encountering AirDrop issues on your Mac is to check if your macOS is compatible. AirDrop perfectly supports Macs running macOS Yosemite and beyond.
To clarify further, below is the list of devices that support AirDrop functionality.
- Macs released after 2012 with OS X 10.10 (Yosemite) or higher
- iPhones running on iOS 7 or higher
- iPads running on iPadOS 13 or higher
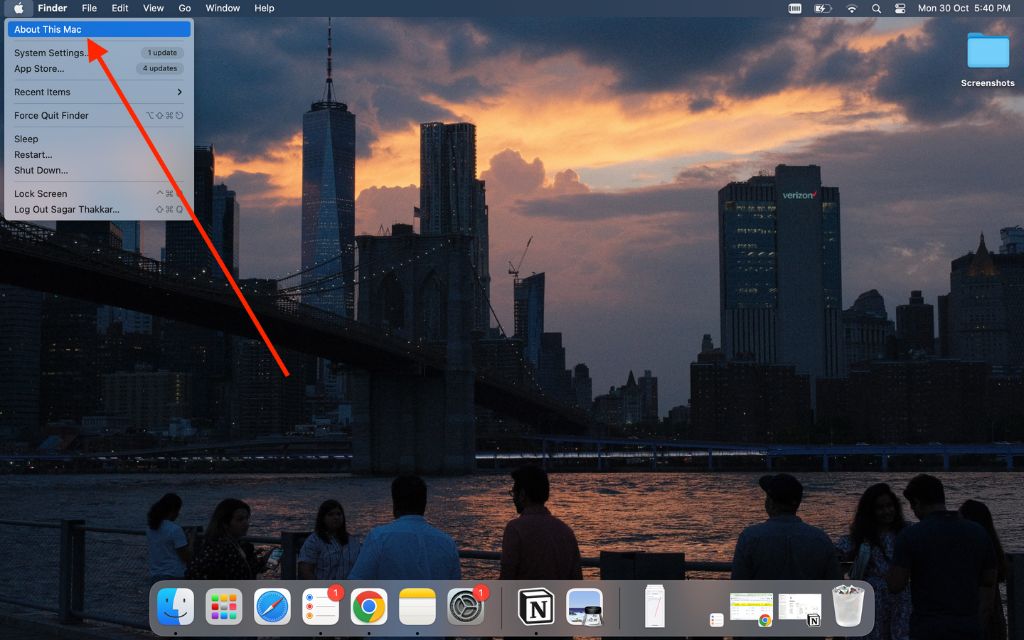
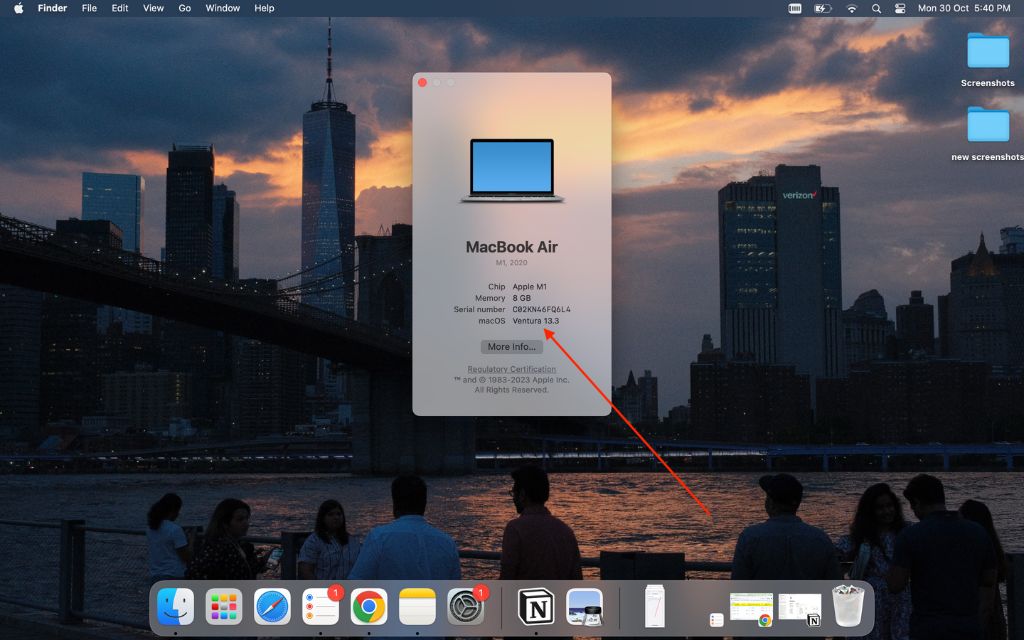
To check your macOS version, simply click on the Apple icon on the top left-hand corner and go to ‘About this Mac’, and ensure your version is compatible.
You may need to upgrade your system if your macOS is old.
2. Turn On AirDrop on Mac
Seamless communication between devices is very vital when it comes to AirDrop. You must make sure that AirDrop is turned on for all devices.
How to enable AirDrop on Mac,
1. Open the Control Center from the top-right corner of your Mac.

2. Now, tap on the AirDrop icon to turn it on.
Through this step, you make sure that your devices are prepared enough and open for connecting and sharing files with other users.
3. Change AirDrop Visibility
In case AirDrop isn’t performing adequately, you should change your AirDrop visibility settings. You can also customize such settings as who can detect and transfer files to your Mac via AirDrop.
How to Change AirDrop Visibility on Mac,
1. Click on the Control Center icon located at the top right corner of your menu bar.

2. Now, choose AirDrop.

3. You will be presented with two options that are ‘Everyone’ and ‘Contacts Only’.
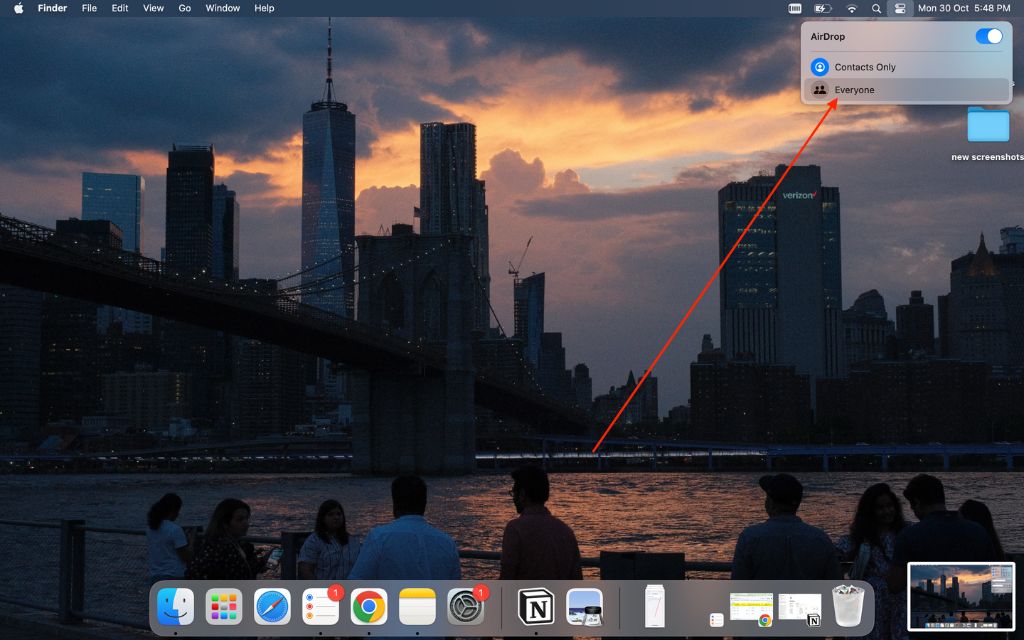
- With ‘Everyone‘ selected, AirDrop is accessible to all nearby Apple devices.
- With ‘Contacts Only‘ only allows AirDrop to be used with the people you have saved in your contacts.
4. Ensure Both Devices are on the Same Wi-Fi Network
When AirDrop experiences connectivity problems, a Wi-Fi network is an important area to examine. The sending and receiving devices need to be connected to the same Wi-Fi network in order for the AirDrop to work smoothly. It is important to note that AirDrop functions well in a shared network.
Verify the Wi-Fi network configuration on your Mac and the device that is receiving information, and ensure their compatibility. Otherwise, your Mac may use Bluetooth to send and receive files, which may not be an ideal option in all cases.
5. Try After Unlocking the Device
AirDrop usually works well when your Mac and other Apple devices have been unlocked and kept actively busy. Prior to using AirDrop, unlock your Mac and the recipient device, such as an iPhone or iPad. Sometimes this is a simple step but it goes a long way in ensuring that both devices involved are fully functional. AirDrop will be more reliable and efficient if your devices are unlocked.
6. Restart Wi-Fi and Bluetooth Connections
Give a quick reboot to your Wi-Fi and Bluetooth connections when AirDrop starts experiencing connectivity hiccups. Wireless technology lies at the basis of AirDrop, and any flaws in their functioning have the potential to disrupt file exchange. Start by switching off Wi-Fi and Bluetooth on your Mac device.
Turn them off, wait for a couple of seconds, and then switch them back. Effectively, it reboots all the wireless communication lines that may have an issue with AirDrop. You will then find your Mac able to send or receive files smoothly using AirDrop once your Wi-Fi and Bluetooth connections come back on.
7. Restart Your Devices
It is sometimes all that is required to fix persistent AirDrop issues is to perform a simple restart. This may be a temporary problem that can be solved by restarting your Mac and the device you want to share with. Most times a minor step of power cycling the router or device could clear most connectivity issues enabling AirDrop to run normally.
Check out ways to restart your iPhone and Mac and then try again after some time has passed. As a result, your devices will be prepared to share information rapidly.
8. Try After Moving Your Devices Closer
In case your transfer via AirDrop isn’t flowing well, you may want to consider if your devices are close physically. AirDrop works more efficiently when your respective devices are just close enough. Move the Mac and the targeted device such as iPhone and iPad closer, if you are experiencing connectivity problems.
The power of Wi-Fi or Bluetooth can depend on physical distance for the successful working of AirDrop technology. In most cases, ensuring that you bring your devices closer may often help to improve the reliability as well as speed of your file transfers. This is just an assurance that your devices are in the same room, they can efficiently communicate and Air Dropping works well for your devices.
9. Update Your Devices
In order to get the best functionality from AirDrop, you must upgrade your devices. Make sure that your Mac is updated with the latest software as well as the target device, especially if you are experiencing connectivity problems.
In some cases, outdated software can cause compatibility issues. Check out the easy steps to update your Mac as well as iPhone and install the latest software available. Now that your device has been updated, you should be able to share files with AirDrop without any problems.
10. Disable Personal Hotspot on iPhone
One possible cause of AirDrop issues while sending files from Mac to iPhone is Personal Hotspot on your iPhone. When Personal Hotspot is enabled, it can affect the connectivity between your devices.
How to turn off Personal Hotspot on iPhone,
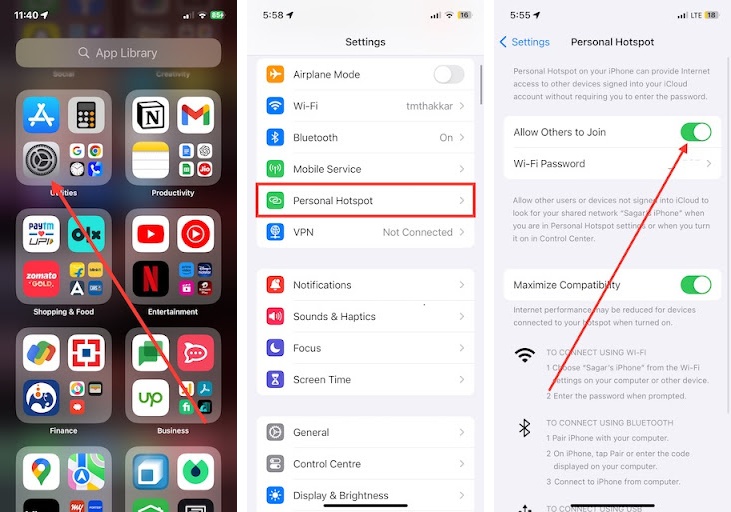
1. Visit the Settings app on your iPhone.
2. Tap the Personal Hotspot settings.
3. Finally, toggle off the switch for Allow Others to Join.
Most of the time, it is recommended that you disable Personal Hotspot to improve file-sharing between your Mac and iPhone and solve some connection issues. Data transfer is smoother when your devices don’t have any distractions.
11. Try After Turning off Focus Mode
If your attempts still hit a snag, consider checking whether Focus Mode is enabled on your iPhone or Mac. The new Focus Mode, which was introduced in iOS 15, enables you to filter notifications and distractions for specific activities. Yet, it can also interfere with AirDrop by affecting notifications.
How to turn off Focus Mode,
1. Open Control Center by clicking the icon in the top right corner of the Mac menu bar.
2. Now, tap on Focus (activated Focus mode).
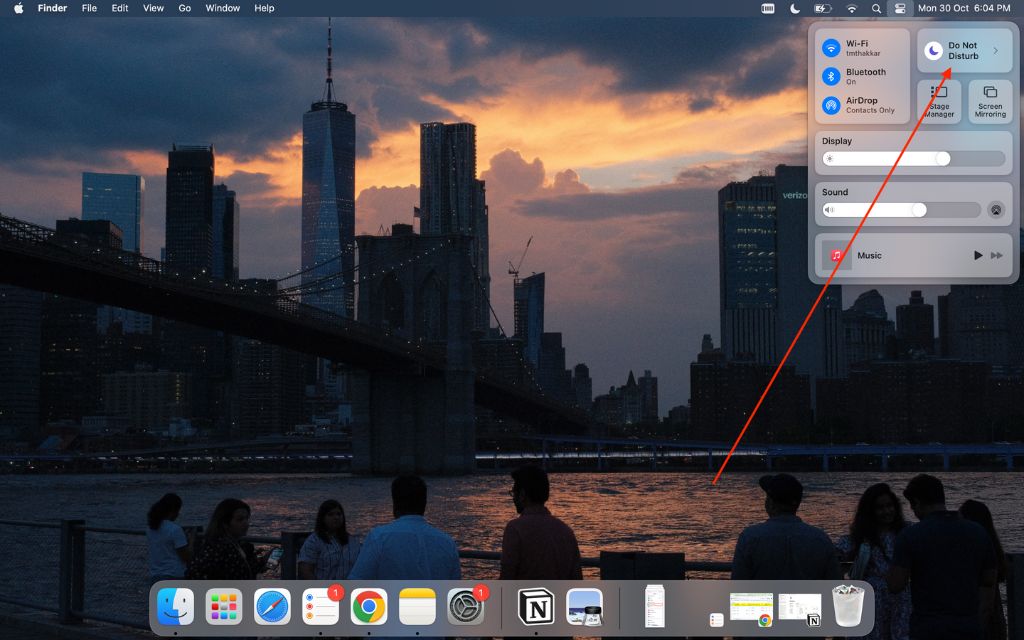
3. Lastly, click on the enabled Focus mode to turn it off.
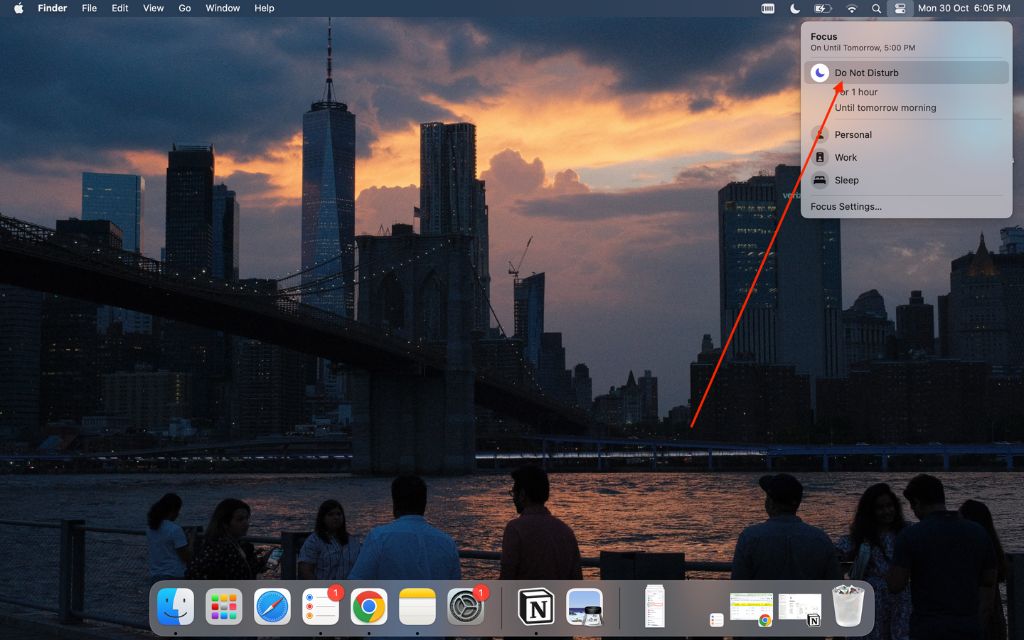
Once you disable focus mode, the iPhone will receive more AirDrop requests and alerts that are more appropriate for file-sharing across the iPad or Mac. This way, an iPhone becomes alert and responsive immediately to AirDrop transfers.
12. Try Reset Network Settings on iPhone
In case AirDrop keeps giving you problems with connectivity, it might be time to reset your network settings on your iPhone. This helps in clearing the network-related configurations and might resolve some complicated problems associated with AirDrop.
13. Check Firewall Settings on Mac
Sometimes when you are trying to resolve AirDrop connection issues with your Mac, you usually forget about the firewall settings. In some instances, firewalls that offer security by screening network traffic can be a challenge to AirDrop’s effectiveness.
How to Check Firewall Settings on Mac
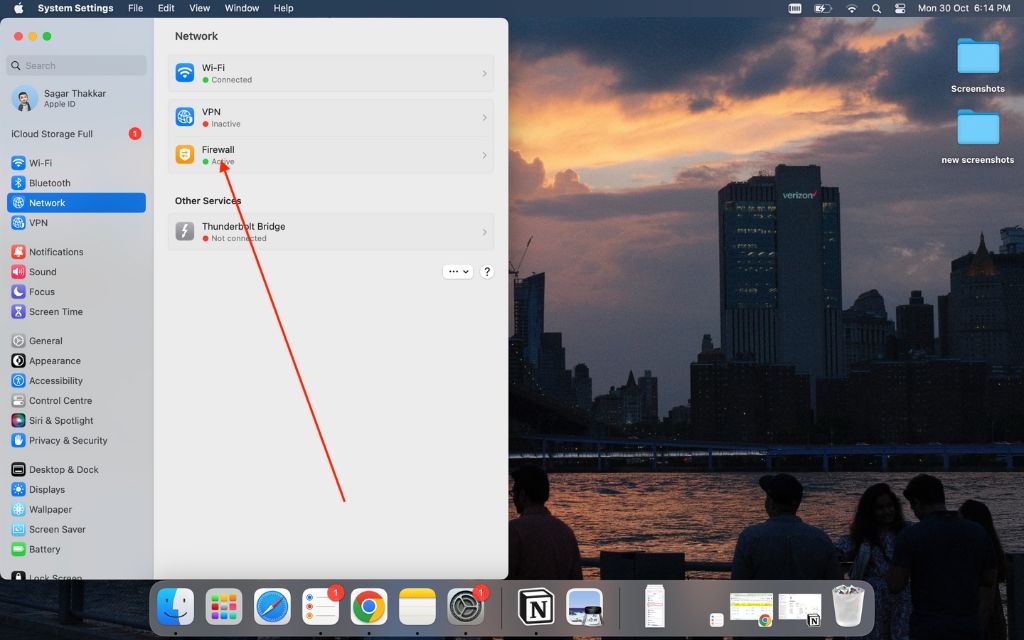
1. Click the Apple icon then click System Settings.
2. Go to Network then click on the Firewall option.
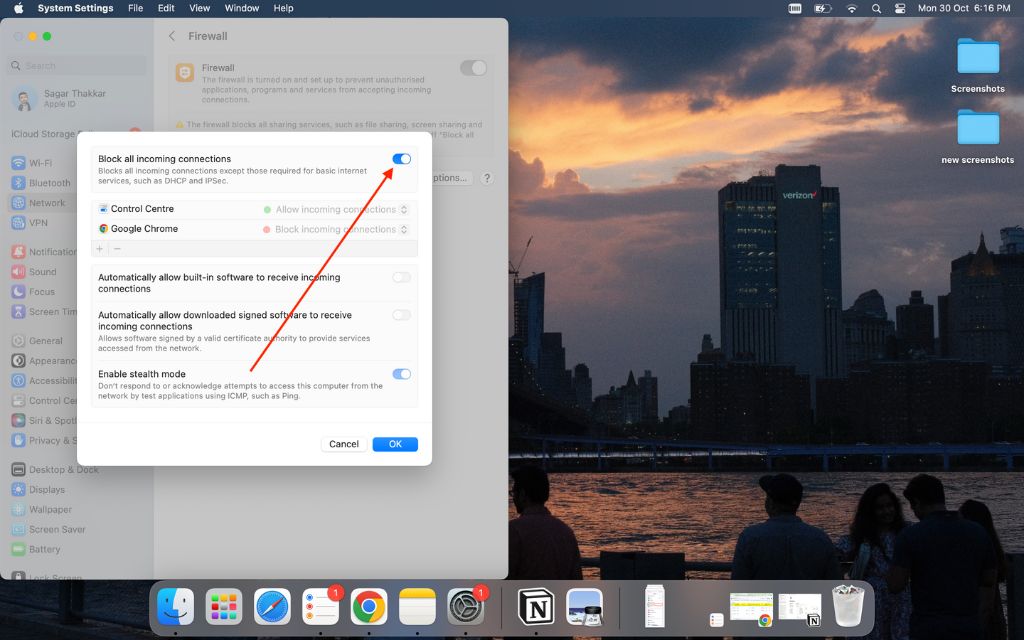
3. Now, click on the Options button.
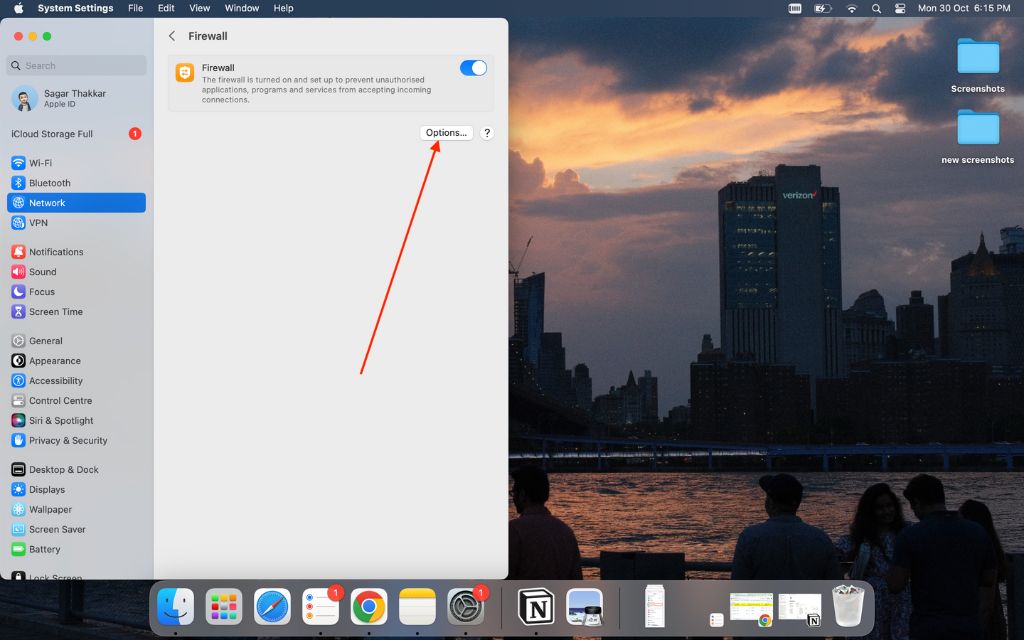
4. Here, toggle off the switch for Block all incoming connections.
5. Additionally, make sure to Turn on > Automatically allow built-in software to receive incoming connections.
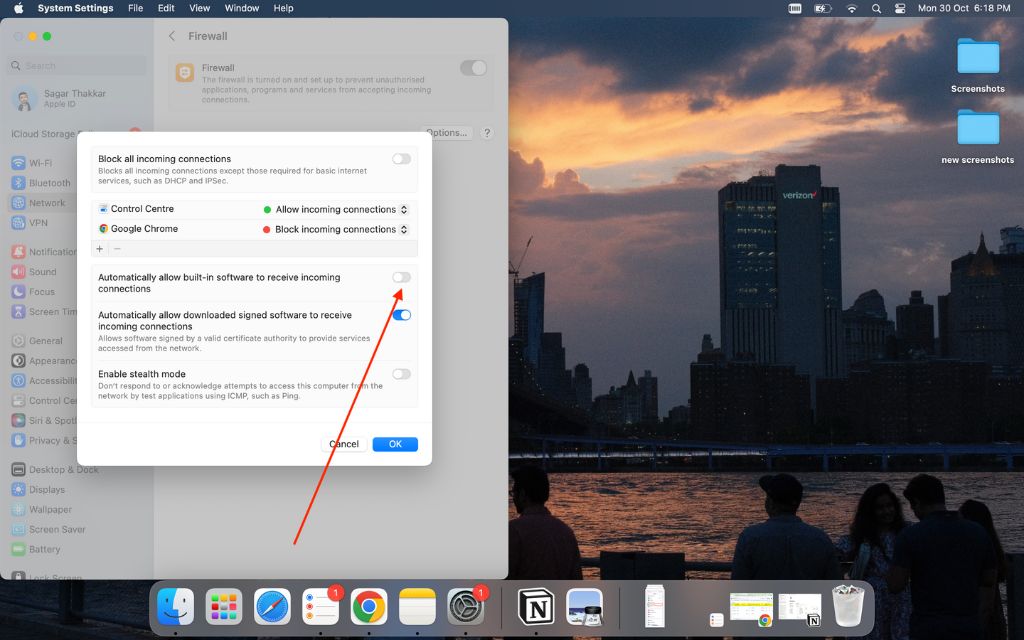
Try AirDrop for receiving files after turning it off, you might be able to do so.
14. Contact Apple Support
In case you have tried all these troubleshooting steps and AirDrop is still giving you a hard time, then contact the specialists. You can simply call or chat with their experts who can solve AirDrop problems in a personalized manner. Apple’s support team has the capacity to help you in solving any configuration problem or technical issue. They may direct you in diagnosing the issue and help you recover your smooth flow of file sharing again. Other times, the best thing to do is seek professional assistance so as to put an end to such stubborn AirDrop problems.
Conclusion:
It is very easy to transfer files between Apple devices using AirDrop, and when your Mac refuses to cooperate, it can be quite annoying. Often by just following the steps of troubleshooting mentioned in this article, it is possible to fix AirDrop problems and again enjoy smooth file sharing. However, if the problems persist even after following these steps, then Apple Support would probably come in handy.
More Mac Tips: