To get the best performance out of your Android device, you must manage its storage. By frequently clearing your trash or removing unwanted files, you can improve your device’s performance. Thankfully, clearing the trash on Android is simple. We’ll walk you through the process of How to empty trash on Android efficiently and create some much-needed room in this article.
Why is deleting the trash important?
Deleting trash and freeing up storage on Android is critical for several reasons.
- It helps free up your device’s storage space, which is valuable. By removing things from the bin, you’re essentially making space for more crucial items to accommodate by removing files or other materials that you no longer require.
- Emptying your Android device’s trash can improve its performance. Your device may slow down or hang as a result of cluttered storage. You can maintain the smooth and effective operation of your gadget by routinely clearing the trash.
- Keeping your security and privacy requires removing junk. Sensitive information that you don’t want to get end up in the wrong hands, documents, messages, or images, may be found in the bin. Furthermore, your personal data is less likely to be accessed by unauthorized parties if you permanently remove these items.
3 Ways to Empty Trash On Samsung Smartphones
1. Using My Files
Step 1: Open the “My files” app. Click on “3 vertical dots.”
Step 2: Tap on “Analyse storage.”
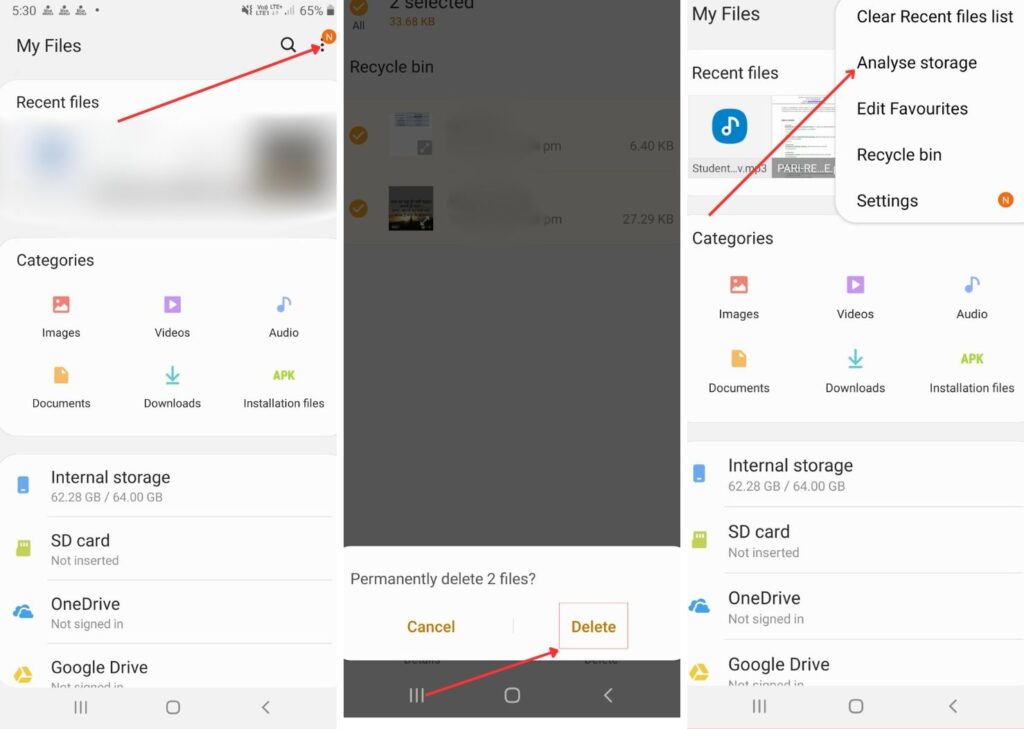
Step 3: Now, to remove trash from the bin, tap “Recycle Bin.” (You will be shown the internal storage metrics.)
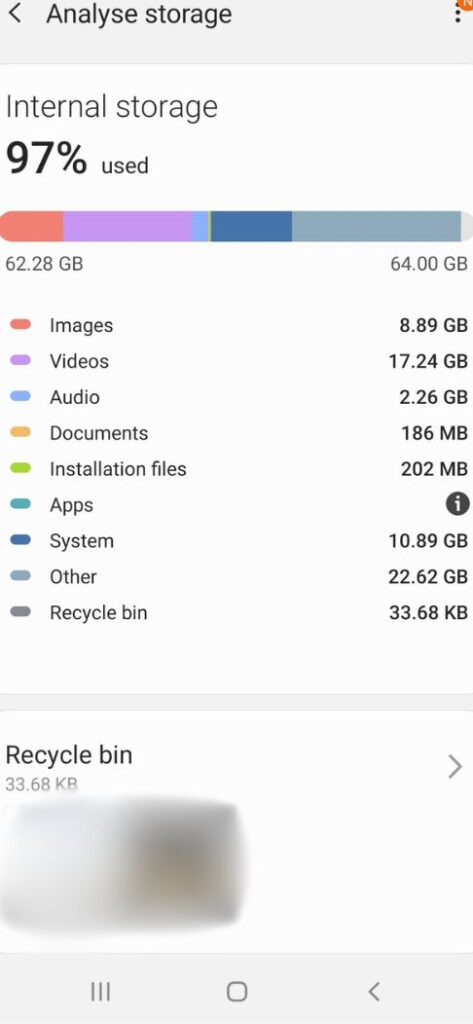
Step 4: Select the items you want to remove by “clicking” on them.
Step 5: Hit “Delete.” When asked again, click on “delete” again.
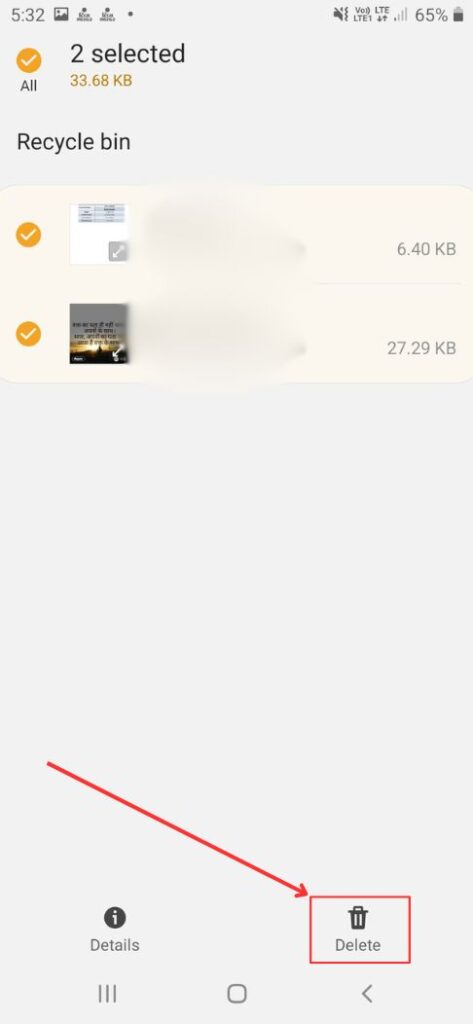
Carrying out these steps will lead you to remove trash using the “My Files” app.
2. Via Google Files
Step 1: Launch the “Google Files” app. Tap “3 horizontal lines” on the left side.
Step 2: Tap “Bin” in the menu that opens.
Step 3: All your deleted files will be displayed in the “Bin.” Select the items you desire to delete permanently. Once selected, tap “delete.”
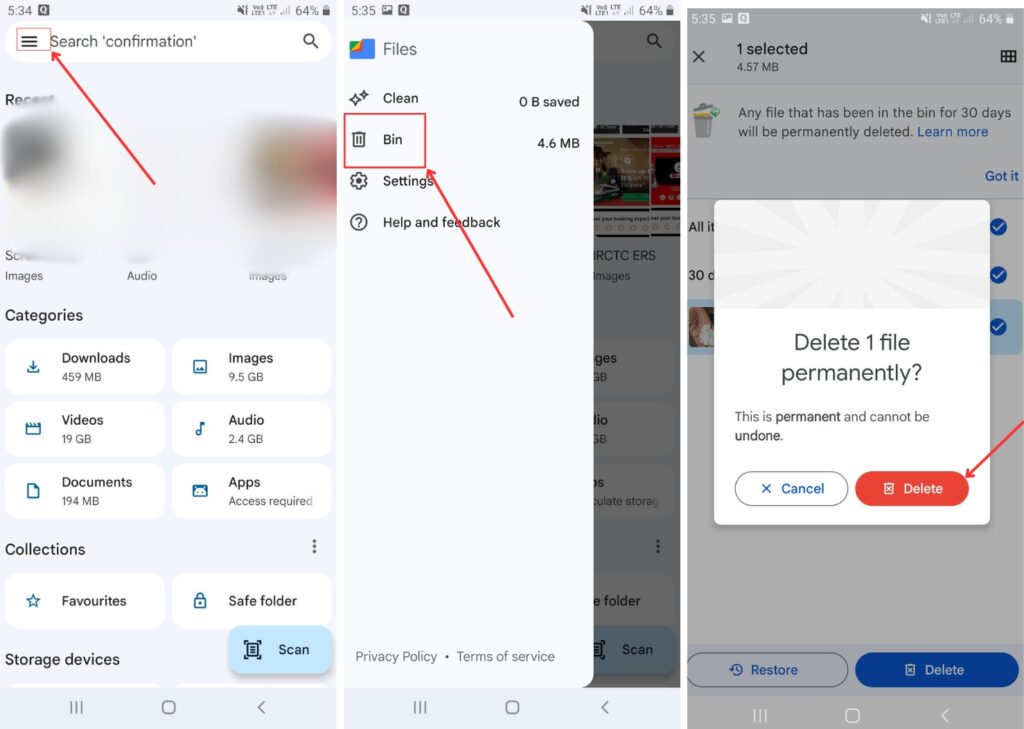
Step 4: Again tap “delete” when asked.
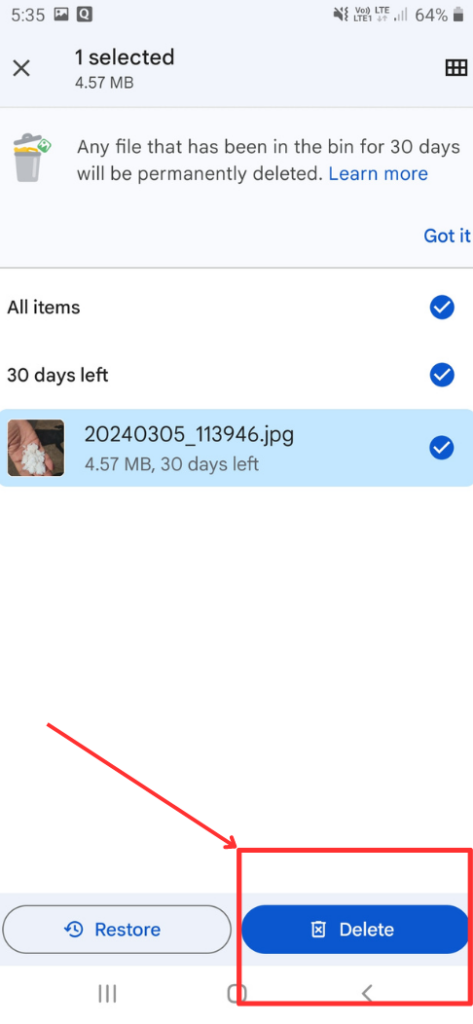
Through these steps, you can clear the trash in files by Google.
3. Via Google Photos
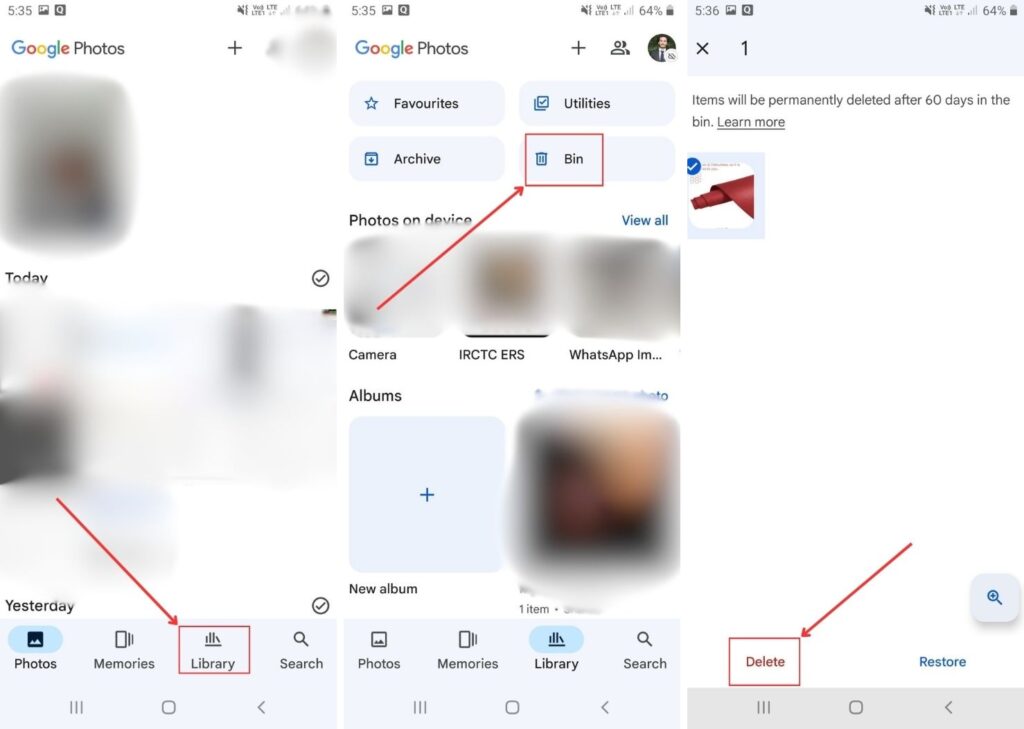
Step 1: Open “Google Photos.” Navigate to “Library” and click on it.
Step 2: Locate “Bin” and tap on it.
Step 3: Select the items you want to delete. Tap on “delete.”
Step 4: When asked if you want to delete it permanently, hit “Delete permanently.”
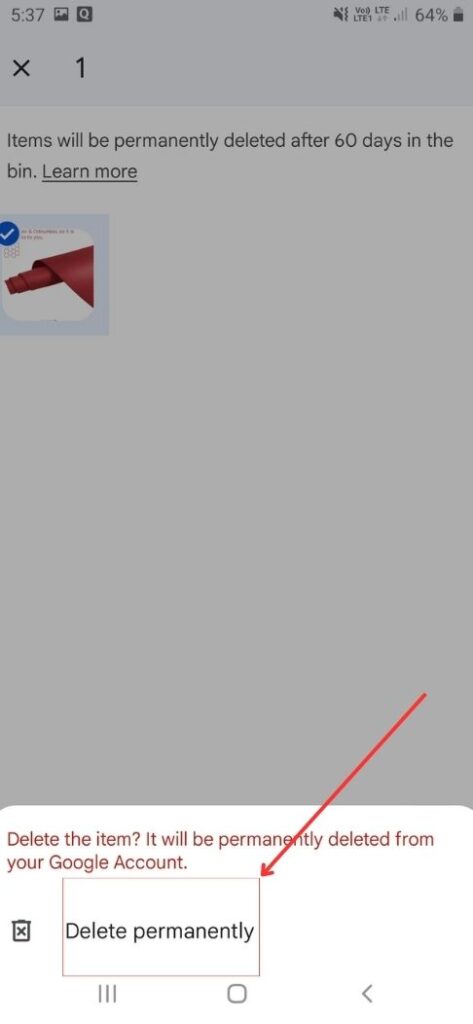
This is how you empty the trash from Google Photos.
Where is Recycle Bin On Android?
On Android devices, there isn’t a central trash folder like in desktop operating systems, which have special trash folders for removing files and folders, such as Windows’ Recycle Bin.
Many programs, like Google Photos, do come with a trash/bin folder, though. It is also imperative to know that if you don’t delete the items that you moved to the bin, after 30 days, they get automatically deleted. This happens in most folders and all of Google’s folders.
FAQs
With two exceptions—if your device is running slowly because of the volume of files on it or if you have a file that should be erased right away because it includes sensitive data—it is a question of personal preference.
It is a personal choice. However, if you feel that your Android gadget has become slow, you can empty the trash to make a difference. Moreover, it is always good to take out unnecessary items to make room for new ones.
Although they are somewhat similar, they are not the same ultimately. Temporary files, which can occasionally build up and occupy a considerable amount of storage space, can be removed by clearing the cache. On the other hand, you can free up space by emptying the trash by permanently removing these files from your device’s storage.
Final Words
The above-mentioned steps will guide you on How to empty trash on Android and create more space. You can optimize your gadget’s space and efficiency by deleting the trash. Clearing the bin regularly will help maintain the device’s efficiency. So, think no more and start clearing the trash by following these steps!
In case you missed!

