Windows 11 is a very robust and efficient operating system. Many users love it because it is highly customizable. However, out of the box, there may be a few elements you will want to tweak. In this guide, we discuss 15 things you should change in Windows right now. Note that these are not specifically OS flaws. Rather, they are modifications you may make on a Windows 11 device to enhance usability and, in some cases, increase security. So, if you are like us and love to play around with OS settings, let’s get straight to it.
1. Remove Pre-installed Bloatware
Bloatware on gadgets are unwanted applications or features preinstalled on a computer. They occupy storage space that may be used for more important resources and may contribute to slowing down your computer. Microsoft may install these unwanted apps, but they may also come with other third-party apps on your computer. Here is how to get rid of bloatware.
1. Press Windows + I to open the Settings app.
2. Click Apps on the left pane, and on the right, click Installed Apps.
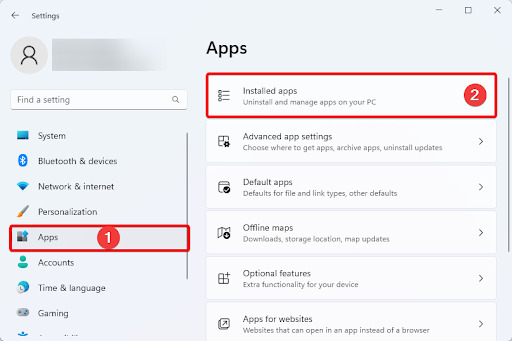
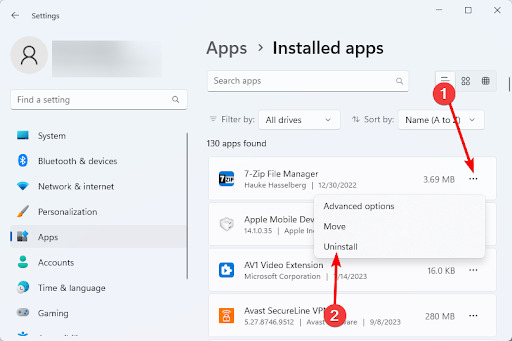
3. Browse through the app list, and if you come across any apps that are not needed, click its ellipses (the three horizontal dots) and click Uninstall.
2. Disable Windows Data Tracking
Windows tracks and collects data about your computer and how it’s used, thanks to a feature called Windows Data Tracking. Information gathered with this tracking feature is used to improve your experience and send personalized recommendations. However, data security and privacy are becoming more of an issue in the modern world, and you may not be comfortable with that amount of data sitting on Microsoft’s hands. So, you may turn off the feature.
1. Press Windows + I to launch the Settings app.
2. On the right pane, click Privacy & Security, then on the left, click Diagnostics & feedback.
3. Expand Tailored Experiences and toggle off the feature.
3. Sync Clipboard Across Devices
This setting is an excellent utility hack. When you sync your clipboard across devices, you can copy and paste regardless of the device you are on. This means that items copied on one device may be pasted on a separate device.
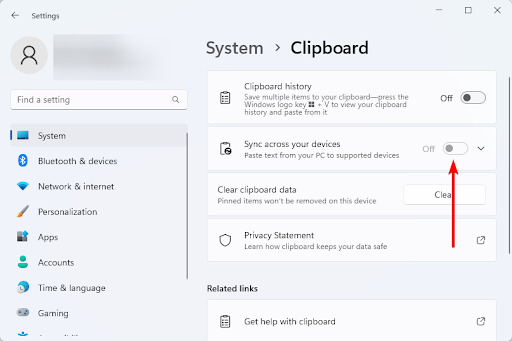
1. Press Windows + I to launch the Settings app.
2. Click the Clipboard option on the right pane.

3. Toggle on the Sync across your devices option.
4. Show File Name Extensions
All files on a Windows computer have a specific extension assigned to them. This extension is based on the format of the file. So, for example, a text file comes with the .txt extension, and a Word file has the .doc extension. When you enable the Show File Name Extensions option, the extensions will be displayed next to the file. This is great sometimes when you need to troubleshoot specific files.
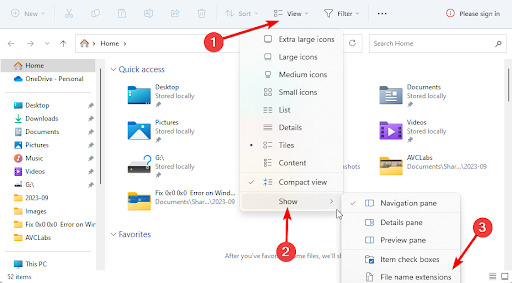
1. Press Windows + E to launch File Manager on Windows 11.
2. Click View, hover on Show, and click File name extensions.
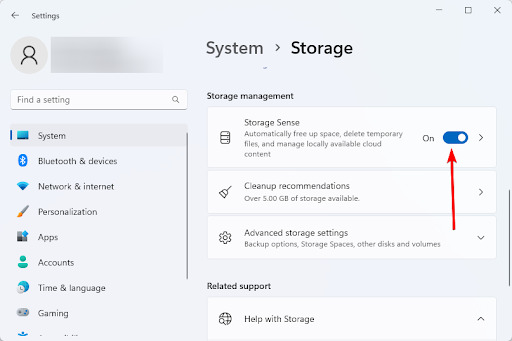
5. Enable Storage Sense and Automatic File Management
File management is very important in any robust operating system. It is very easy to gather clusters, and if you do not have an automatic way of cleaning up the cluster, over time, it begins to slow your computer down. On Windows 11, the Storage Sense feature will automatically free up space, delete temp files, and manage your locally available cloud content.
1. Press Windows + E to launch File Manager on Windows 11.
2. Click Storage on the right pane.
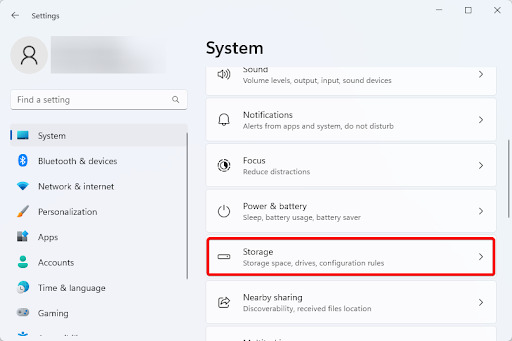
3. Scroll down and toggle on Storage Sense.
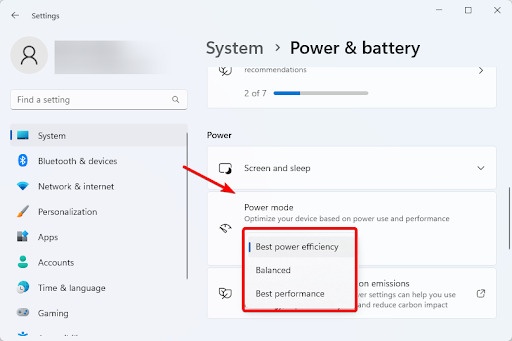
6. Edit the Power Mode
Windows 11 allows you to change the power mode to suit your preferences. The power mode is an excellent performance hac on the OS, allowing you to extend battery life. While tweaking power options, you should not change features that will affect regular use on your computer.
1. Press Windows + E to launch File Manager on Windows 11.
2. On the right pane, click Power & battery.
3. Under the Power mode category, you may select Best power efficiency, Balanced, and Best performance.
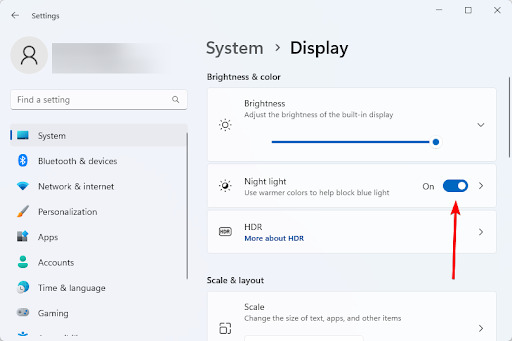
7. Enable Night Light
If you are constantly behind the screen, this is a setting you should pay close attention to. When you enable Night Light on Windows 11, it will reduce the amount of blue light emitted by your computer. Since blue light may interfere with sleep, this setting will help you sleep better.
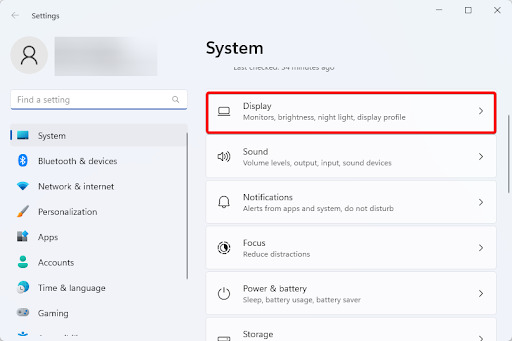
1. Open the Settings app by pressing Windows + I.
2. Click Display on the right pane.
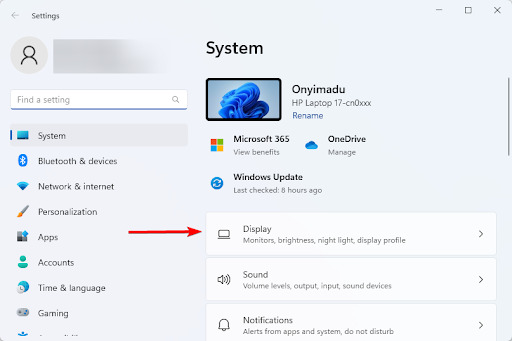
3. Toggle on the switch under Night Light.
8. Restrict Third-Party App Installation
Some third-party applications are very valuable, but installing specific applications may also introduce malware. Restricting third-party app installation may help increase security, privacy, and performance and may be a good parental control feature.
There are several third-party app blockers that you may use. A simple Google search will give you nice options; however, you may try apps like AppBlocker and WinPatrol.
9. Turn off Ads in Windows 11
Ads are often great because they often point you in the direction of services you really need. But more often than not, ads can be very distracting, especially when you are in the middle of real work. You may avoid this distraction by turning off ads on Windows 11.
1. Press Windows + I to launch the Settings app.
2. On the right pane, click Privacy & Security, then on the left, click General.
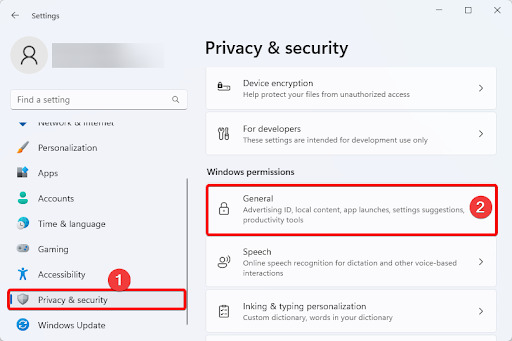
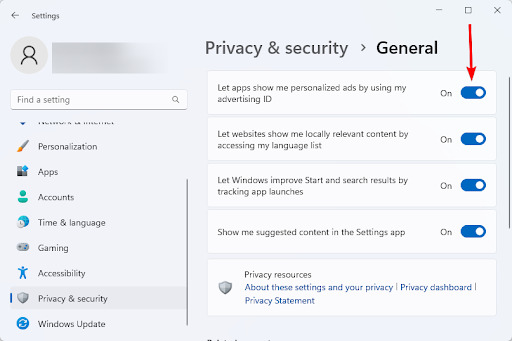
3. Toggle off Let apps show me personalized ads by using my advertising ID.
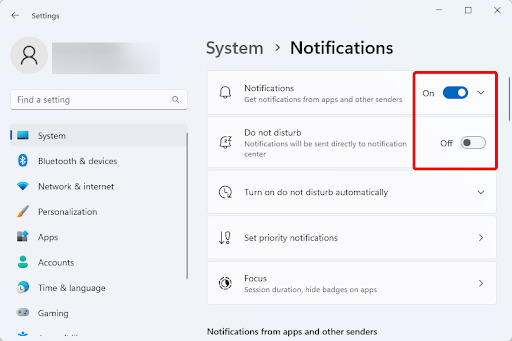
10. Disable Persistent Notifications
On Windows 11, it is possible to have notifications that stay on your screen until they are dismissed. These are called persistent notifications. They can be very distracting and can not be ignored. You should turn off this setting to have a distraction-free time on your computer.
1. Launch the Settings app by pressing Windows + I.
2. Click Notifications on the right pane.
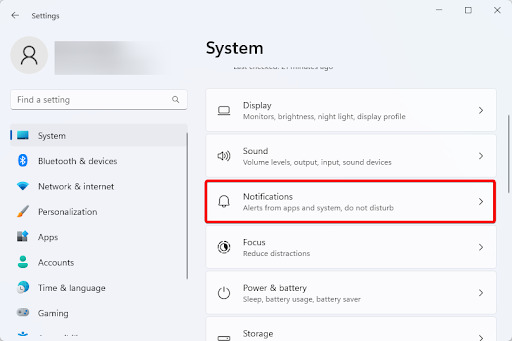
3. Toggle off the Notifications and Do not disturb options.
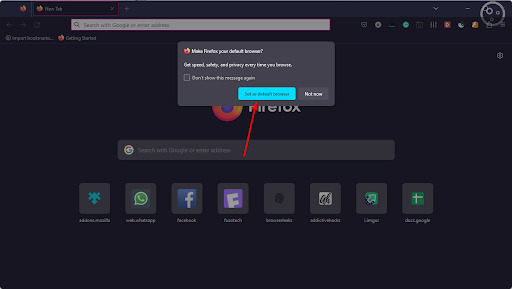
11. Update Default Browser
On Windows 11, Microsoft Edge is the default browser. While this browser is robust and very effective, it is not the browser of choice for many Windows users. So, change your default browser to what you are used to using.
To change the default browser, simply download and open your browser of choice, and you should get a popup asking if you would like to make it your default. Click Yes, Set as default browser, or Accept, and you are done.
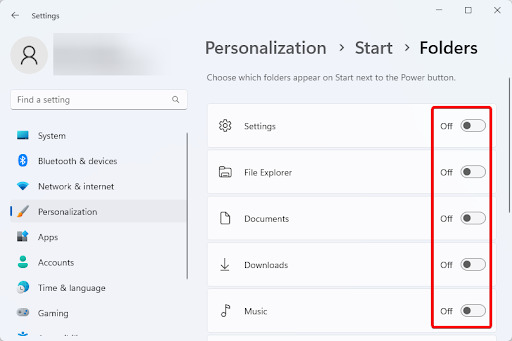
12. Include Folders in the Start Menu
The Windows 11 Start menu comprises many pre-installed applications. It makes it easy to open these apps, but you may take this customization a step further by including some of your frequently used folders.
1. Launch the Settings app by pressing Windows + I.
2. Click Personalization on the left, then Start on the right.
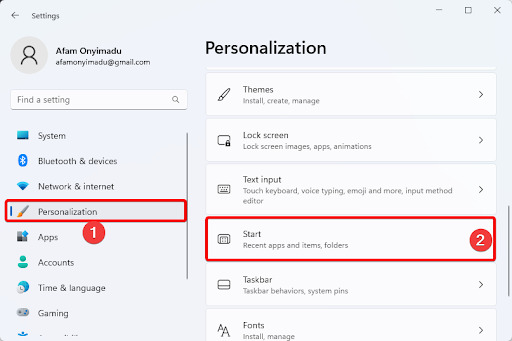
3. Scroll down on the right pane and click Folders.
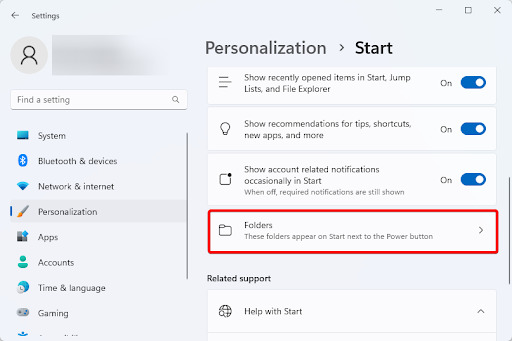
4. Toggle on any folders you want added to the Start menu from the available list.
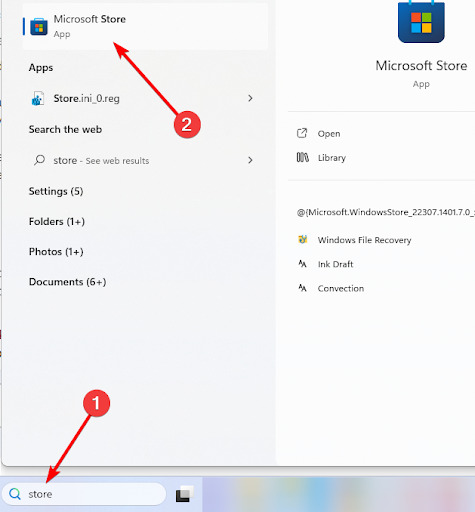
13. Disable Autoplay in Windows 11 Microsoft Store
The Store’s autoplay feature will start playing previews of videos automatically when you open the Microsoft Store. While it helps you understand what an app is all about, it may be distracting and often annoying on slower internet connections.
1. Type store in the search bar of the Taskbar and click Microsoft Store.
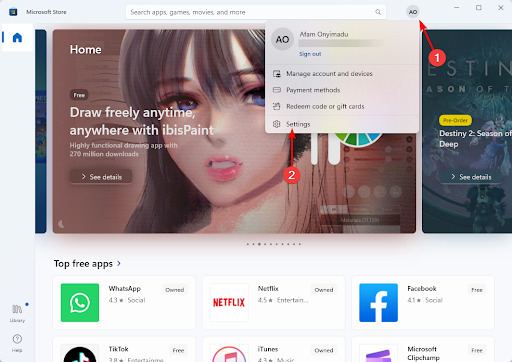
2. Click your name abbreviation at the app’s top and select the Settings option.
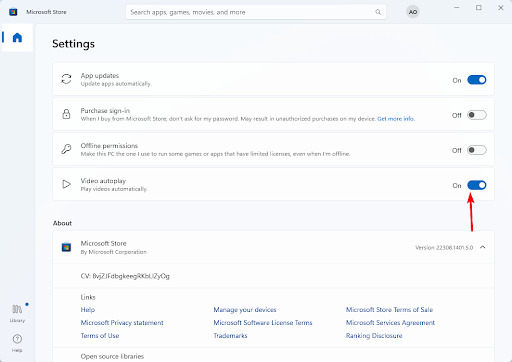
3. Toggle off Video autoplay.
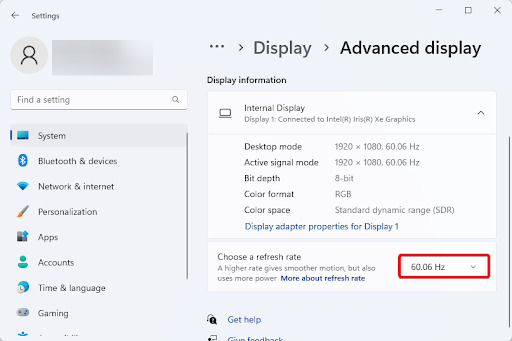
14. Adjust the Screen Refresh Rate
On Windows 11, this refers to the number of times the display updates the image every second. High refresh rates imply a more responsive and smoother image. If you are gaming, using high refresh rates may be beneficial. However, they also take more CPU resources, so you should find a good balance.
1. Launch the Settings app by pressing Windows + I.
2. Click Display on the right pane.
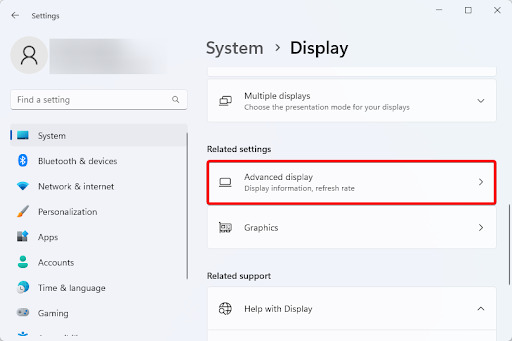
3. Scroll down the right pane and click Advanced display.
4. Expand the Choose a refresh rate dropdown and select a value that works best for you.
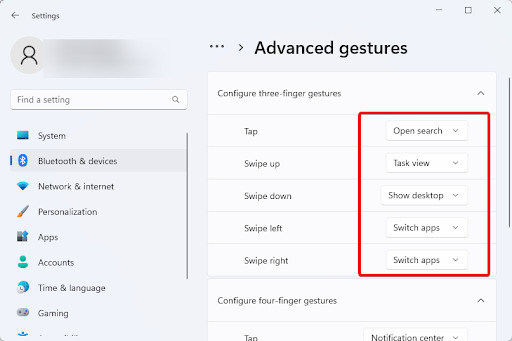
15. Edit Advanced Gesture Controls
It is possible to control specific operating system features using gestures on the trackpad or touchpad. This is called advanced gesture control. You may customize this feature as you please to make the user experience more pleasant and seamless for you.
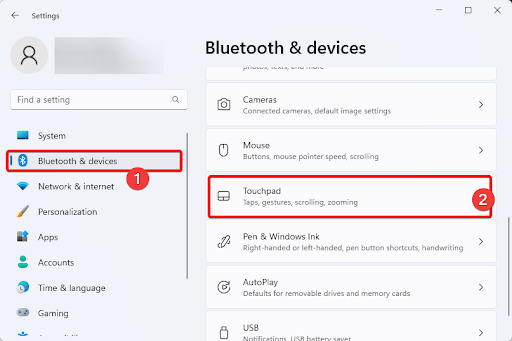
1. Launch the Settings app by pressing Windows + I.
2. Click on Bluetooth & devices on the left pane, then on the right, click Touchpad.
3. Scroll down the right pane and click Advanced gestures.
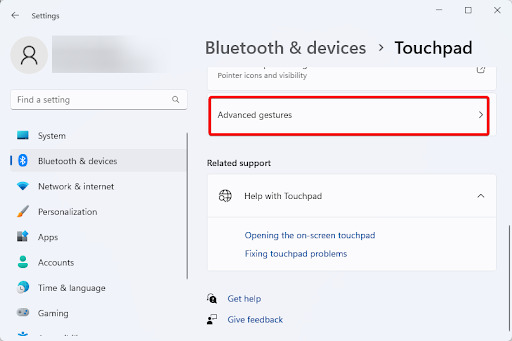
4. From the list, click the dropdown of any option you want to customize and apply the gesture you want.
Final Thoughts: Getting the Best User Experience From Windows 11
If you have gone through our list of settings you should change right now on Windows 11, you will realize that the customization features are endless on the operating system. While not all the suggestions will be perfect for you, they must give you an idea of what is possible and how to get the best experience using the latest Microsoft OS.
Please let us know what your favorite customization settings are in the comments section.
Keep Reading: