In the modern world with limited time to do multiple works, it becomes a blessing when you can multitask on your Android. The good news is that you can split screen on Android as easily as other devices like Mac, iPhone and iPad.
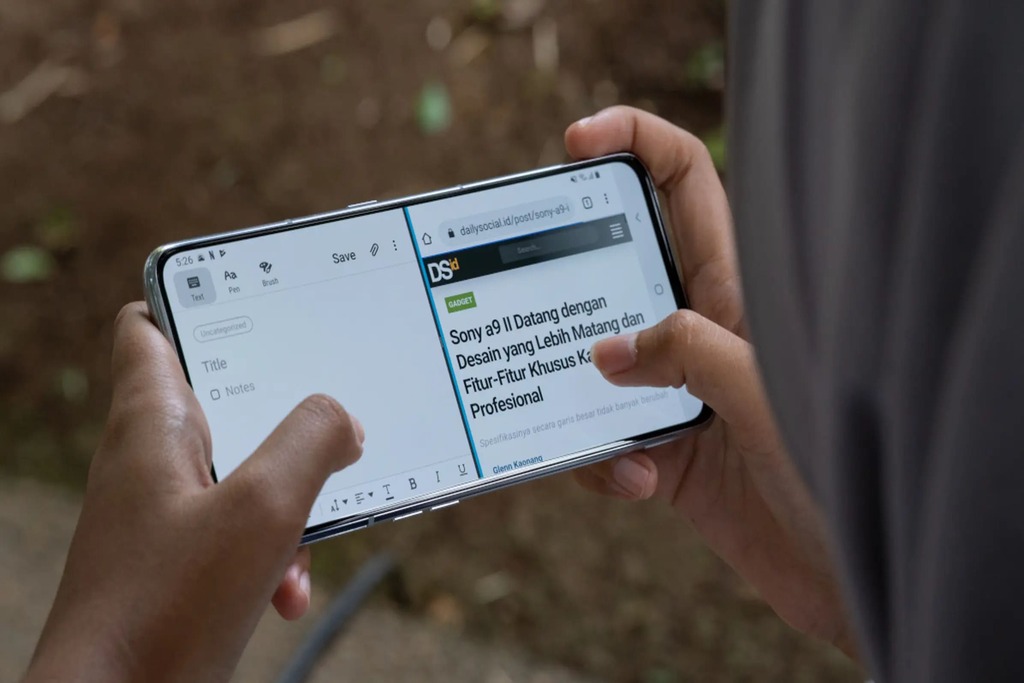
If you have no idea about the split screen, let us tell you that split-screen mode is a useful feature on Android devices that allows you to use two apps simultaneously. The split screen mode on Android is especially useful when you need to multitask and want to view two apps side by side on your smartphone or tablet.
If you’ve been wondering how to use split screen on Android lately, this blog is definitely going to be for you. In this blog post, we’ve covered everything starting from how to split screen on Android, multiple ways of a split screen, including Samsung split screen and how to get rid off split screen on Android phone.
Moreover, we’ve also covered some tips and tricks to help you get the most out of this feature.
So, let’s get started without any further delays!
How to Split Screen On Android?
There are multiple ways to use split screen Android, including gesture-based navigation, button-based navigation, and other shortcuts to split your screen on Android. We’ve mentioned a step-by-step guide to each method in the following sections.
How to Use Split-Screen on Android (Gesture-Based Navigation)?
If your Android device uses gesture-based navigation, here’s how to use split-screen mode:
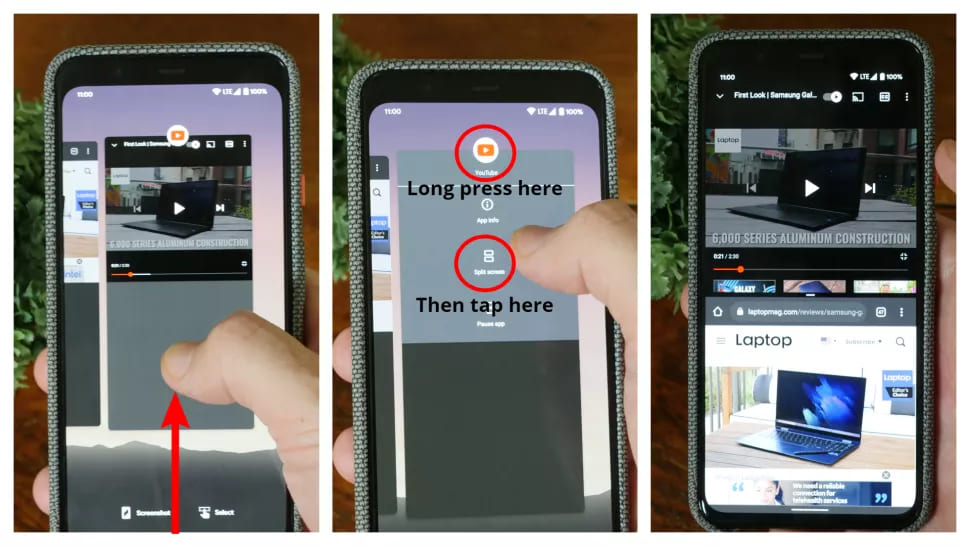
- Open the first app you want to use in split-screen mode.
- Swipe up from the bottom of the screen to open the recent apps menu.
- Find the second app you want to use and tap and hold on to its app icon.
- Select “Split screen” from the menu that appears.
Source: futurecdn.net
- Adjust the divider between the two apps as needed.
- To exit split-screen mode, drag the divider all the way to the top or bottom of the screen.
How to Use Split-Screen on Android (Button-Based Navigation)?
In case gesture-based navigation doesn’t work when figuring out how to split screen on Android, you can use button-based navigation for split screen Android.
Here are the steps to split screen on Android for button-based navigation:
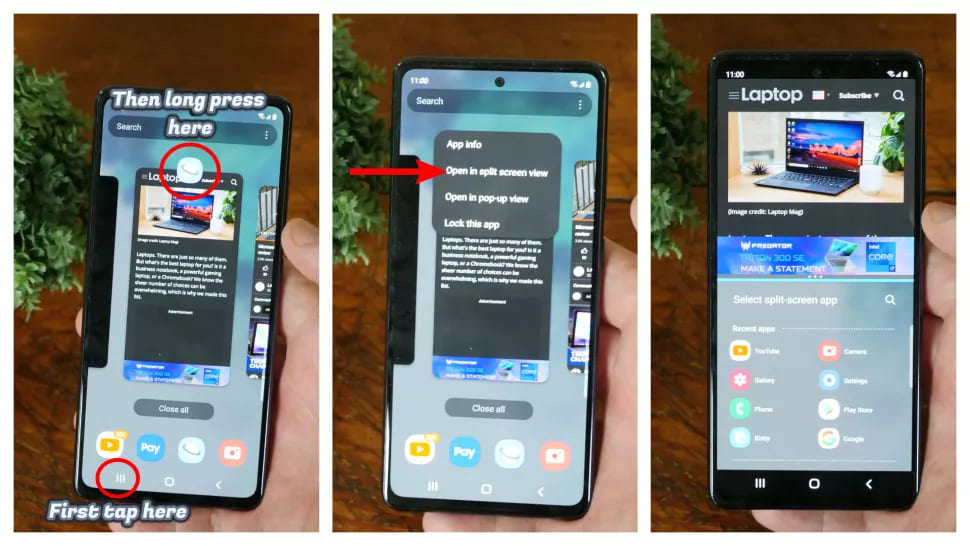
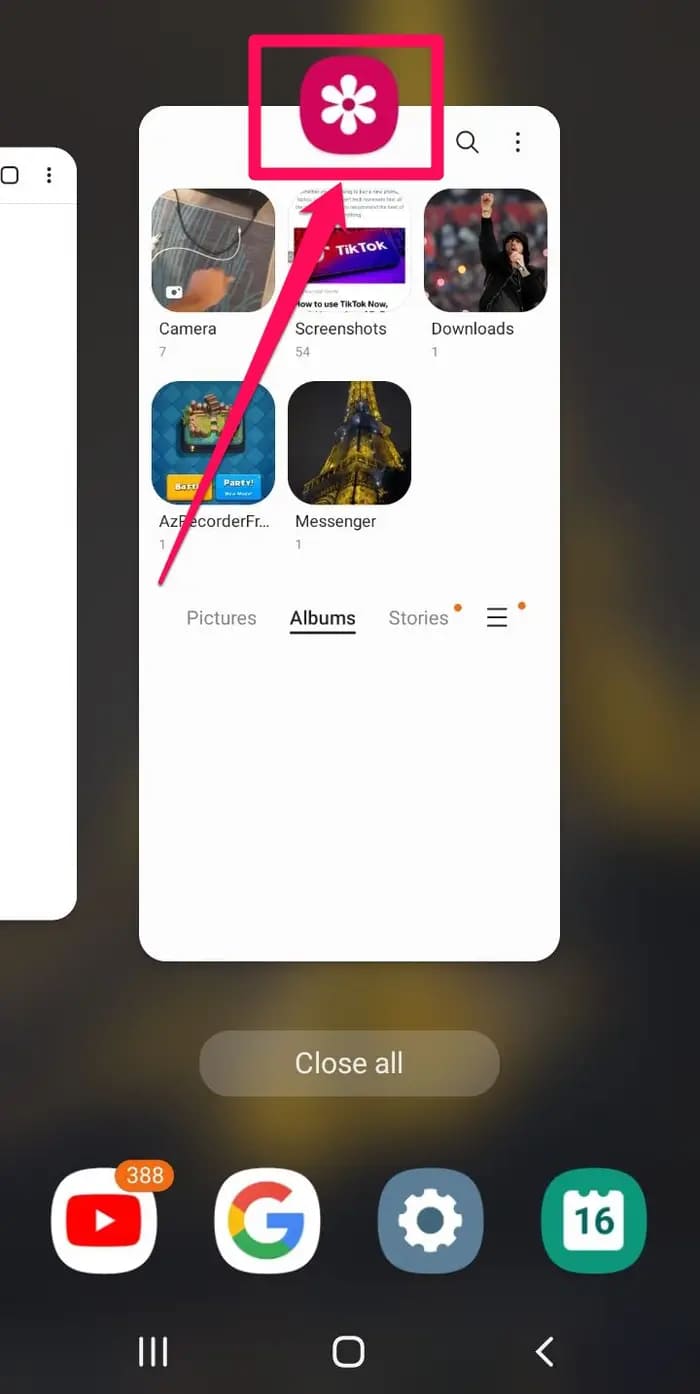
- Open the first app you want to use in split-screen mode.
- Tap the Recent Apps button (the square icon).
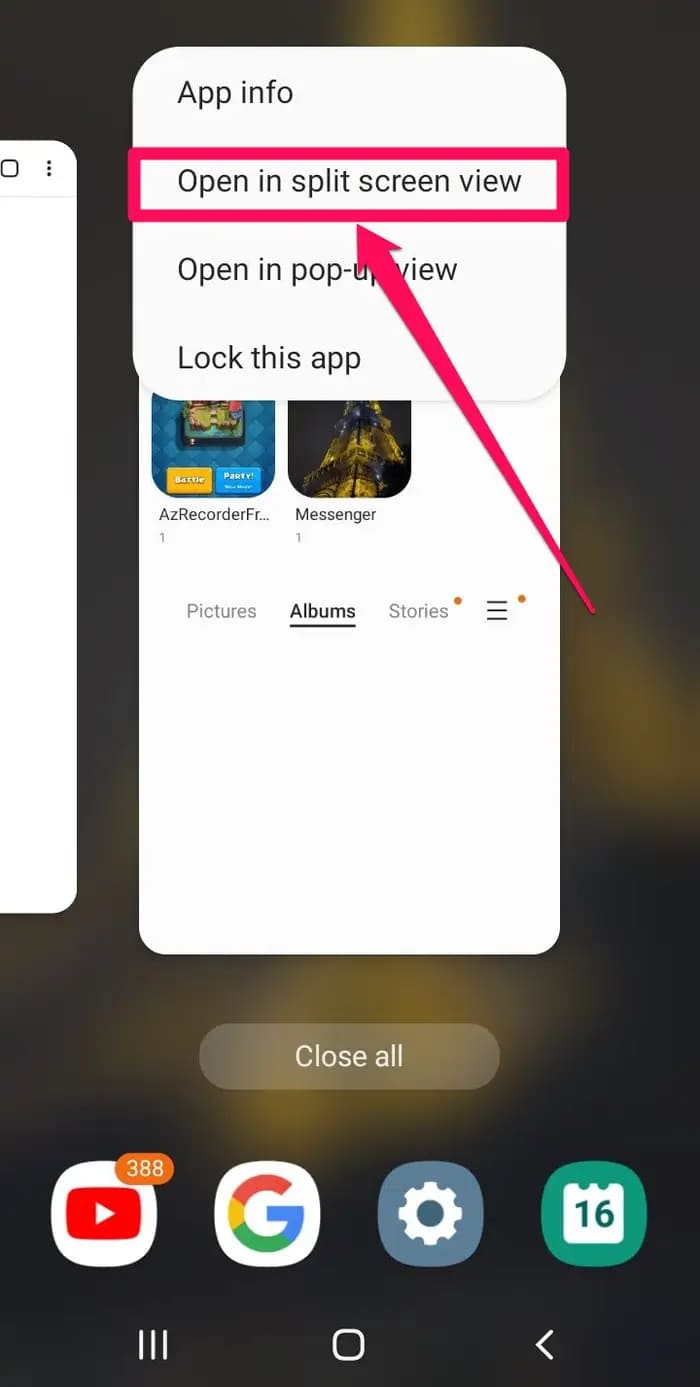
- Find the second app you want to use and tap and hold on to its app icon.
- Select “Open in split screen view” from the menu that appears.
Source: futurecdn.net
- Adjust the divider between the two apps as needed.
- To exit split-screen mode, drag the divider all the way to the top or bottom of the screen.
The Steps mentioned above for split screen Android may or may not work for Samsung split screen, and thus we have mentioned specific steps that work for Samsung devices.
How to Split Screens on a Samsung Galaxy?
If you have a Samsung Galaxy phone, here’s how to use split-screen mode:
- Open the first app you want to use in split-screen mode.
- Swipe up from the bottom of the screen to open the recent apps menu.
Source: insider.com
- Tap the icon for the second app you want to use and select “Open in the split screen view.”
- Adjust the divider between the two apps as needed.
Source: insider.com
- To exit split-screen mode, drag the divider all the way to the top or bottom of the screen.
After knowing how to do a split screen on Android, the next section is definitely for you if you want to know how to use apps in dual-screen mode on Android.
How to Use Apps in Dual Screen Mode on Android?
Some Android devices, like the LG V60 ThinQ, allow you to use two separate screens to run different apps simultaneously. Here’s how to use dual-screen mode:
- Open the first app you want to use on one screen.
- Swipe right from the left edge of the screen to open the dual-screen menu.
- Select the app you want to use on the second screen.

Source: howtogeek.com
- Adjust the size and position of the two screens as needed.
- To exit dual screen mode, swipe the second screen to the left until it disappears.
How to Use Split-Screen Mode in Android 9.0 Pie and Later?
The ways how to do a split screen on Android mentioned above apply to Android 9.0 Pie and above versions, but if you have Android 9.0 Pie or a later version, here are the steps to split screen Android:
- Open the first app you want to use in split-screen mode.
- Swipe up from the bottom of the screen to open the recent apps menu.
- Find the second app you want to use and tap and hold on to its app icon.
- Drag the app icon to the top or bottom of the screen.
- Adjust the divider between the two apps as needed.
To exit split-screen mode, swipe the app card up or down, or tap the app card to bring it to full screen.
How to See One App While Using Another (Picture-in-Picture)?
Sometimes you may want to use one app while watching or seeing another, and Picture-in-Picture (PiP) mode allows you to do that. Here’s how you can access PiP mode on Android.
- Open the app you want to use in PiP mode.
- Tap the Home button to go to the home screen.
- The app will appear in a small window on the screen.
- To resize the PiP window, tap and drag the edges of the window.
- To move the PiP window, tap and drag the window to a new location.
- To exit PiP mode, tap the PiP window and then tap the X icon in the corner of the window.
How to See Two Apps at the Same Time on a Pixel Phone?
Well, PiP was one way to see two apps simultaneously on Android, however; if you want to have the same feature in PiP, it’s known as App Continuity.
Here’s how you can access App Community on a Pixel Phone:
- Open the first app you want to use in split-screen mode.
- Swipe up from the bottom of the screen to open the recent apps menu.
- Tap the icon for the second app you want to use and select “Split screen.”
- Adjust the size and position of the two screens as needed.
To exit split-screen mode, drag the divider all the way to the top or bottom of the screen.
How to Do Multitasking on Android?
Multitasking on Android is easy with split-screen mode and other features like PiP mode. Here are some tips for multitasking on Android:
- Use split-screen mode to view two apps simultaneously.
- Use PiP mode to keep one app visible while you use another app.
- Use App Continuity on Pixel phones to seamlessly switch between apps.
- Use dual screen mode on LG phones to use two separate screens for different apps.
What’s the Difference Between Multi-Window Support and Split-Screen Mode on Android?
Source: howtogeek.com
Multi-window support and split-screen mode are ways to view two apps simultaneously on Android, but they work differently. Multi-window support allows you to open two apps in separate windows, while split-screen mode allows you to view two apps side by side in one window.
How to Adjust and Change Apps in Android Split Screen Mode?
If you want to adjust and change apps in in-split mode on Android, here are the steps to do that:
- To adjust the size of the app windows, drag the divider between the two apps.
- To switch the position of the apps, tap and hold on the title bar of one app and drag it to the other side.
- To switch to a different app, tap the app icon on the divider and select a new app from the recent apps menu.
- To close one app and return to full-screen mode for the other app, drag the divider all the way to the top or bottom of the screen.
How to Quit Android Split-Screen Mode?
To exit split-screen mode on Android:
- Drag the divider all the way to the top or bottom of the screen to return to full-screen mode for one app.
- Swipe the app card up or down in the recent apps menu to close one app and return to full-screen mode for the other app.
Source: howtogeek.com
- Tap the Home button to return to the home screen and close both apps.
Also Read: How to Split Screen on Mac: Effective Ways to Multitask
How to Use Pop-up View on Android?
The pop-up view is a Samsung feature that allows you to open an app in a small window on top of another app. Here’s how to use Pop-up View:
- Open the first app you want to use.
- Swipe up from the bottom of the screen to open the recent apps menu.
- Tap the icon for the second app you want to use and select “Pop-up view.”
- The app will appear in a small window on top of the first app.
- To move the window, tap and drag the window to a new location.
- To resize the window, tap and drag the edges of the window.
- To close the window, tap the X icon in the corner of the window.
FAQs:
Can All Android Devices Use Split-Screen Mode?
No, split-screen mode is only available on devices running Android 7.0 Nougat or later.
Can I Use Split-Screen Mode with Any App?
No, Not all apps are compatible with split-screen mode. Some apps may not work properly or cannot run in split-screen mode.
How Do I Get Rid of Split-Screen Mode on My Samsung Phone?
To exit split-screen mode on a Samsung phone, drag the divider all the way to the top or bottom of the screen or press the Back button.
Conclusion:
Split-screen mode on Android is a useful feature that allows you to view two apps simultaneously. Whether you’re using a Samsung phone or a Pixel phone, there are several ways to use split-screen mode and other multitasking features on Android.
Following the tips and tricks in this guide, you can take advantage of split-screen mode and other features to make the most of your Android device.
More from The Technographx