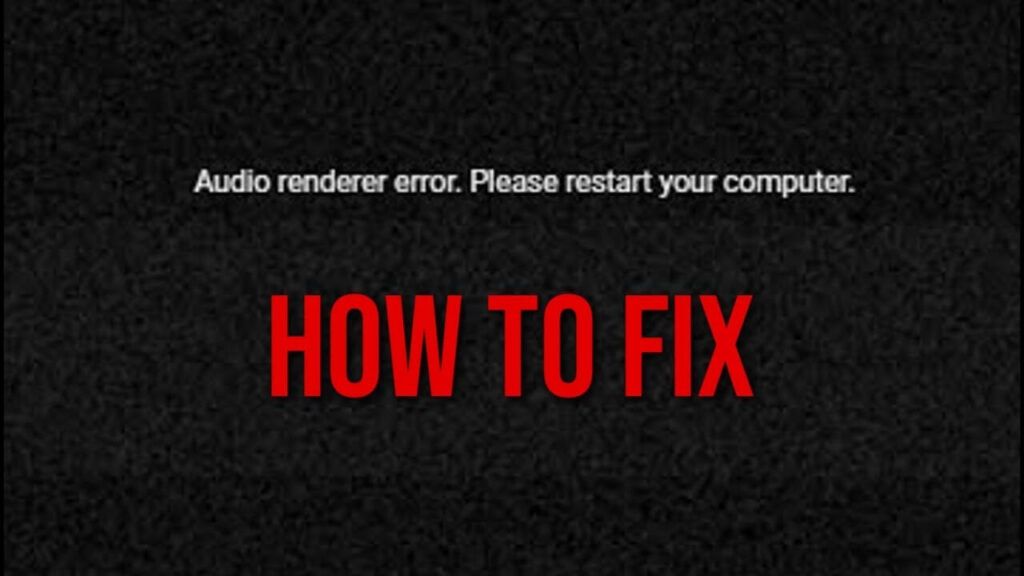
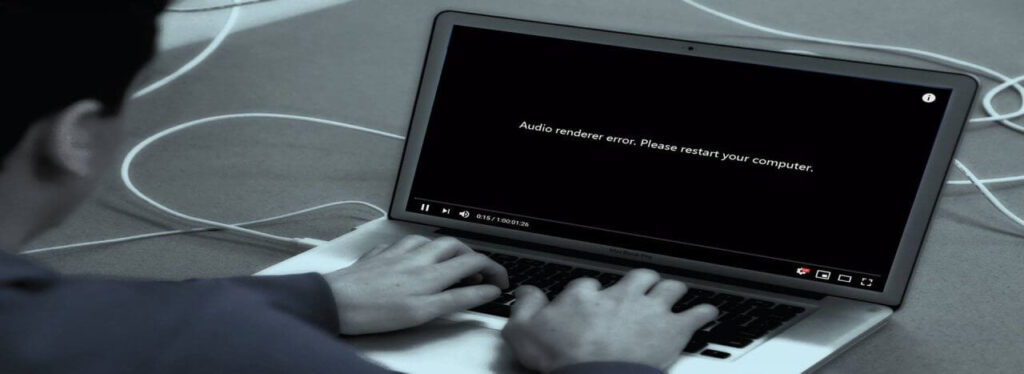
Many users have reported the issue of the “Audio Renderer error, Please restart your computer” error while they play a video on YouTube. This issue occurs on many browsers like Chrome, Opera, Edge, and Mozilla Firefox. This issue is also occurring when users switch on iTunes.
It is a very frustrating issue and many users facing it are having a common question: how do I fix the audio renderer error on YouTube? If you are also one of them frustrated with this issue and want to get it fixed today then just check out the solutions that we have brought for you.
Properly follow all the steps shown in the solutions and the audio renderer error on youtube will get fixed certainly.
Solution 1: Remove the headphones and plug them back
This is a temporary solution and not a permanent fix. Many users have said that this fix has worked for them temporarily. You have to unplug the headphones and plug them back, as simple as that, and check if the issue gets resolved. It will work with both jack headphones and USB.
Also, many people connect more than one audio device to the system. For example, in one audio port, the speaker is connected and in the second audio port, headphones are connected.
There is a chance of getting this error in this case so you should disconnect the second audio device and remain connected with the first one.
Try both these things and see if the YouTube audio render error vanishes or not. If not then go for the next solution.
source: easypcmod.com
Solution 2: Restart your system
As the error informs you to restart your system, we must do it and check if the error goes or not. This is also a temporary solution and won’t fix the issue permanently.
It might be possible that after you restart your system and play a YouTube video again, the error doesn’t come immediately but it may start appearing after 1 minute or so.
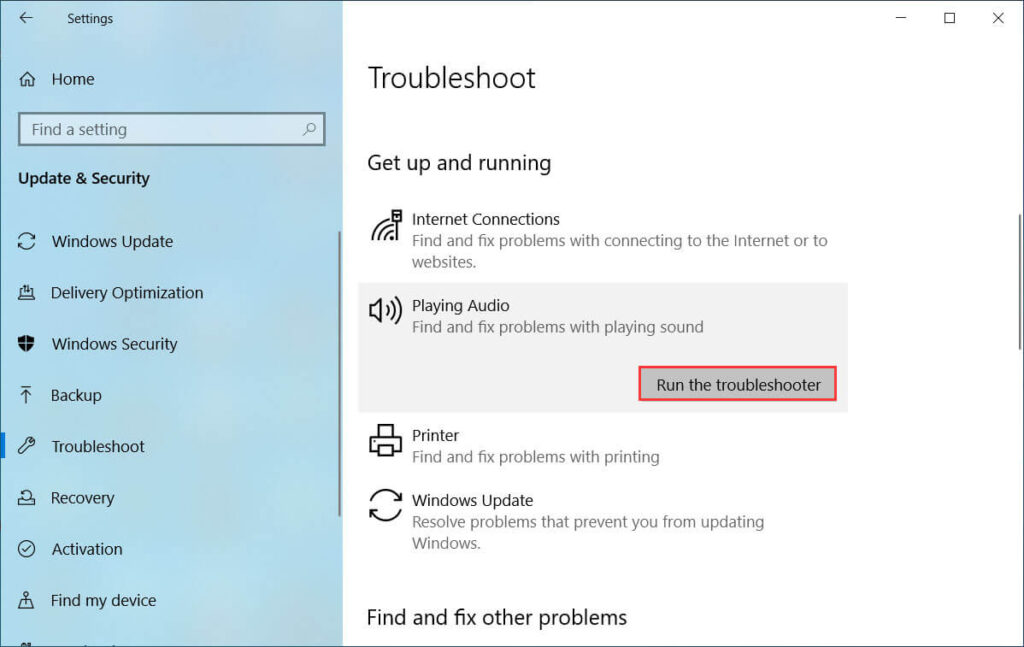
Solution 3: Audio trouble-shooter will be helpful
source: partitionwizard.com
Microsoft’s audio troubleshooter will be helpful to us to resolve the issue. There are a lot many repair strategies available within this troubleshooter that can treat the audio problems well so one must give it a try. If it is a common issue listed in the troubleshooter then it will get fixed.
Let us have a look at the steps now to troubleshoot it.
- Open run box by pressing Windows logo key + R.
- Now, type “ms-settings: troubleshoot” here and press enter. It will open the Troubleshooting tab of the settings app.
- Now inside this tab, you have to scroll down to Get up and running section. Click on Playing Audio and then click on Run the troubleshooter button.
- The investigation phase will start and upon completion, you will be shown the device names. Select the device with which you are facing the error. Click the Next button then.
- It will check for any issue with the device and suggest a repair strategy. Then, you have to follow the on-screen commands that it suggests for the repair.
After the repair has got completed, restart your system and see what is the status of the error.
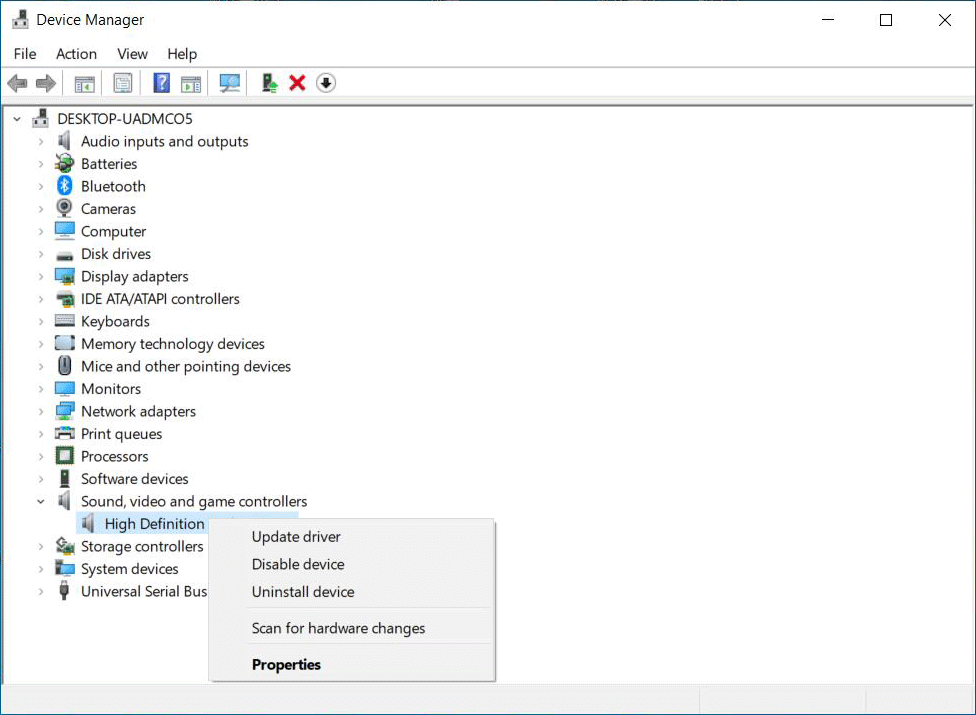
Solution 4: Disable the audio drivers for a while
source: partitionwizard.com
This is a good solution and has worked for many users. Disabling all the audio drivers for a while helps and it solves the problem. You have to disable all the audio drivers for some seconds and enable them back.
Follow the below steps for this.
- Open run box and type “devmgmt.msc” and press enter.
- This will open the device manager. Here, you have to expand the Sound, video, and game controllers menu. You will see the different audio drivers displayed here. Right-click on each of them one by one and click on Disable device. Make sure all the audio drivers have been disabled.
- Now, wait for 30 seconds and then enable all of them back by right-clicking each of them and select Enable device.
Now, check if the error has been resolved or not. If you are facing the error still then move to the next solutions down the list. Also, know how to fix windows 10 update stuck problem.
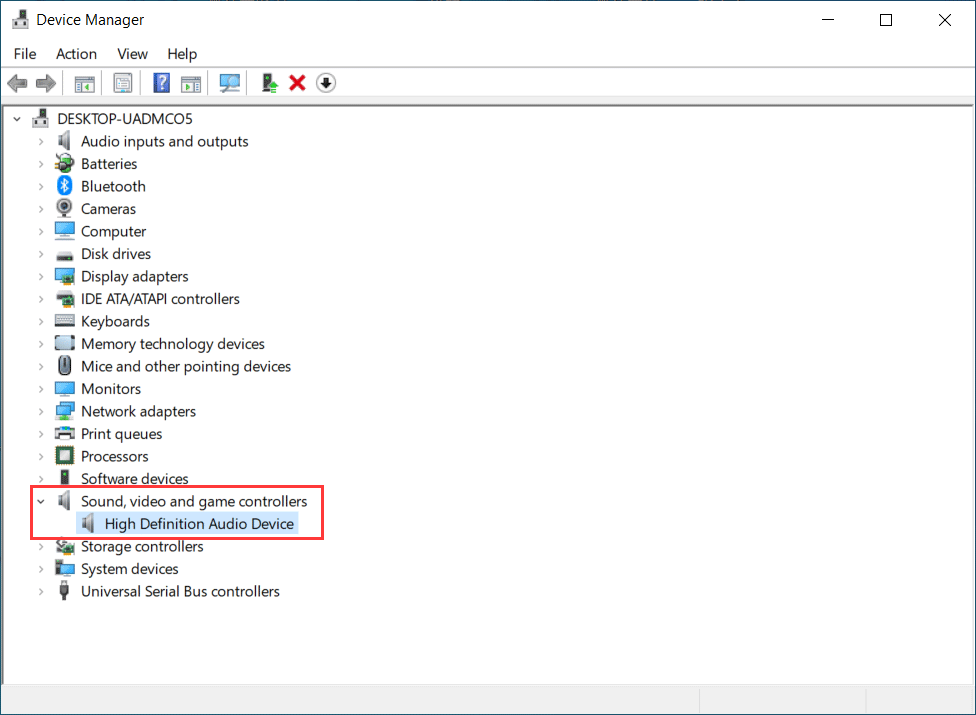
Solution 5: Update the audio drivers
source: appuals.com
One of the reasons why the errors occur is due to the drivers not updated to the latest version. Not only with this error but it is one of the chief reasons for other errors as well. Let us try to update the audio drivers and see if it solves our problem or not.
- Again, an open device manager.
- Expand the Sound, video, and game controllers menu and right-click the audio drivers displayed.
- Click on the update driver option.
- It will show you two options. The first option is to search automatically for updated driver software and the second option is to browse the system for driver software.
- Go for the first option. It will search the internet for any updates that are available for that driver and let you know, then you can allow it to update it.
- If there are no updates available or rather your driver is up-to-date then it will inform you of this too and then you can close the window.

source: pinterest.com
Do this for all the audio drivers installed on the system. Update them and then restart your system and check if the error still comes or has gone.
Don’t get disappointed if it doesn’t work for you, we have some more solutions waiting for you so keep on reading.
Solution 6: Try rollback/uninstall audio drivers
We should try rolling back the audio drivers to the previous version and check if it fixes the problem or not. It might be possible that the latest version of the audio driver is doing some problems due to some of the other reasons and that’s why it is not able to deliver the audio.
Rolling back to the previous version, in this case, will get your system to have the old version with which your system was working fine.
If there is not an option for rollback then we will uninstall the audio driver and then Windows will automatically get it back.
Let us now check out the steps to do this.
- Open the device manager again. Search for it in the Windows search box or open run box and type “devmgmt.msc” and press enter.
- Expand the Sound, video, and game controllers menu and double click the audio driver.
- You will see the Properties window. Click the Driver tab and click the Roll Back Driver option. If it is not available then we need to click on Uninstall Device.
- Restart your system and now see if the error has gone or not.
Solution 7: Update BIOS
BIOS update has fixed the issue for some of the users. So, you can also try updating your BIOS and see what happens. But, this step should be taken by the people who are techy as it involves some complex steps so if you are confident about your tech skills and can manage BIOS update on your own then and then only you should go for it.
Updating BIOS for different PCs has different steps so we will urge you to go your laptop/pc manufacturer’s website and look for a detailed guide for the same.
Solution 8: Disable Hardware acceleration option
One can try disabling the hardware acceleration option in the browser and see if it helps. Let us see the steps to disable it for the Chrome browser.
- Open Google Chrome.
- Go to settings. Scroll down to get Advanced and expand it.
- Scroll down to System and disable Use hardware acceleration when available option.
Play the YouTube video and check what is the status of the audio renderer error Windows 10.
Also Read: 6 Quick Solutions to Fix Windows 10 Update Error 0x80240034 and 0x80244018
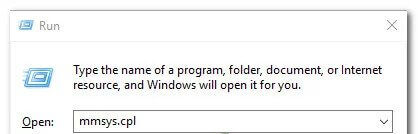
Solution 9: Set sample rate for ASIO driver and audio driver
source: thewindowsclub.com
If your Cubase is opened and you have the ASIO audio device setting software then there are chances of the arrival of this error. The reason for the error, in this case, is the conflict between ASIO driver settings and the Windows sound system. Setting the sample rate will solve the problem so let us have a look at the steps to do it.
source: appuals.com
- Open the run box and type “mmsys.cpl”. Press enter.
- The sound window will open up. Now in the Playback tab, if you have more than one audio device then select the one due to which error is occurring and click Properties.
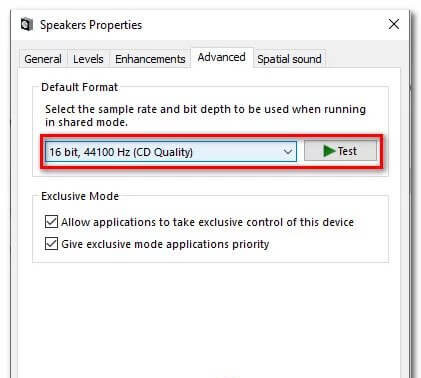
- Click the Advanced tab.
- Now, you have to select the desired sample rate. Click Apply and OK to save it.
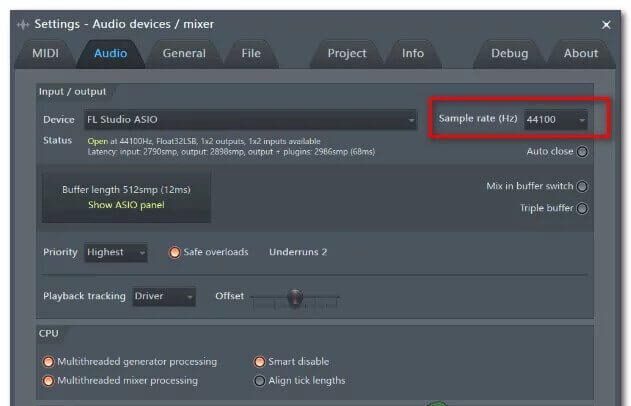
- Now, you have to open the ASIO driver settings and select the Audio tab and set the same sample rate that you chose earlier.
- Now, restart the system and see if the error comes or not.
source: appuals.com
source: drivereasy.com
So, these were the solutions to fix the audio renderer error on YouTube. Follow the steps properly and the issue will get fixed for sure. After fixing the issue, you can play as many YouTube videos you want to play with ease. For more information, visit Technographx.