In the world of smartphones where everyone is connected, you may be required to delete everything on your iPhone for several reasons. These reasons include protecting sensitive info, preparing for a resale, or when faced with persistent software issues. Learning how to erase your iPhone can protect your files and allow it to perform better. Data privacy and security are the most important considerations here. When you wipe your iPhone, personal data, accounts as well and all other sensitive information are cleared from it completely.
To help you out, this guide will provide clear step-by-step instructions on how to erase your iPhone confidently.
Is there a difference between wiping, erasing, and factory resetting your iPhone?
“Erase,” “wipe,” and “factory reset” are terms often used when talking about iPhones. All of them are the same thing. In all three cases, wiping the phone’s contents and putting it back to factory settings is the same thing.
What Should You Do Before I Wipe iPhone?
You can save yourself some potential headaches before embarking on the wipe by taking a few precautionary steps ahead. To start with, make sure that you back up your data. Whether you decide to go for iCloud or your Mac, ensuring your important pictures, contacts, and applications are safe is vital.
Also, think about disabling FaceTime and iMessage, switching off Find My iPhone, unpairing your Apple Watch, and deleting the eSIM profile. All these precautions will reduce the time spent during the wiping process as well as avoid any mistakes that may occur during this process.
How to Back Up Your iPhone to iCloud
It is important to back up your iPhone before you reset everything to make sure that you don’t lose things like photos, contacts, and apps that can be retrieved easily. iCloud is the most hassle-free service for securing your information on the cloud. Updating your iCloud backup will make switching between iPhones easy in case of sudden data loss, device breakdowns, or if you get a new one.
1. Open the Settings app on your iPhone.
2. Tap Your Name (Apple ID icon) then select the iCloud option.

4. Then choose iCloud Backup.
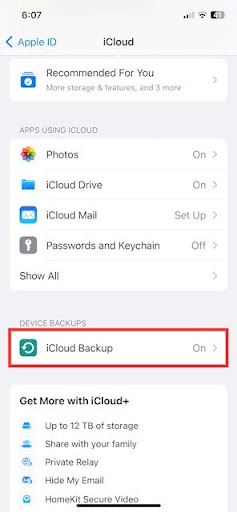
5. Next, toggle on the switch to enable Back Up This iPhone.
6. Finally, ensure that your device is connected to Wi-Fi and plugged into a power source.
7. Tap Back Up Now to initiate the backup process.
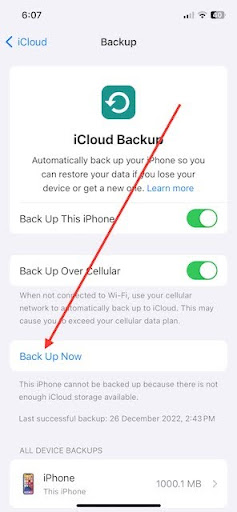
In this way, your data is securely stored in the cloud, ready for restoration when required.
How to Back Up Your iPhone to Mac
You can back up your iPhone on a Mac locally without having to worry about its security. This step will ensure that all pictures, contacts, and other necessary information are saved on your computer rather than using cloud-based services. Additionally, this process permits quick and effortless recovery in the instances of device upgrades or unintentional data loss thereby enhancing manageability and flexibility.
1. Connect your iPhone to your Mac using a USB cable and launch Finder (or iTunes on Windows).
2. Select your device and click on “Back Up Now.”
This creates a complete backup on your computer, ensuring that you have a copy of your data that can be easily restored.
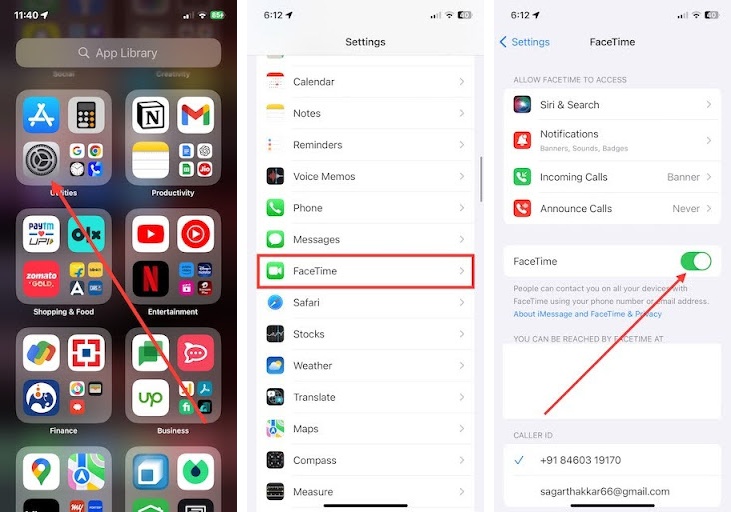
Deactivate FaceTime Using iPhone
To avoid possible communication disruption, it is important to deactivate iMessage and FaceTime before erasing your iPhone. This saves you the trouble of missing out on calls and texts during a reset when turned off. If you do this, there will be no interruption of the user experience thus preventing any miscommunication and missed messages.
How to deactivate FaceTime,
1. Launch the Settings app on your device.
2. Now, head over to FaceTime settings.
3. Then, toggle off the switch for FaceTime.
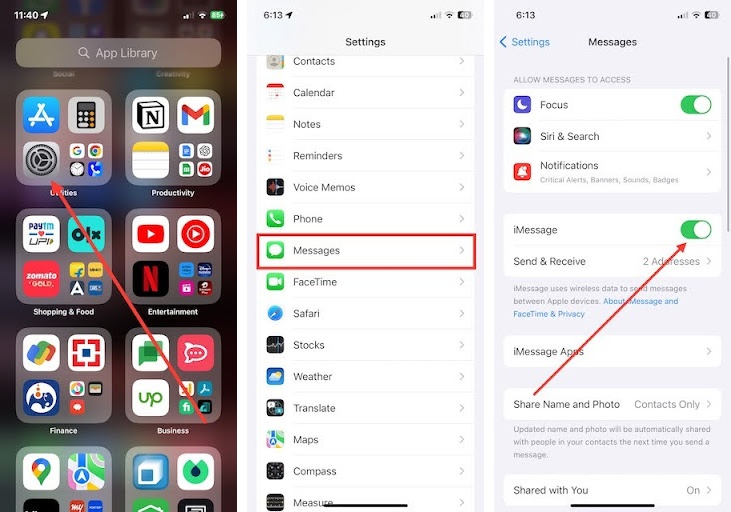
Deactivate iMessage Using iPhone
1. Open the Settings app on your device.
2. Scroll down and go to Messages settings.
3. Finally, toggle off the switch for iMessage.
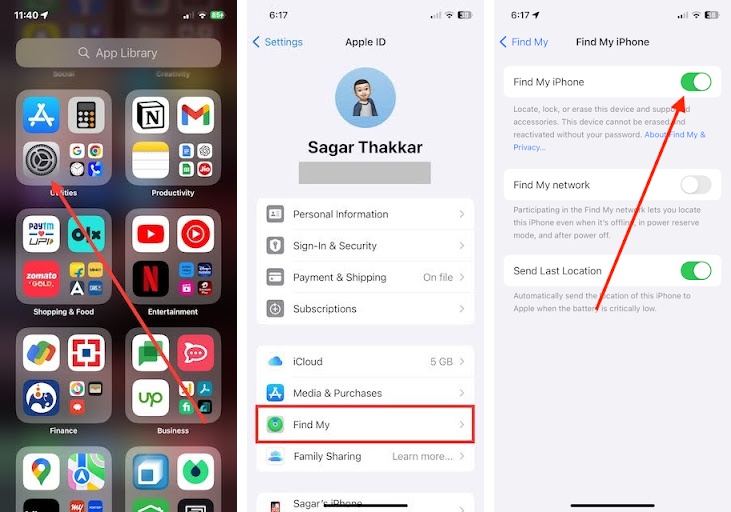
How to Turn off Find My on iPhone
One needs to disable Find My iPhone before wiping the device so that it can be reset without any difficulties. By turning off Find My iPhone, you prevent any possible conflicts during the wipe process and make the transition smooth without facing activation lock issues.
To disable this option. You can only do this if you are selling or giving away your device to someone else, not if you lost it.
1. Open the Settings app and tap the Apple ID icon.
2. Now, visit the Find My section.
3. Then head over to the Find My iPhone option and toggle off the switch for it.
How to Unpair Your Apple Watch
Unpairing your Apple Watch is a necessary step before wiping your iPhone to avoid complications and ensure a clean disassociation between the two devices. Unpairing disconnects the Apple Watch from your iPhone, preventing any potential data synchronization issues during the reset. Connecting the Apple Watch to a new iPhone or setting it up for a different user is easier with this precaution.
1. Open the Apple Watch app on your iPhone.
2. Now, go to the My Watch section.
3. Select [Your Watch]
4. Lastly, hit the Unpair Apple Watch option to disconnect it.
5. Follow the on-screen instructions to complete the unpairing process.
Delete the eSIM Profile and Remove SIM Card
Deleting the eSIM profile is essential before wiping your iPhone, particularly if you have an embedded SIM card (eSIM). This step ensures a clean break from cellular networks, preventing any lingering connections that might interfere with the reset process.
1. Visit the Settings app on iPhone then go to Cellular Data.
2. Tap the Cellular and select Cellular Plans options,
3. Lastly, hit the Delete eSIM Profile.
Also, if your iPhone has a physical SIM card, power off the device, use the SIM card ejector tool to remove the card, and keep it in a safe place.
How to Wipe Your iPhone
Following the precautions you’ve taken, let’s look at some methods of wiping your iPhone completely.
1. Using Settings App on iPhone
The most straightforward method of wiping your iPhone is by using the Settings app, which offers a user-friendly approach that can be accessed directly from the device. If you are someone who wants to get rid of their data without needing additional tools or external sources, this is the best way to go. It is for individuals who want an effortless reset even if they don’t have a computer or do not use third-party apps.
1. Open Settings on your iPhone.
2. Scroll down and tap General.
3. Scroll to the bottom and tap Transfer or Reset iPhone.
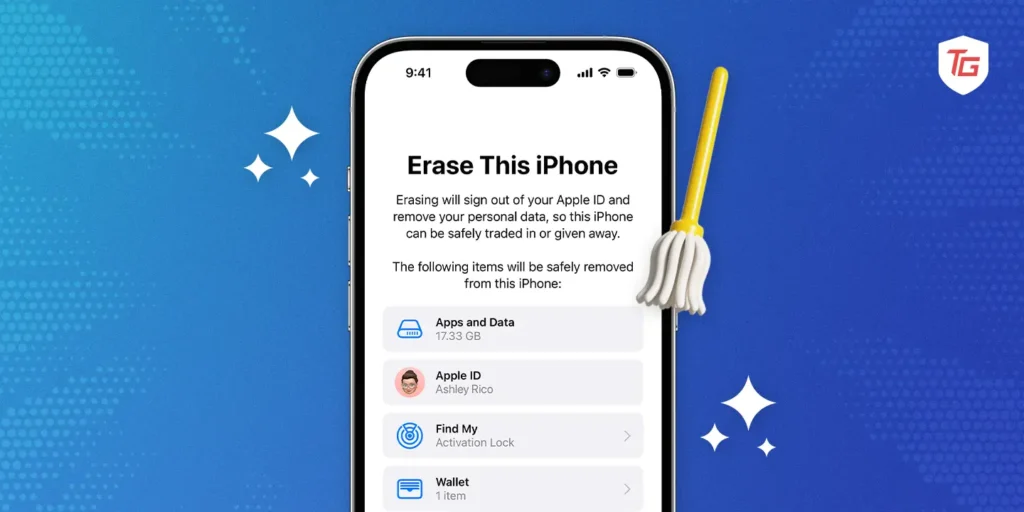
4. Select Erase All Content and Settings.
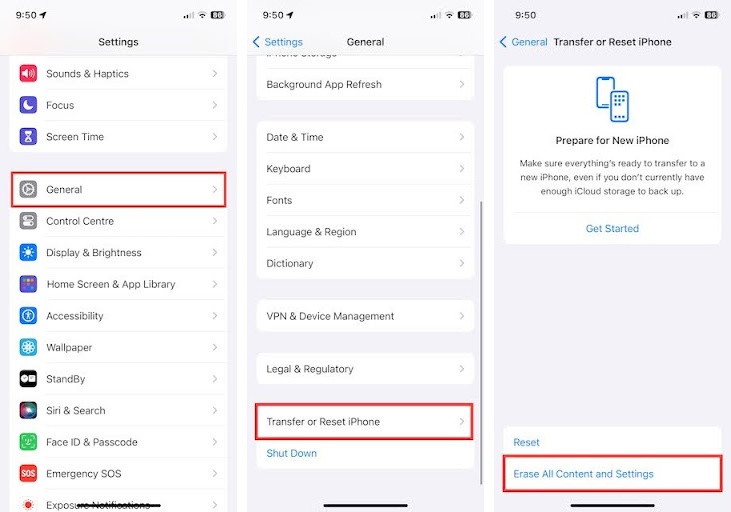
5. Enter your passcode if prompted.
6. Confirm the action by tapping Continue.
The process will begin once you hit Continue. Simply follow the on-screen instructions to erase all data from your iPhone.
2. Using the Finder App on Mac/iTunes App on Windows
This method can also be used to perform a factory reset on the device, restoring it to factory default settings and making it ready for resale. Furthermore, this method eliminates the need to wait for the device to finish booting up, allowing the user to get started right away.
- Connect your iPhone to your Mac or PC using a USB cable.
- Open Finder (or iTunes on Windows).
- Select your device.
- In the General tab, click “Restore iPhone.”
- Confirm the action and the wiping process will begin.
This method is suitable for users who prefer using a computer for the reset process.
3. Using the Find My App on Other Apple Devices
Employing the Find My app on other Apple devices offers a convenient and remote method for wiping your iPhone. This approach is particularly beneficial if your iPhone is misplaced or stolen, allowing you to initiate a secure wipe from another Apple device. It ensures that personal data remains protected even in the absence of a physical iPhone while providing an additional layer of security and accessibility.
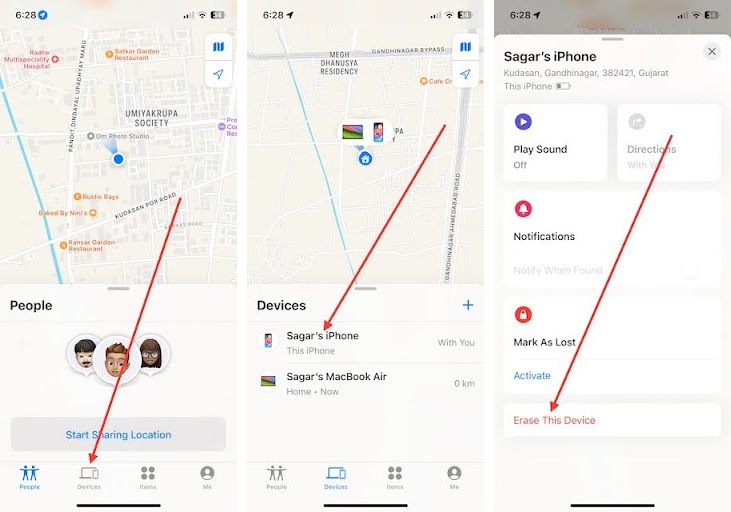
1. Open the Find My app on another Apple device.
2. Select the Devices tab.
3. Choose the iPhone you want to erase.
4. Tap Erase This Device and follow the on-screen instructions.
How to Completely Wipe an iPhone Without a Factory Reset
Consider these options if you do not want to perform a factory reset but still want to wipe certain aspects of your iPhone:
- Reset All Settings: This option resets system settings like wallpaper, Wi-Fi passwords, and home screen layout but keeps your data intact. Navigate to Settings > General > Reset > Reset All Settings.
- Reset Network Settings: This option resets Wi-Fi, Cellular, and VPN settings. Find it in Settings > General > Transfer or Reset iPhone > Reset > Reset Network Settings.
- Reset Keyboard Settings: If you want to clear customized keyboard settings, go to Settings > General > Transfer or Reset iPhone > Reset > Reset Keyboard Settings.
- Reset Home Screen Layout: This option resets the arrangement of your apps on the home screen.
- Reset Location & Privacy Settings: For a clean slate regarding location and privacy preferences, go to Settings > General > Transfer or Reset iPhone > Reset > Reset Location & Privacy Settings.
- These options provide flexibility in managing specific settings without completely wiping your iPhone, catering to users who seek a more targeted approach to data management.
Conclusion:
That is what you should do to erase your iPhone data. It guides you on how to ensure that your personal information is safely erased in case you want to sell it, give it as a gift, or start using it afresh. It’s important to realize that by starting out with a fresh and clean iOS device you are helping it perform better and protect your privacy at the same time.
Doing so will help you wipe out your data without any difficulties if you are bidding farewell to someone or refreshing your iPhone with new memories. Good luck rebooting!
More iPhone Tips: