Taking screenshots on a Mac is one of those common skills that makes it easier to share information. There are several different ways that Mac lets you choose to take a screenshot. We’ll show you how to take a screenshot on a mac, whether you want to record your entire screen or just part of it.
Starting from using keyboard shortcuts to controlling the touch bar and screen recording methods, let’s choose one that suits you best. We’ll also examine more advanced features, such as delayed screenshots and markup tools that let you annotate your captures or define regions to capture based on first clicking them.
4 Ways to Take a Screenshot on Mac
Inherently versatile, the process of capturing screenshots on a Mac offers a range of options tailored to different needs and preferences. Using these four methods illustrates how the Mac platform can easily integrate screenshot functionality into users’ workflows. Mac can handle many situations, whether you want to quickly capture your entire desktop, concentrate on a certain area, grab a certain window, or use advanced features in Command + Shift + 5.
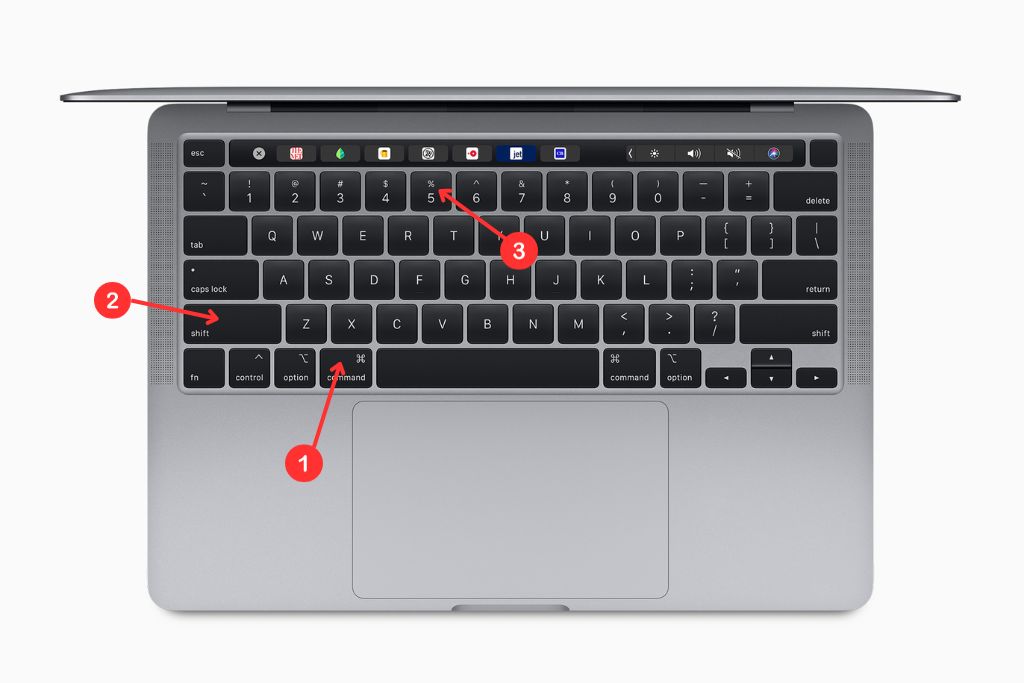
1. Command + Shift + 3
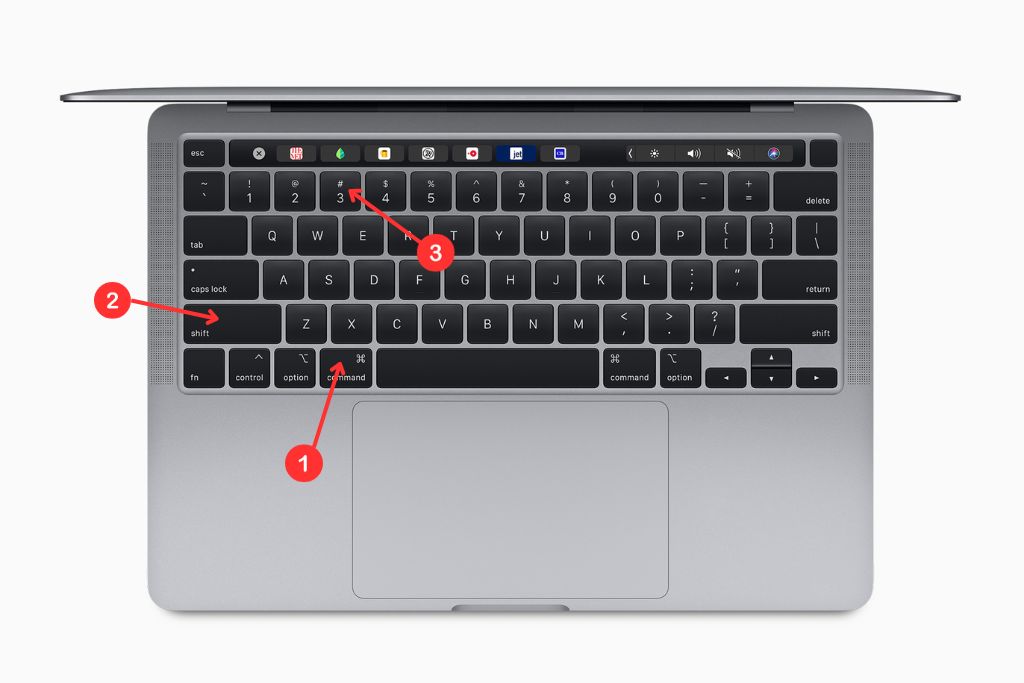
Simply press Command + Shift + 3, and your Mac will snatch up the entire screen. It’s a simple but effective shortcut that shouldn’t be overlooked. This key combo sets a quick capture of everything on your desktop right now. This technique is especially beneficial when you want to record the whole environment, such as a complete top-to-bottom view of your work area or what’s displayed on a webpage.
When you open the screenshot menu by pressing Command + Shift + 3, your Mac takes a picture of everything on its screen, windows, and desktop images. The image then gets automatically stored on the desktop in a file named Screen Shot, which is generally followed by a date and time.
2. Command + Shift + 4
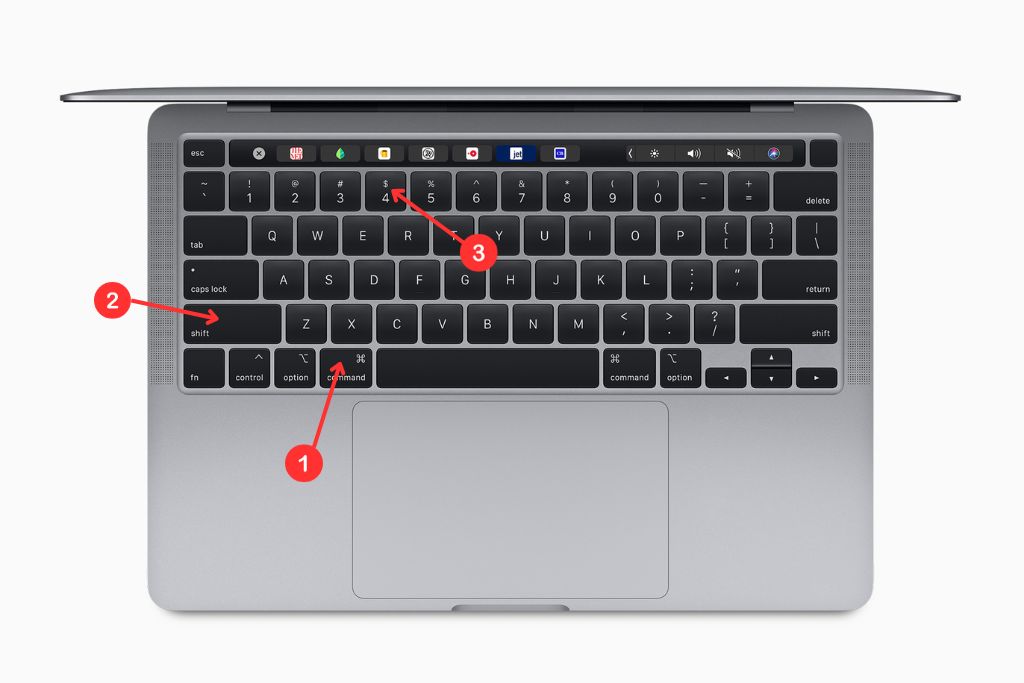
For users who seek more precision in their screen captures, the Command + Shift + 4 shortcut on Mac offers a flexible solution. This method allows you to capture a specific area of your screen, granting you greater control over the content you save. Whether you want to focus on a particular section of a document, capture a specific image, or create custom-sized screenshots, this versatile shortcut caters to your selective capture needs.
Upon pressing Command + Shift + 4, your cursor transforms into a crosshair, and a coordinate display appears in the top-right corner of your screen. You can then click and drag to select the exact region you want to capture. As you drag, the dimensions of the selected area are dynamically displayed, giving you precise control over the screenshot’s size.
3. Command + Shift + 4 + Space Bar
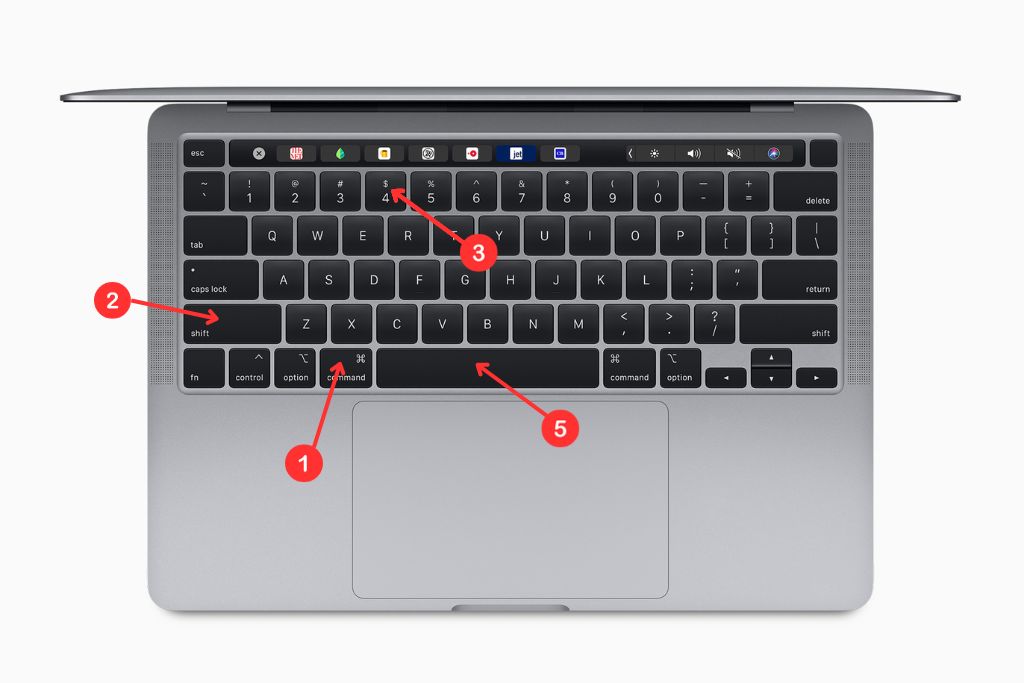
When precision matters and you want to capture a specific window on your Mac screen, the Command + Shift + 4 + Space Bar shortcut becomes your go-to method. Tailored for scenarios where you need to focus on a particular application, document, or dialogue box, this shortcut streamlines the process, ensuring that only the selected window is captured in your screenshot.
Upon pressing Command + Shift + 4 + Space Bar, your cursor transforms into a camera icon, indicating that you are in window-capture mode. Move the camera icon over the window you want to capture, and the highlighted window will be framed, indicating it’s the active capture area. Click on the selected window, and your Mac will capture the contents of that window exclusively.
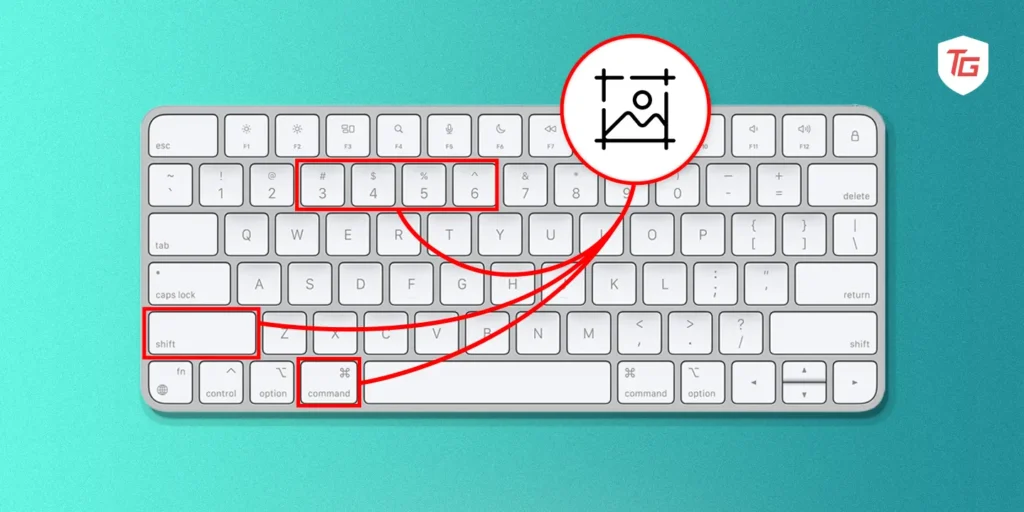
4. Command + Shift + 5
Introduced with the macOS Mojave update,
the Command + Shift + 5 shortcut revolutionizes the screenshot process on Mac by opening the screenshot utility. This method provides a comprehensive interface that empowers users to capture specific portions of the screen, entire windows, or even record the screen, offering an all-in-one solution for various capture needs.
Upon pressing Command + Shift + 5, the screenshot utility interface appears at the bottom of the screen. This user-friendly menu offers options to capture the entire screen, a selected portion, or a specific window. Additionally, it provides tools for screen recording and access to advanced settings. Users can customize the destination for saved files, set timers, and choose to show or hide the mouse pointer in their captures.
How to Screen Record on Mac (Bonus)
In addition to its robust screenshot capabilities, Mac offers users the ability to record their screens, making it an invaluable tool for creating tutorials, capturing dynamic content, or sharing interactive experiences. This bonus feature, initiated through a simple keyboard shortcut, expands the creative possibilities for users seeking to convey information more dynamically.
Shortcut: Command + Shift + 5
To begin screen recording, press and hold Command + Shift and then press 5. This activates the screenshot utility interface, where you can select the “Record Entire Screen” or “Record Selected Portion” option, depending on your preference.
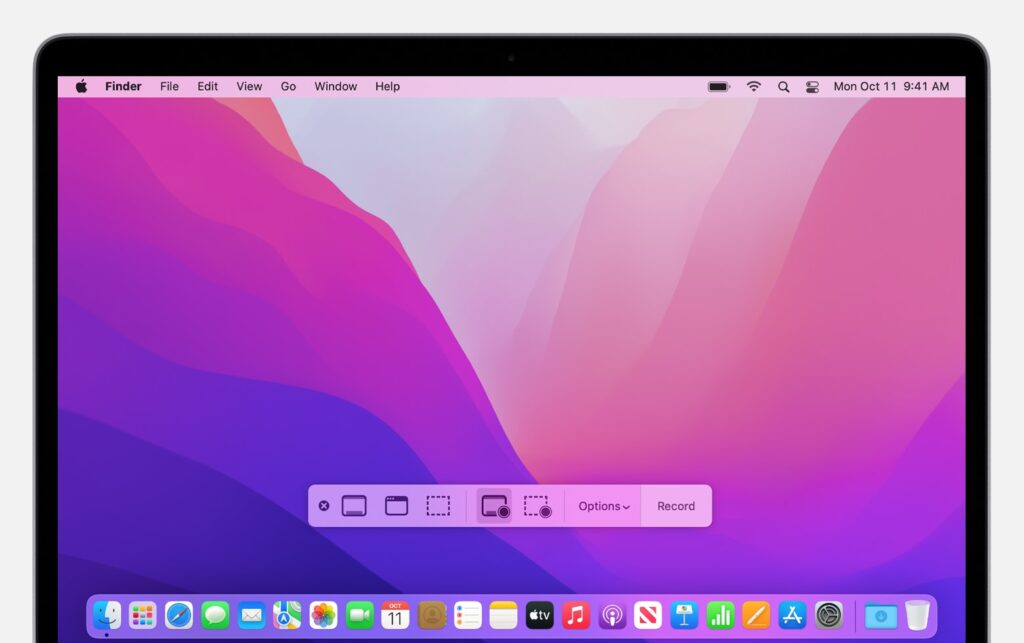
Record Entire Screen:
- After selecting this option, click on the screen to start recording the entire display.
- A control panel appears in the menu bar, allowing you to pause, stop, or cancel the recording.
- Once stopped, the recording is automatically saved to the specified location.
Record Selected Portion:
- Choose this option to define a specific area on the screen for recording.
- Drag to select the desired portion.
- Similar to recording the entire screen, the control panel in the menu bar facilitates easy management of the recording process.
How to Take Delayed Screenshots on Mac
Precision is sometimes essential, and you may even have to go through a few minutes of setup just to capture the right screenshot. Mac already takes this into consideration and offers a convenient opportunity to take delayed screenshots. Also, this is especially useful when you need to make a quick pause and get your screen organized, open a menu, or prepare any animated content before capturing it. Mac’s efforts include putting a delay in the screenshot so that users could have ample time to compose and deliberate on their capture.
Shortcut:
- To take a delayed screenshot, press and hold Command + Shift
- While holding these keys, press 5 to activate the screenshot utility.
- In the menu bar, select “Options.”
- Choose “Timer” and set the desired delay – this can range from 5 to 10 seconds.
Conclusion
That’s it in a nutshell – a tour of taking your Mac screen for snapshots. With keyboard shortcuts, a screenshot menu, and different methods at your command, you are now ready to freeze time in the digital world. It doesn’t matter whether it is a segment of a web page, some dialogue that makes you laugh or important breakthroughs; your Mac has the ability to save all visual stories through screenshots. Therefore, capture away!
Let the screen express what words cannot. Macs are no longer just workstations.
Check out more Mac tips: