Learning how to overclock your GPU is one of the easiest ways to get extra gaming performance without buying a new graphics card. With the right tools and careful testing, many GPUs can deliver a free 5–15% performance boost in GPU-bound games while remaining stable for everyday use.
The key is doing it carefully. Every graphics card is different, even two identical models from the same manufacturer. Factors such as silicon quality, cooling, case airflow, and power limits all affect how much overclocking headroom your GPU has. Settings that work perfectly on someone else’s RTX or Radeon card may crash yours.
In this guide, you’ll learn how to overclock your GPU safely using MSI Afterburner and similar tools, understand what settings actually matter, test stability properly, and avoid common mistakes that can lead to crashes, overheating, or reduced performance.
Understand What GPU Overclocking Can and Cannot Improve
GPU overclocking raises operating frequencies above the manufacturer’s default curve. In practical terms, it can increase boost clocks, improve benchmark scores, and lift frame rates when your graphics card is the limiting component.
When you learn how to overclock GPU clocks, expect incremental gains rather than miracles. A well-cooled RTX 3060 might gain 5–12% in a GPU-heavy title. In a CPU-limited esports game, the same tune may add only 1–3 FPS.
| What an overclock can improve | What it cannot fix |
|---|---|
| GPU-bound frame rates and 1% lows in some games | A weak CPU, slow system RAM, or stuttering from shader compilation |
| Sustained boost clock when power and cooling allow it | A game’s frame-rate cap or poor game optimization |
| Performance per dollar from hardware you own | A 30% performance gap to a newer GPU tier |
Check GPU usage before you tune. If it stays near 95–99% during gameplay, an overclock may help. If GPU usage sits at 55% while one CPU core is saturated, reduce CPU-heavy settings or address the processor bottleneck first.
Also remember: modern NVIDIA GeForce and AMD Radeon cards already boost automatically. How to overclock GPU performance today is mostly about giving that boost algorithm more stable power, temperature, and frequency headroom.
Check Cooling, Power Headroom, Warranty, and Laptop Limits Before You Start
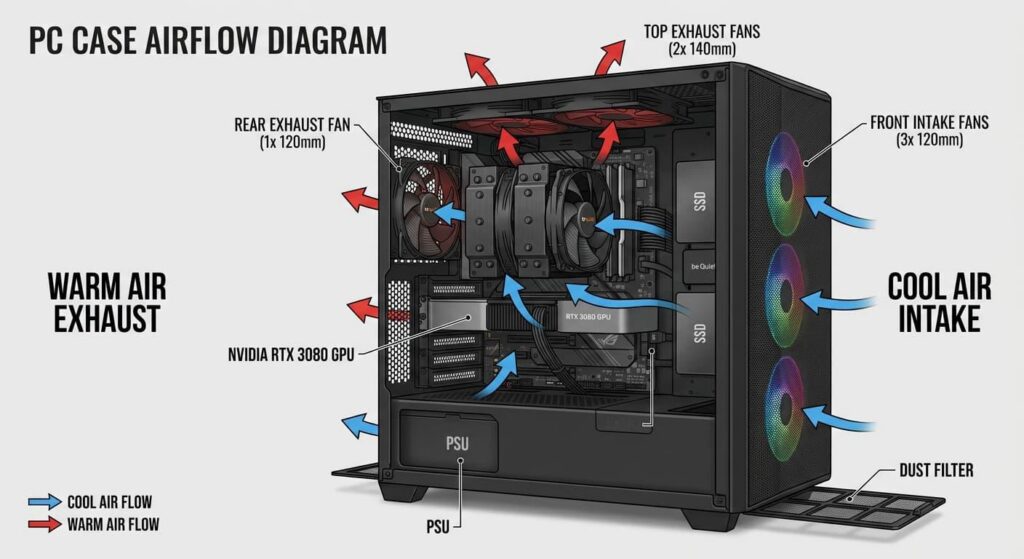
Preparation matters because additional clock speed increases power draw, and added power becomes heat. Before you practice how to overclock GPU settings, update your graphics driver, install current Windows updates, and return any old tuning profile to default.
Inspect your case with the PC powered off. Remove dust from GPU heatsink fins and filters. A simple airflow layout, front or bottom intake with rear or top exhaust, often prevents thermal throttling better than an aggressive clock offset.
Use this preflight checklist:
- Confirm your PSU is a reputable model with adequate wattage for your GPU and CPU.
- Make sure PCIe power connectors are fully seated: use separate PSU cables when your GPU manual recommends them.
- Record room temperature. A 28°C room can make a previously stable overclock throttle or crash.
- Check the manufacturer warranty terms. Overclocking controls are usually supported, but physical damage or modified firmware may not be covered.
- On laptops, plug in the original AC adapter, select the performance power mode, and keep the rear vents clear.
Laptop GPUs have smaller heatsinks, shared CPU/GPU cooling, and often locked power limits. For that reason, how to overclock GPU settings on a laptop should mean conservative offsets and strict temperature monitoring. If your laptop already reaches 85–90°C at stock, improve airflow or use a cooling pad before raising clocks. If you’re unsure whether your temperatures are safe, check our guide on normal GPU temperature while gaming before increasing clock speeds.
Install Monitoring and Overclocking Tools and Record a Baseline
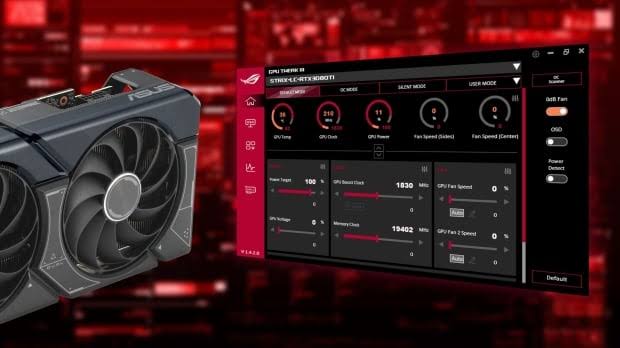
You need one tuning utility, one monitoring overlay, and repeatable tests. MSI Afterburner works with most NVIDIA and AMD cards: ASUS GPU Tweak III and EVGA Precision X1 are solid alternatives for compatible hardware. Pair Afterburner with RivaTuner Statistics Server (RTSS) for an in-game overlay.
Before changing anything, establish a baseline. This step makes overclocking GPU performance measurable instead of guesswork.
Configure the overlay to show:
- FPS and 1% low FPS
- GPU temperature and hotspot temperature, if available
- GPU usage, power draw, and core clock
- Memory clock, fan speed, and CPU usage
Run the same benchmark three times, or use a repeatable 60-second route in one demanding game. Use the same resolution, graphics preset, ray tracing setting, DLSS/FSR mode, and background apps each time.
| Baseline item | Example record |
|---|---|
| Game and scene | Cyberpunk 2077, 1440p High, built-in benchmark |
| Average / 1% low FPS | 68 / 51 |
| GPU temperature | 74°C average, 79°C peak |
| Core clock | 1,905 MHz average |
| Ambient temperature | 23°C |
Save a screenshot or spreadsheet row. Without this reference, a higher reported clock may look impressive while actual FPS falls due to heat or instability.
Raise the Power Limit, Temperature Limit, and Fan Curve First
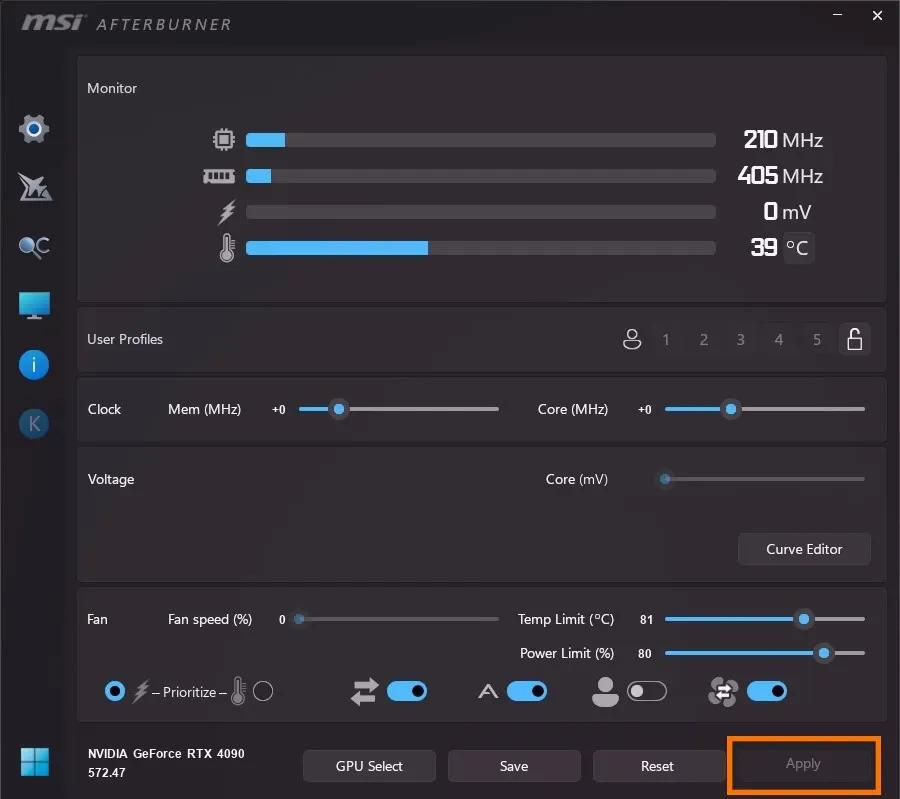
Power and thermal settings determine whether the GPU can hold higher boost clocks. In Afterburner or GPU Tweak, click Reset or Default first. Then move the available Power Limit slider to its maximum permitted value. Link and raise the temperature limit only if your tool and card allow it.
This does not force the GPU to consume maximum power at all times. It raises the ceiling that GPU Boost or Radeon Boost behavior can use under load. It is the sensible first move in how to overclock GPU tuning because a core offset has little value if the card immediately hits a power cap.
Next, set a custom fan curve. Aim for stable temperatures rather than a perfectly silent PC. As a starting curve, use 50% fan speed at 65°C, 65% at 75°C, and 75–80% at 82°C. Adjust for your noise tolerance.
Keep these boundaries in mind:
- Below 80°C: usually comfortable for sustained gaming.
- 80–85°C: acceptable on many cards, but watch clock behavior and noise.
- Above 85–90°C: reduce clocks, improve airflow, or lower the power limit.
Do not add core and memory offsets yet. How to overclock GPU hardware safely depends on isolating one variable at a time.
Use OC Scanner for a Safe Automatic Starting Point
OC Scanner is a useful automated starting point on supported NVIDIA cards. It tests voltage-frequency points and creates a conservative core-clock curve. In MSI Afterburner, open the curve editor, select OC Scanner, start the scan, and let it complete without running games or heavy programs.
The scan can take 15–30 minutes. When it finishes, apply the result and run your baseline benchmark again. If it passes, save the profile temporarily.
Using OC Scanner reduces the trial-and-error part of how to overclock GPU core frequency, especially if you are new to voltage-frequency curves. It does not certify stability in every game, but. A scanner cannot reproduce every shader workload, ray-tracing load, or heat-soaked gaming session.
Treat its result as one of two options:
- Keep the scanner curve as your balanced daily profile.
- Use it as a reference, then manually test small additional core offsets.
Avoid running OC Scanner with a memory overclock already enabled. Start with memory at stock so you know the scanner result reflects core stability. If your software lacks an automatic scanner, skip this section and begin manual core tuning from a zero offset.
Manually Increase the GPU Core Clock in Small, Testable Steps
The core clock affects shader, rasterization, and compute work. For manual tuning, begin at stock core offset with your chosen power limit and fan curve active. Increase Core Clock by 25 MHz, click Apply, then run a 10–15 minute benchmark loop or a demanding game scene.
This is the central skill in how to overclock GPU performance: make a small change, test it, and write down the result. If the run is clean, add another 25 MHz. Some cards handle 100 MHz easily: others fail at 50 MHz. Silicon lottery is real.
Watch for these failure signs:
- Driver reset, black screen, reboot, or benchmark crash
- Flashing geometry, bright pixels, or shimmering textures
- Lower benchmark score even though a higher offset
- Core clock bouncing down because the card is too hot or power-limited
When instability first appears, reduce the offset by 25–50 MHz from the last stable setting. For example, if +125 MHz crashes but +100 MHz completes tests, use +75 or +100 MHz as the candidate setting.
Do not use another owner’s “+180 MHz stable” post as a target. How to overclock GPU settings depends on your card’s chip, cooler, case, driver version, and room temperature.
Tune Memory Clock Separately, Then Validate the Combined Overclock
After the core clock passes its first tests, return the core offset to that stable value and tune memory separately. VRAM bandwidth affects texture-heavy games, high resolutions, and some ray-traced workloads. It can also produce less obvious instability than core clock tuning.
Start with a +50 or +100 MHz memory offset, depending on how your utility labels the slider. Test for 10–15 minutes, then repeat in equal steps. GDDR6 and GDDR6X behavior varies widely, so there is no universal number.
Memory errors may show as colorful specks, texture corruption, a benchmark crash, or a strange score drop. That last one is easy to miss: error correction or retransmissions can lower real performance before the system crashes.
| Test result | Likely action |
|---|---|
| Clean image and score rises | Add one more small memory step |
| Artifacts or crash | Reduce memory offset by 50–100 MHz |
| Score drops at a higher offset | Revert to the fastest score-producing setting |
Once you find a candidate memory offset, combine it with the stable core setting. Run the same test again. How to overclock GPU memory safely requires this combined check because the extra heat and power load can expose a core setting that seemed stable on its own.
Stress-Test Stability, Monitor Temperatures, and Compare In-Game FPS
A quick benchmark catches obvious errors. Long sessions find heat-soak failures, which appear only after the heatsink, VRAM, and case interior reach their full operating temperature. This is where how to overclock GPU guides often stop too early.
Run a benchmark loop for 30–60 minutes after you settle on core and memory settings. Then play two demanding games for at least one to two hours each. Choose different engines when possible: one rasterized game and one with ray tracing or a heavy VRAM load.
During testing, monitor the following:
| Metric | What to look for |
|---|---|
| Temperature | Keep sustained GPU temperature preferably below 85°C |
| Clock speed | A steady average clock, not repeated sharp drops |
| Frame time | Fewer spikes, not just a higher average FPS |
| FPS | Compare the same scene against your stock baseline |
| Fan noise | A profile you can tolerate for a full session |
If your average FPS rises from 80 to 86 but 1% lows drop from 61 to 52, the tune is not automatically better. Frame-time consistency matters more than a flattering benchmark peak.
Test on a warm day if possible. A profile stable at 20°C ambient may fail in a 28°C room. How to overclock GPU hardware responsibly means validating the conditions in which you actually play.
Fix Artifacts, Crashes, Thermal Throttling, and Other Common Problems
Problems are useful signals. Do not keep rerunning a crashing benchmark with the same settings: reset the last change, then retest. Modern GPUs contain protection systems, but persistent instability is not a setting to ignore.
| Symptom | Most likely cause | Fix |
|---|---|---|
| Bright dots, corrupted textures, checkerboards | Memory clock too high | Reduce memory by 50–100 MHz |
| Driver crash or black screen under load | Core clock too high or insufficient power stability | Reduce core by 25–50 MHz: check power cables |
| FPS declines after 20 minutes | Thermal throttling | Increase fan curve, clean filters, improve case airflow |
| System reboot | PSU issue, excessive load, or unstable core | Restore defaults: check PSU capacity and connections |
| Loud fans with minor FPS gain | Cooling cost exceeds benefit | Use a lower power limit or balanced profile |
If artifacts persist at default settings, stop overclocking. Run a clean driver installation, check temperatures, and test another game or benchmark. Persistent artifacts at stock can point to a hardware or driver problem rather than a bad tune.
Avoid raising GPU voltage manually unless you understand voltage-frequency curves, card-specific limits, and thermal consequences. For most players, how to overclock GPU performance with power, fan, core, and memory controls provides the useful gains without that added risk.
Save Stable Game Profiles and Decide Whether Overclocking Is Worth It
Save your stable settings as profiles rather than applying one aggressive tune to every task. In MSI Afterburner, use the profile slots and enable “apply overclocking at system startup” only after several successful gaming sessions. ASUS GPU Tweak III can also assign profiles to specific games on supported setups.
A practical profile set looks like this:
- Stock: troubleshooting, hot weather, and quiet desktop use.
- Balanced: moderate power limit and conservative clocks for daily gaming.
- Max FPS: your fully validated tune for competitive matches or demanding games.
This final part of how to overclock GPU planning is about value, not bragging rights. Compare average FPS, 1% lows, temperature, and noise against stock. A gain of 8 FPS at 144 FPS can matter on a 165 Hz display. A gain of 3 FPS at 42 FPS may not solve the underlying need for a faster GPU or lower settings.
If extra frames are your goal, pair the tune with sensible settings: enable DLSS, FSR, or XeSS where image quality remains acceptable: close background capture tools: and use a display with a refresh rate that can show the added frames. A high-refresh OLED monitor makes smoother motion easier to feel than a static benchmark chart.
The best result from how to overclock GPU tuning is a repeatable profile that stays cool, quiet enough, and stable through a full evening of gaming, not the highest slider value.
Final Verdict
For most gamers, GPU overclocking is worth trying because it can deliver a measurable performance boost with no hardware cost. The biggest gains come from careful testing rather than aggressive settings. A stable overclock that improves frame rates while keeping temperatures under control is far more valuable than chasing the highest benchmark score.